
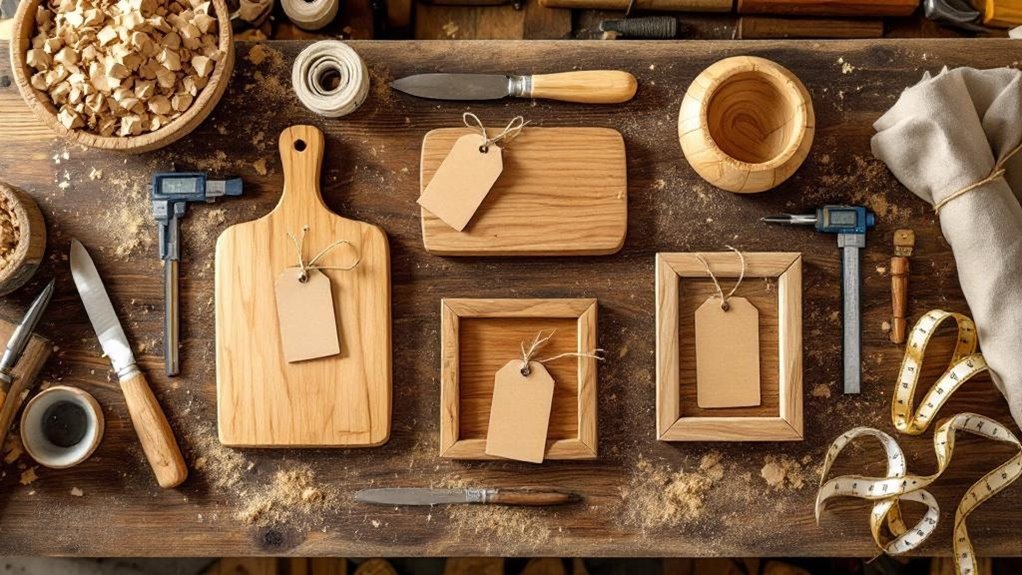
You can price handmade woodworking projects by adding materials, labor, and overhead, then applying a 20% waste buffer to lumber and supplies. Track every hour for design, cutting, assembly, finishing, and client communication, and use your local market to stay competitive. Aim for a 50-100% margin on custom work, and charge extra for complex details or unusual wood. A simple pricing formula helps protect profit, and there’s more to refine your quotes.
Key Takeaways
- Price handmade woodworking as materials + labor + overhead, using your hourly rate and actual build hours.
- Add a 20% waste buffer to material costs and include hardware, consumables, milling, and transport fees.
- Increase prices for complex or custom work with a 10-30% markup to reflect extra time and skill.
- Research local market rates and comparable handmade items to stay competitive without underpricing your work.
- Request a 50% deposit upfront and track hours and materials to improve future quotes and protect cash flow.
How to Price Woodworking Projects
To price woodworking projects fairly, start with the basics: add your material cost to your labor cost using the formula materials + (hourly rate × hours spent).
First, total your material costs, then add a 20% waste buffer so you don’t underbuy or cut corners.
Next, choose an hourly rate that matches your skill and market, usually $35 to $75 per hour. Multiply that rate by the hours you expect to spend, including setup and finishing. Then add about 15% for overhead, such as shop supplies and utilities.
Finally, adjust the number for complexity and demand. If a piece is custom, detailed, or time-heavy, you can charge more.
This approach helps you price your woodworking projects with confidence.
Why Accurate Pricing Protects Your Profit
When you price with materials, labor, and overhead in mind, you protect your profit and keep your rates fair.
A balanced formula helps you charge enough for your skill without undercutting yourself or the craft. That matters even more on custom jobs, where one underpriced project can wipe out the margin you need to stay profitable.
Fair Rates, Fair Profit
Fair rates start with accurate pricing: you need to add up materials, labor, overhead, and profit so every project covers its costs and still pays you fairly for the skill involved.
Set a fair hourly rate, usually $50 to $75, then multiply it by real shop hours, not guesses. Build in about 15% overhead for utilities, blades, sandpaper, and tool wear, and aim for a profit margin that reaches 50% to 100% when the work justifies it.
- Check your numbers before quoting.
- Match price to demand and complexity.
- Review each project after delivery.
When you price this way, you protect cash flow and make sure your woodworking stays sustainable without cutting into your earnings or your time.
Avoiding Underpriced Projects
Underpricing a project might feel like a safe way to win the job, but it usually costs you more than it earns. When you undersell your work, you cut into the money you need for materials, labor, overhead, and profit. That pressure can trap you in unprofitable jobs and weaken your business over time.
Use pricing strategies that calculate every cost before you quote, so your price reflects the true effort and skill involved. If you’re moving from hobbyist to pro, don’t copy low market rates that ignore sustainability.
A solid pricing structure can still help you win bids while protecting a 50-100% margin. When you charge fairly, you respect your time, support craftsmanship, and avoid sending a message that your work is cheap.
Woodworking Project Pricing Formula
You can price a woodworking project by adding up all material costs first, including hardware, transport, and waste, so you don’t miss hidden expenses.
Then set an hourly labor rate based on your target income and available shop time, and add overhead such as rent, utilities, and other business costs.
Once you have your wholesale cost, mark it up for profit and selling expenses so your final price stays competitive and sustainable.
Material Cost Basics
Material costs start with a clear count of the wood and hardware in the project, including screws, fasteners, and any other components that affect your total spend. You can estimate the cost of materials by tracking each item and comparing it to local lumber prices, since rates change by region.
Use board feet to measure lumber needs, then add a 20% waste buffer so you don’t run short. If you choose figured or unusual wood, expect the materials cost to rise 10–30% because desirability drives price. Also include transport and milling fees in your tally.
- Count every consumable part.
- Price wood by local market rates.
- Add waste, special wood premiums, and fees.
Labor And Overhead
Next, add overhead costs, which often run about 15% of materials plus labor, to cover shop rent, tools, utilities, and wear. If materials and labor total $136.50, overhead adds about $20.00, bringing your cost to $156.50 before profit.
When you track these numbers carefully, you keep your pricing grounded, avoid undercharging, and protect your shop’s long-term health.
Profit And Selling Price
Once you’ve tallied materials, labor, and overhead, the final step is setting a profit that makes the project worth building. Use this formula: cost of materials + labor + overhead + profit = final price.
If you spent $39 on oak, charge your hourly rate for the hours worked, and add about 15% for overhead, you’ve covered your base costs. Then choose a profit margin that fits the piece and market. Many woodworkers aim for 50% to 100%, though 10% may work on low-risk jobs.
- Add profit after every true cost.
- Compare your final price with similar handmade items.
- Raise margins on custom, time-heavy builds.
This keeps you cost-conscious and helps each sale pay you fairly.
Material Costs for Handmade Wood Projects
When you price a handmade wood project, start by counting every material you’ll actually buy: the wood itself, plus screws, fasteners, glue, and any other hardware.
Add up material costs from the lumber price and each accessory, then include transport and milling charges if you need them. For example, 12 board feet of oak at $3.25 per board foot costs about $39, before extras.
Build in a 20% waste buffer so you don’t understate your real expense or cut quality. If you choose boards with striking grain or markings, charge more for that visual value.
Also, price full sheets of plywood, even when you use only part of one, so you can price your work accurately and protect your margin.
How to Estimate Lumber and Waste
You can start by counting the board feet your project needs, then add a 20% waste buffer so you’re covered for cuts, errors, and offcuts.
A sketch and cut list help you match each dimension to the lumber you’ll actually buy, which keeps your estimate tighter and your costs lower.
If you check what your lumberyard stocks before you order, you’ll avoid paying for extra material you can’t use.
Board Foot Estimation
Estimating lumber starts with a simple board-foot calculation: multiply each board’s thickness, width, and length in feet, then add about 20% for waste, offcuts, and mistakes. This board foot method gives you a practical baseline for the cost of the wood and keeps your budget grounded.
Use a precise sketch and cut list so you match every dimension before you buy.
- Confirm each piece’s size from your cut sheet.
- Compare board grades and prices at the lumberyard.
- Add a few extra boards if your cuts are complex.
When you shop, ask your lumberyard about stock limits and pricing so you don’t overpay or come up short.
Accurate measurements help you buy only what you need and reduce surprises during the build.
Waste Allowance Buffer
A smart waste allowance buffer keeps your lumber estimate realistic, so add about 20% to your board-foot total for offcuts, errors, and miscuts. You’ll use this waste allowance buffer to protect your budget when boards don’t match your cut list perfectly.
Match your estimate to exact lengths and cut sheets, then compare it with what the lumberyard actually has in stock. That helps you buy the right boards and avoid paying for lumber you won’t use.
If you can, plan cuts to reduce scrap before you order extras. Still, a few spare boards can save you from delays and rush purchases.
Build every project’s cutting loss into the total cost, and you’ll price handmade work more accurately and spend less on avoidable waste.
Labor Costs for Custom Woodwork
Track every minute so your estimates stay sharp on later jobs.
- Include design, setup, client calls, and selling time in labor costs.
- A 2.5-hour accent table would cost about $97.50 in labor alone.
- Record actual job times to refine pricing and avoid guesswork.
If you underprice because you fear sounding expensive, you’ll lose money fast. Value your skill, your shop time, and the hidden work behind each piece.
Clear labor costs protect profit and keep your handmade pricing sustainable.
Set a Fair Hourly Rate
To set a fair hourly rate, start by calculating your shop rate from your target annual income and the number of billable hours you can realistically work.
Then add overhead costs like rent, utilities, and tools so your rate covers every business expense and still leaves room for profit.
Keep an eye on the market and your own speed, because charging too little can hurt your business and rushing can lower the quality you sell.
Calculating Your Shop Rate
Setting your shop rate starts with what you need to earn, not just what seems competitive. Add your fixed costs, then divide your annual target by the hours you can actually work. If you want $75,000 and expect 1,920 billable hours, your hourly rate is about $39.00.
- Start near $50 if your market supports it.
- Drop to $35–$40 if you need to win more work.
- Check whether your speed still protects craftsmanship.
Include rent, utilities, and materials so your pricing covers real expenses, not guesses. Track every job, every minute, and every receipt. That record shows when you’re undercharging and helps you sharpen future estimates without giving away your skill.
Factoring Overhead And Goals
Once you know your base shop rate, add overhead and profit goals so the number actually works for your business.
Start by dividing your annual income target by your billable hours, then compare that hourly rate with market pricing and your skill level. Include overhead, usually about 15% of materials and labor, so you cover rent, tools, software, and other business costs.
If you open at $50/hr, watch client response; many woodworkers land near $35-$40/hr for a competitive balance.
Don’t forget planning, consulting, and material runs, because that time is labor too.
Recheck your cost structure often, especially when expenses rise or demand shifts. As your experience grows, adjust your hourly rate to stay profitable and sustainable.
Track Your Actual Build Hours
Tracking your actual build hours is one of the simplest ways to tighten up future estimates and improve your pricing accuracy. When you record each job’s time, you stop guessing and start pricing from real labor. Most woodworkers underestimate projects, so your log helps you adjust quotes before you lose money.
Break the work into clear tasks and note the hours for:
- measuring and layout
- cutting and joinery
- assembly and finishing
This gives you a cleaner view of where your time goes and where you can work faster. It also helps you explain your price to clients with confidence, because you can point to the labor behind the project.
Over time, your records make future estimates sharper and your shop more efficient.
What Overhead Costs to Include
You’ll want to include shop expenses like rent, utilities, insurance, tool wear, and maintenance, since these ongoing costs usually run about 15% of your materials and labor.
Don’t forget hidden business costs such as marketing, fuel, and transportation for sourcing materials, because they affect your real price.
When you build all of that into your overhead, you can set a selling price that covers your costs and still protects your profit.
Shop Expenses
When you price woodworking jobs, don’t stop at lumber and labor—your overhead should also cover shop expenses that keep the business running, and they typically run about 15% of total materials and labor.
Track overhead costs for electricity, water, rent, and tool maintenance so you don’t undercharge. Add regular sharpening, repairs, and replacement parts to protect quality and avoid delays.
Include setup items that support efficient work, like storage and safety gear, because they affect how smoothly you build. If you buy materials yourself, factor in gas and vehicle wear for pickups and deliveries.
- Electricity and water
- Tool upkeep and replacements
- Storage, safety, and transport
Hidden Business Costs
Add overhead costs like rent, utilities, shop maintenance, and insurance; these often run about 15% of your materials and labor.
Don’t forget tools: saws, drills, and routers cost money to buy, maintain, and eventually replace.
For custom projects, include packaging and shipping, especially when you send work to distant buyers.
You should also budget for selling expenses, which can take about 15% of the retail price through marketing and store placement.
Finally, fold in travel for sourcing materials, design software, and bookkeeping services.
When you price every hidden cost, you protect your margin and avoid undercharging.
Include Selling and Marketing Costs
Selling and marketing costs can add up fast, so build them into every woodworking price from the start. You should budget for selling expenses, which often run about 15% of the final price, so you don’t eat into profit.
When you set retail pricing, a 100% markup on wholesale can help cover those costs and protect your margin. Track marketing costs carefully, because ads, online listings, and marketplace fees can shift your numbers quickly.
- Add booth fees and travel costs before you quote craft markets.
- Include photo, ad, and listing expenses in each project’s overhead.
- Review your pricing after each sale to catch hidden losses.
Price Woodworking by the Board Foot
A good way to price lumber is to start with board feet, then add a 20% waste buffer for mistakes, defects, and irregular cuts. You can then set materials costs with pricing based on the lumber’s board-foot rate. For example, oak at $3.25 per board foot changes your total fast.
| Board feet | Rate | Cost |
|---|---|---|
| 10 | $3.25 | $32.50 |
| 25 | $3.25 | $81.25 |
This gives you a practical baseline for your project budget. Include screws, fasteners, and other materials so you don’t underprice the job. When you buy, ask your lumberyard for straight, usable boards that match your plan. That keeps your estimate tight and your shop costs under control.
Use Cut Lists for Better Estimates
A detailed cut list makes your estimate sharper before you ever pick up a saw. You’ll know every part, its dimensions, and how many you need, so you can price lumber with less guesswork and less waste.
Woodworkers tend to undervalue how much a good cut list protects profit, but it keeps your material totals tied to the actual design. Add a 20% waste buffer to your board-foot count, then compare that against supplier pricing.
- Match each part to its final size before milling.
- Use software like Cutlist Plus for efficient layouts.
- Track offcuts so you can reuse them on later jobs.
A solid cut list also streamlines sourcing and helps you spot costly mistakes early, before they cut into your margin.
Break Each Project Into Time Blocks
Break every project into clear time blocks—sourcing, milling, joinery, assembly, sanding, finishing, and cleanup—so you can price each phase instead of guessing at the whole job.
When you split work this way, you see where your time spent really goes and can estimate each step more accurately. Add generous buffers for setup, tool changes, and cleanup, because those tasks eat hours fast.
Track actual time spent on each phase in a simple log, then compare it with your estimate. Over time, you’ll spot patterns, tighten bids, and charge per hour with more confidence.
This method also helps you plan materials, shop time, and labor without overcommitting. Clear blocks make your pricing more honest and your workflow more efficient.
Apply the 50% Deposit Rule
To protect your cash flow and lock in a serious client, ask for a 50% deposit before you buy materials or start milling. This upfront payment covers lumber, hardware, and early labor on a custom project, so you’re not financing the job yourself. It also helps you filter out buyers who aren’t ready to commit.
- State the deposit amount in your quote and invoice.
- Explain that work begins only after the payment clears.
- Collect the final payment when you deliver the finished piece.
When you spell out the payment schedule early, you cut confusion and keep the project moving. For long builds, that deposit gives you breathing room to manage prep time and shop expenses without straining your budget.
It’s a simple rule that protects your margins and supports smoother client relationships.
How to Price Custom Details and Add-Ons
Custom details and add-ons should be priced separately because they usually take more time, more material, and more skill than your base build.
You should break out each custom details item in your pricing so you don’t undercharge for labor or supplies. Estimate the extra time carefully, since carving, joinery changes, or finishing steps can stretch your timeline fast.
List every material separately, including premium woods, hardware, adhesives, or specialty finishes, and charge what they cost you.
For more complex customization, add a 10-30% markup to cover the extra effort and risk.
Then explain the value to your client clearly: they’re paying for uniqueness, craftsmanship, and the added work your base price doesn’t cover.
This keeps your pricing fair, transparent, and profitable.
Charge More for Unique Wood Grain
Unique wood grain can justify a higher price because it instantly raises the perceived value of your piece, especially when the pattern is rare, striking, or hard to match.
You can usually ask 10-30% more for unique wood grains, but only when the figure truly stands out. Factor in the extra time you spend sourcing, sorting, and shaping specialty stock, since that labor cuts into profit fast.
Custom pieces with dramatic grain also demand more careful sanding and finishing, so higher prices help cover the added skill.
- Explain why the grain adds value.
- Show photos that prove the pattern.
- Charge for extra handling and finish work.
When you describe the wood’s appeal clearly, buyers understand they’re paying for a one-of-a-kind look, not just lumber.
Price for Your Local Market
Your local market should set the floor for your pricing, because what buyers already pay for similar handmade pieces gives you a realistic target. Research nearby makers, shops, and craft markets to see average prices for items you make, then compare them with your own quality.
If cutting boards sell for about $150 in your area, that’s a useful benchmark. Check who buys there, too; affluent clients may pay more for distinctive work, while budget-focused shoppers expect tighter pricing. Track regional material costs for lumber, screws, and hardware so you know your baseline.
Then add selling costs from market fees or shop commissions. When your pricing matches local expectations and covers costs, you can make steady sales without guessing.
Avoid Underpricing Your Craft
Underpricing can sink a woodworking business before it gets started, because if you don’t charge enough to cover materials, labor, overhead, and profit, every sale moves you backward.
You need to set an hourly rate x that reflects your skill, experience, and income goals, usually $35 to $75 per hour. Then calculate how much time each build really takes, including sanding, finishing, setup, and client revisions.
Set an hourly rate that reflects your skill and goals, then time every build realistically.
- Track every material cost, even screws and finish.
- Add overhead for tools, shop space, and utilities.
- Build in 10% to 30% profit so you can grow.
When you explain the craftsmanship and quality materials, clients see value instead of a high tag.
Use Woodworking Pricing Formulas
Once you know what your time is worth, you can turn that into a clear pricing formula for every project: materials + labor = base price****.
Add the cost of wood, hardware, glue, and a waste factor so mistakes don’t eat your margin. Then multiply your hourly rate by the hours you expect to spend; if you target $75,000 a year, you might need about $39 per hour.
Next, include overhead at roughly 15% of material and labor costs to cover your shop’s real expenses. For selling, add another 15% for selling costs, then set your retail price with a 100% markup on the wholesale total.
These woodworking tips help you price confidently, stay profitable, and avoid guessing.
Use Cut List Software for Faster Quotes
Cut list software like Cutlist Plus can speed up your quotes by turning project dimensions into detailed cut sheets and a reliable material estimate. You enter your projects, and the software calculates board feet, adds a waste buffer, and lays out efficient cuts.
That helps you buy only what you need, cut down waste, and keep costs in check. It also saves you time when planning, so you can focus on craftsmanship and customer service instead of manual math.
It helps you buy only what you need, reduce waste, and save time on planning.
- Compare material costs before you price.
- Check layouts to reduce offcuts and scrap.
- Use the total estimate to quote faster and more confidently.
When you use cut list software, your numbers stay tighter, your quotes stay competitive, and your margins stay healthier.
Frequently Asked Questions
How Do I Price Rush Orders Without Losing Profit?
Charge a rush fee that covers overtime, expedited materials, and lost scheduling time; add 20–50% based on urgency. You’ll protect profit by quoting the premium upfront, limiting rush slots, and requiring deposit.
Should I Charge Extra for Design Revisions?
Yes—charge extra for design revisions. Like sanding rough wood smooth, each change costs time and materials. You should include one or two revisions, then bill hourly for extra tweaks, mockups, or redraws.
How Do I Handle Pricing for One-Off Prototypes?
You should price one-off prototypes higher than production pieces by covering design time, materials, setup, and risk. Estimate labor honestly, add a contingency, and charge separately for revisions, because prototypes usually take extra problem-solving.
What if a Customer Supplies Their Own Materials?
Yes—you should still charge labor, setup, waste, tooling, and risk, even if they bring the wood. You’re steering the ship, not just cutting boards, so protect your margin with a clear, written materials policy.
How Often Should I Update My Woodworking Prices?
You should update your woodworking prices at least every 6 to 12 months, and sooner if lumber, hardware, or labor costs shift. Review your margins regularly, so you don’t undercharge or lose profit.
Conclusion
Pricing your woodworking projects right protects your profit and your time. I once saw a maker sell a walnut table for $450, then spend 18 hours on it; at $25 an hour, that’s a loss dressed up as a sale. Use your formula, count lumber waste, and check local market rates before you quote. Cut list software can speed things up, but your numbers still need to tell the truth.