
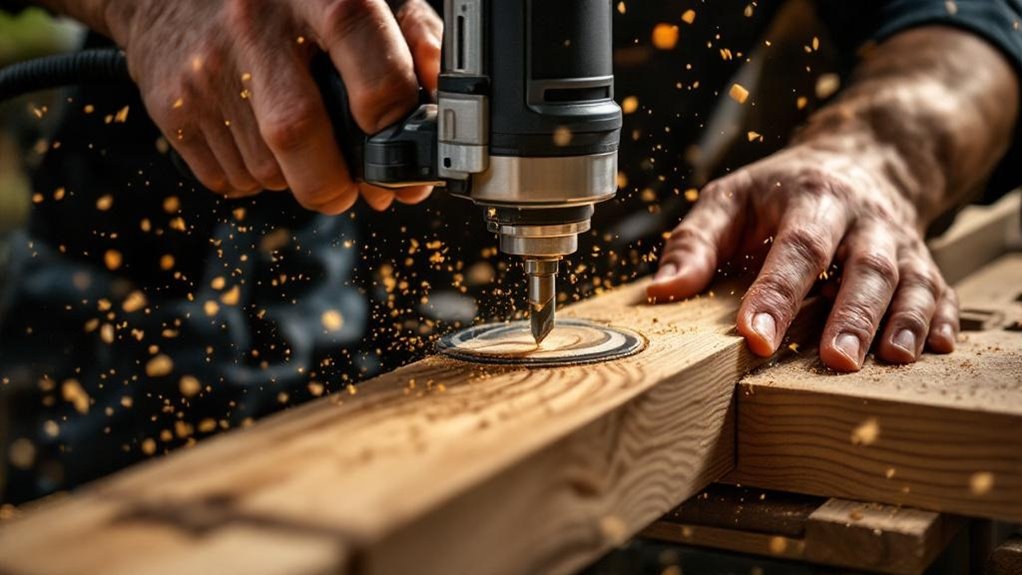
For cleaner edges and tighter joinery, you should match the router type and bit to the task, then set speed and depth carefully. Use spiral bits when possible, with up-cut for solid wood and down-cut for plywood. Clamp the work, test on scrap, and take several shallow passes instead of forcing a deep cut. Keep the feed steady, use featherboards for control, and inspect bits often. A few more details can sharpen the results even further.
Key Takeaways
- Use spiral bits instead of straight bits for cleaner edges and more consistent cuts in routing tasks.
- Match bit type to material: up-cut for chip removal, down-cut for reducing tear-out, and compression bits for clean plywood edges.
- Make multiple shallow passes rather than one deep cut to improve control, reduce burn marks, and produce smoother joinery.
- Clamp workpieces firmly and use featherboards to prevent shifting, improve accuracy, and keep cuts consistent.
- Set router speed, depth, and feed rate correctly, and test on scrap before cutting final pieces.
What Does a Wood Router Do?
A wood router spins a cutting bit at high speed, giving you precise control for edge profiling, groove cutting, and hollowing out wood for joinery work.
You use it to shape clean profiles, cut accurate grooves, and form recesses for joints with confidence. With the right Router Bits, you can create repetitive templates, decorative inlays, and crisp edge work that elevates a project’s finish.
Shape clean profiles, cut precise grooves, and create refined joinery details with confidence.
It replaces several hand tools because it cuts fast, stays consistent, and handles detailed tasks with precision. Fixed-base routers suit edge work, while plunge routers let you enter the workpiece under control for mortises and other interior cuts.
When you want repeatability, accuracy, and refined detail, a router delivers all three in one tool.
Choose the Right Router Type
Choosing the right router type starts with matching the tool to the cut you need. A fixed-base router gives you steady control for edge profiling and repeatable dadoes, so you can trust its depth once set.
Reach for a plunge router when you need controlled entry into the workpiece, such as mortises or interior cuts. If you want one setup that handles both tasks, a combo kit gives you fixed and plunge capability in one router type.
For small parts, detail work, and one-handed control, a trim router stays light and nimble.
When you understand what each router type does best, you’ll make cleaner cuts, reduce mistakes, and build stronger joinery with less fuss and more confidence in every pass.
Pick Bits for Cleaner Cuts
The bit you choose has as much impact on cut quality as the router itself. You’ll get cleaner edges when you favor spiral bits over straight bits, because they shear fibers instead of tearing them.
Use up-cut bits in solid wood when you want efficient chip removal, and switch to down-cut bits in plywood or melamine when you need to limit chip-out on the top face. For exposed work, compression bits give you chip-free surfaces on both sides, which matters in joinery and edge profiling.
Match the bit diameter to the task so you keep control and precision. Inspect your bits often, and replace dull ones quickly; sharp bits cut cooler, leave smoother walls, and reduce friction that can ruin the result.
Set Up Your Router for Accurate Cuts
You’ll get accurate cuts when you match the router bit to the job and set the speed for its diameter, since the wrong combination can compromise control and finish.
Clamp the workpiece firmly so it can’t shift under load, and set the bit depth with care to keep each pass clean and manageable.
Before you cut the final piece, run a test on scrap to confirm your settings and catch any adjustment you need.
Bit And Speed Selection
Pick the right router bit for the job first: straight bits handle dadoes cleanly, while cove bits shape decorative edges with control and consistency.
Match the bit diameter to your speed setting; large bits need slower RPMs to reduce heat, while smaller bits can run faster for a crisper cut. Choose sharp bits only, and keep the bit fully seated and tightened before you start.
Set depth in small increments, taking multiple shallow passes instead of forcing one deep cut; you’ll get cleaner walls, less tear-out, and better control.
Before you rout the final workpiece, clamp it solidly and check your setup on scrap. That quick trial confirms the cut quality, lets you fine-tune speed and depth, and helps you avoid waste.
Secure Setup And Test Cuts
Clamp the workpiece firmly, secure the router, and set the bit depth for shallow initial passes so the cut stays controlled and the edges stay clean.
Your secure setup starts with a rigid mount and a clamped board, because any shift ruins accuracy and safety.
Add a larger auxiliary base plate if you need more stability; it spreads the tool’s weight and helps you track straight.
Match router speed to bit diameter and material, slowing down for larger cutters to reduce chatter and burning.
Before you touch the final piece, make test cuts on scrap and inspect the edge, depth, and surface finish.
Then fine-tune depth or speed as needed.
Careful preparation saves material, improves control, and gives you cleaner joinery every time.
Use Shallow Passes for Smoother Results
You’ll get a cleaner finish if you make multiple shallow cuts instead of forcing the bit to remove too much material at once.
Keep each pass light and controlled, and you’ll reduce burn marks, chipping, and tear-out while holding a steadier feed rate.
Finish with a shallow cleanup pass, and you’ll improve edge quality and joinery precision.
Multiple Shallow Cuts
When you’re routing a profile or cutting joinery, take several shallow passes instead of one deep cut to keep the work cleaner and the tool under control.
With multiple shallow passes, you reduce burning, cut chatter, and the chance of the router tipping. Set the bit so each pass removes no more than 1/8 inch, especially in hard or dense stock.
That measured approach helps you avoid tearout, keep edges crisp, and maintain tighter control when the bit follows a profile or forms a joint.
You’ll also ease the load on the motor and extend bit life because the cutter isn’t forced to bite too aggressively. Work patiently, feed steadily, and let each pass establish the cut before you deepen it.
Cleaner Finish Passes
Sneak up on the final surface with multiple shallow passes, and you’ll usually get cleaner edges, less chatter, and far less burning. For cleaner finish passes, set each cut around 1/16 inch deep and let the router work deliberately. A sharp router bit matters; a dull one tears fibers, leaves rough edges, and forces extra cleanup. Keep your feed rate steady and even so the cut stays uniform and the tool won’t gouge or kick back. Before you touch the final board, test the setup on scrap and confirm the depth, speed, and feel.
| Setting | Result |
|---|---|
| Shallow depth | Smoother cut |
| Sharp router bit | Cleaner edge |
| Steady feed | Less burn |
That discipline gives you a finer finish with less rework.
Fine-Tune Edges With a Router Plane
A router plane gives you a reliable way to bring edges to flat, true, and perfectly straight, especially when you’re refining tenons, grooves, and other joinery parts. You set the depth with care, then shave only the high spots until the edge reads parallel and true. That control matters when you want cleaner edges and a fit that closes without strain.
Sharp bits cut cleanly, so keep them honed and choose a model with easy depth adjustment and comfortable handles. Support the workpiece solidly, then apply steady pressure so the cut stays even from end to end.
Use the router plane to erase minor imperfections or burn marks left by other tools, and you’ll finish with joint parts that register accurately and look deliberate.
Flatten Wide Boards With a Router
Once you’ve true’d edges with a router plane, you can use a router to flatten a wide board the same careful way, only on a larger scale.
Set the board on a large, stable support, like a workbench or hollow-core door, so it won’t rock. Shim it firmly until it sits solid.
Set the board on a stable support and shim it firmly so it won’t rock.
Mill two guide boards longer than the workpiece and fasten them parallel to form rails. Build a sliding carriage from aluminum angle, then ride the router across the board with steady, even pressure.
A router table can help with setup and bit changes, but use the handheld rig for surfacing. Choose larger bits for faster stock removal and a smoother finish.
Make shallow passes, check your progress often, and stop when the surface reads flat.
Cut Perfect Miter Joints
For miter joints that close tightly and look crisp, start by roughing away most of the waste with a saw or bandsaw, then finish the cut with a chamfer bit set for a true 45-degree bevel. You’ll reduce load on the router and keep the cut more exact.
Set your router table with a zero-clearance opening, and use an edge guide to keep the stock stable and aligned. Add a backerboard behind the workpiece to prevent blow-out and splintering at the exit.
Make small setup adjustments until the bevel runs cleanly end to end. That careful tuning pays off fast: you get quicker routing, cleaner edges, and miter joints that fit like they were machined, not merely cut.
Improve Narrow Moldings With Featherboards
When you’re routing narrow moldings, two featherboards give you far better control than one, holding the stock straight and keeping it from drifting sideways as it passes the bit. You’ll feel the difference immediately: steadier feed, less chatter, and cleaner edges. Leave extra length on the blank as a built-in handle, then trim it off after routing.
| Setup | Result |
|---|---|
| Two featherboards | Even pressure |
| Correct spacing | Better control |
| Solid feed | Less kickback |
| Extra handle | Safer handling |
| Fine adjustment | Uniform profile |
Set the featherboards so they press firmly but don’t bind. That slight, exact pressure keeps the workpiece aligned, lets the cutter do its job cleanly, and gives your narrow moldings a crisp, professional finish every time.
Shape Thick Parts in Two Steps
After you’ve tamed narrow stock with featherboards, handle thick parts in two steps for cleaner, safer routing.
First, use a template and a top-bearing pattern bit to rout the bottom half of the part, letting your plunge router follow the guide with controlled, incremental passes. Keep the cuts shallow, then raise the bit gradually for a better finish and easier control.
Use a template and top-bearing pattern bit to rout the bottom half in shallow, controlled passes.
Next, switch to a bottom-bearing flush-trim bit and finish the profile to exact thickness. If you’re shaping tenons, measure the cut distance from the router baseplate and use a 1/2-inch bit for stability. Rout both sides, deepening each pass only enough to stay ahead of the cutter.
This two-step method protects the router and gives you crisp, repeatable results.
Trim Large Tabletops Cleanly
Start by rough-cutting the tabletop a little oversize with a jigsaw so you’ve got clean, manageable material for the router to finish.
Then clamp a plywood guide with a factory edge and run a router with a large pattern bit to bring the edge dead square and smooth.
Back up end grain with a sacrificial block so you don’t tear fibers out at the corners.
Rough-Cut Oversize First
A clean edge begins with a rough cut: trim large tabletops close to final size with a jigsaw before you bring in the router.
When you rough-cut oversize first, you remove waste fast and give your router techniques less work, which keeps the cut controlled.
Leave the panel slightly proud of layout so the final pass can true the edge without strain.
Clamp a plywood guide with factory edges; it keeps the line square and steady.
Back the cut with a sacrificial block under the tabletop to reduce splintering and preserve the underside.
Then route with a larger diameter bit for cleaner results, especially on end grain.
You’ll get straighter edges, less tear-out, and a better surface for joinery and glue-up.
Use Pattern Bit
Use a pattern bit to clean up a tabletop after your rough jigsaw cut leaves it slightly oversize. Mount the work securely, then run the pattern bit against a straight plywood guide with factory edges so you keep the top square and true.
Leave a small, consistent margin on the rough cut; that gives the router room to reach final size without forcing the cut. A large-diameter pattern bit or one of your trim bits rides the edge cleanly and leaves a smoother finish than hand sanding alone.
If you’re routing across fragile areas, clamp a sacrificial block beneath the workpiece to support the exit and reduce tear-out. Move steadily, keep the base flat, and let the bit do the trimming, not pressure.
Support End Grain
For clean tabletops, route the final edge with a large pattern bit after your jigsaw cuts have left only a small amount to trim. You’ll give the router less work, and you’ll reduce tearout on end grain.
Clamp a plywood guide with factory edges so your cut stays square and your edge runs true. Then fasten a sacrificial block along the exit side; it backs up the fibers and keeps the finish intact when the bit breaks through.
Choose a larger diameter bit, because it shears end grain more smoothly and leaves a cleaner surface on wide panels. Keep firm pressure against the guide, move steadily, and let the bit do the cutting. Measure often, and you’ll trim large tabletops cleanly every time.
Make Straight Edges Without a Jointer
When you need straight edges without a jointer, clamp the workpiece firmly and guide the router with a straightedge made from plywood and aluminum angle.
You’ll get a reliable straight edge if you keep the guide fixed and let a bottom-bearing flush-trim bit ride it cleanly. Set the bit so it cuts flush to the guide, then make shallow passes rather than forcing full-depth cuts. That approach reduces burning, chipping, and chatter.
Check the bit often; a sharp edge cuts cleaner and leaves less tear-out. If you see fuzz or scorch marks, stop and replace or hone the bit before continuing.
With careful clamping, a true guide, and controlled passes, you can square an edge accurately without a jointer.
Cut Better Dados With One Bit
A custom baseplate lets you cut four dado widths with one router bit by shifting the cutter in 1/16-inch steps. You’ll save setup time and keep your joinery consistent when you lay out the plate accurately and confirm the bit tracks true.
- Mark each offset with care; a small error ruins the fit.
- Set depth for the plywood you’re using, then verify it before cutting.
- Check the bit often; dull bits leave ragged shoulders and force extra passes.
- Recalibrate after each width change so every dado stays crisp and repeatable.
This method works especially well when you move between common sheet goods. You can make clean, precise dados without swapping bits, and you’ll keep your workflow steady from one cut to the next.
Keep Router Dust Down
Keep the dust in check and your routing stays cleaner, safer, and more accurate. Use a dust port on the router table, and if your setup allows it, connect a vacuum hose to the router base so you pull shavings at the source. That keeps airborne debris down, improves visibility, and lets you track the cut without guessing.
Rout in a designated, controlled area, and you’ll keep sawdust from migrating across the shop. Sweep and vacuum regularly, because buildup can interfere with your layout, obscure reference marks, and dull the precision of later passes.
When you keep the work area clear, you also keep the router performing consistently, especially during tight joinery where every line matters and every distraction costs accuracy.
Follow Router Safety Best Practices
Safety starts before the bit spins: put on safety glasses and hearing protection, verify every adjustment is locked, and check the bit for sharpness and wear. You’ll reduce risk and keep cuts predictable when you maintain clean work habits and stay alert.
- Keep your hands clear of the bit, always.
- Don’t start the router with the bit touching stock.
- Feed the tool steadily; sudden pauses can invite kickback.
- Inspect bits often and replace dull or worn ones.
You should also confirm the fence, depth stop, and collet are tight before every pass.
That discipline helps you control the tool, protect your workpiece, and avoid surprises. When you respect the router, it rewards you with cleaner edges and safer joinery.
Frequently Asked Questions
How to Clean up an Edge With a Router?
Use a flush trim bit, clamp the workpiece securely, and guide the router steadily along the edge. Make shallow passes, test on scrap first, and maintain consistent feed speed to avoid burning, tear-out, and tipping.
What Is the Best Router Bit for Smooth Edges?
For smooth edges, you’ll usually want a down-cut spiral bit; it shears cleanly and minimizes chip-out. I once watched one turn ragged plywood into glass-smooth joints—like shaving with a surgeon’s blade.
What Is the Best Way to Round or Soften Edges?
You’ll get the best results with a roundover bit, making shallow passes and keeping a steady feed rate. Use a bearing-guided bit for consistency, and practice on scrap before cutting your final edges.
What Not to Do on a Router Table?
Don’t start with the bit touching wood, rush feed, use dull bits, over-clamp, or ignore dust; you’ll risk kickback, burn marks, poor cuts, and unsafe visibility. Slow and steady keeps you safe.
Conclusion
With the right router, you shape sharp, smooth, and square results. Choose the proper tool, pair it with precise bits, and set it up with care. Take shallow passes, guide straight edges, and cut clean dados for crisp joinery. Keep dust down, and keep safety first. When you work steadily and smartly, your router helps you craft cleaner corners, tighter fits, and polished projects that look professionally finished.