
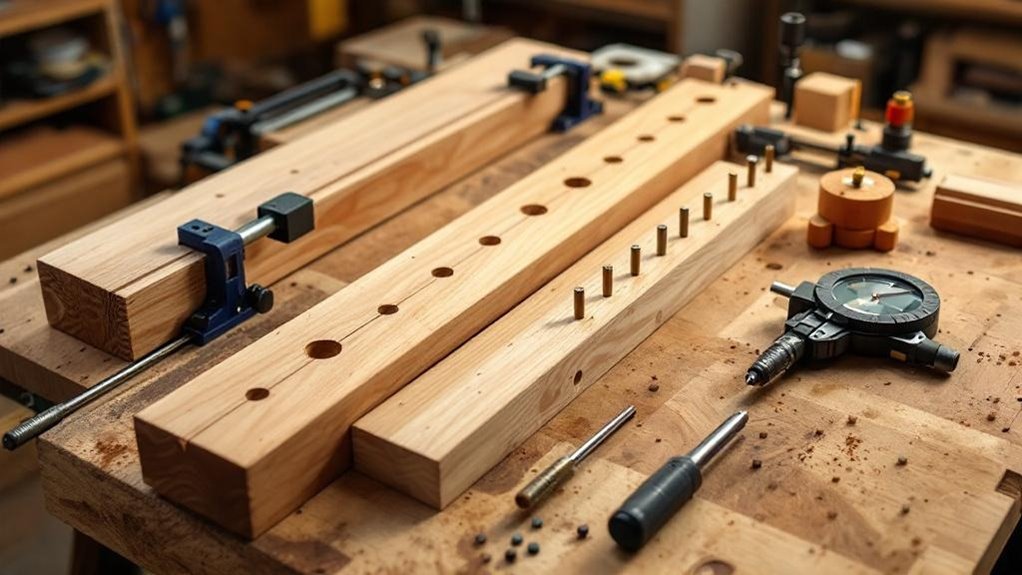
You can build strong, repeatable furniture joints with dowels by drilling exact, aligned holes and gluing them with care. Use a doweling jig, sharp brad-point bits, hardwood dowels, clamps, and a dry fit before assembly. Match dowel size to the stock, space them evenly, and drill slightly deeper than the dowel length. If holes miss, correct small errors early. With a few proven tricks, you’ll make cleaner joints and stronger builds with confidence.
Key Takeaways
- Dowel joints create strong, hidden furniture connections by joining long grain with accurately drilled wooden pins.
- Use a doweling jig, brad-point bits, and sharp layout marks to keep holes aligned and repeatable.
- Match dowel diameter to the bit, and size dowels to about one-third the stock thickness for reliable strength.
- Dry-fit every joint before glue-up to confirm flush alignment, spacing, and dowel fit.
- Clamp firmly, use wood glue on dowels and holes, and let the joint cure fully for the best result.
What Are Dowel Joints?
Dowel joints are a simple, reliable way to connect two pieces of wood by inserting cylindrical wooden pins, called dowels, into matching drilled holes. You drill precise holes in both parts, then add glue and insert the dowels so the joint locks the pieces together.
Because the dowels engage long grain, you get dowel joints stronger than many screw or biscuit joints. Fluted dowels help the glue spread and swell for a tighter fit.
You need exact hole alignment, so use a doweling jig to keep each hole placed correctly. An accurate dowel setup lets you build edge-to-edge joints, T-joints, and clean assemblies that stay hidden in finished furniture and cabinetry.
Why Use Dowel Joints?
If you want strong, clean, and repeatable wood joints, dowels are a smart choice. Dowel joints give you a rigid mechanical bond by locking parts together with cylindrical pins, and they often outlast screws in solid wood because they spread force more evenly.
You also get a neat look: the joint stays nearly invisible, so your design stays clean and flexible. With a dowel jig, drill, dowels, and wood glue, you can build accurate joints without a complicated setup. That simplicity makes the method practical for beginners and efficient for experienced builders.
When you need matching parts or multiple assemblies, dowel joints help you keep spacing, alignment, and strength consistent from one piece to the next.
Tools for Dowel Joinery
You’ll need a doweling jig to align your holes accurately, along with a power drill fitted with sharp brad-point bits for clean, precise cuts.
Choose dowels that match the wood thickness, use high-quality wood glue for a strong bond, and clamp the joint firmly so nothing shifts as it cures.
With these essential tools, you can make dowel joints that fit well and hold securely.
Essential Dowel Tools
A reliable dowel setup starts with the right tools, and each one has a specific job in making the joint strong and accurate.
Use a dowel jig to keep your drill holes aligned, so your parts fit square and the joint stays stable. Choose brad-point drill bits for clean entry points and less tear-out. Match the dowel size to the bit exactly; hardwood dowels usually give you better strength and wear resistance.
Apply high-quality wood glue to the dowels and mating holes to lock the parts together and improve long-term durability. Keep your layout accurate, drill carefully, and test the fit before gluing.
When each tool matches the task, you’ll build dowel joints that stay tight and repeatable in furniture work.
Jigs, Bits, and Clamps
Once you’ve matched the dowel size to the bit and laid out your joint accurately, the next step is choosing tools that keep that precision through drilling and glue-up.
Use a doweling jig to hold the holes square and aligned; it’s essential for repeatable joints and stronger assemblies. Pair it with a sharp brad-point drill bit so each hole cuts cleanly and avoids splintering.
Keep the drill bit size matched to the dowel, ideally around one-third the thickness of the stock.
During assembly, apply clamps to lock the parts in position while the glue cures. Check alignment before tightening fully, then wipe away glue squeeze-out right away so you don’t stain the wood or weaken the finish later.
Choose the Right Dowels and Bits
Choose hardwood dowels for stronger joints and better glue adhesion, and consider fluted dowels if you want improved glue spread and expansion.
Match the dowel diameter to your drill bit exactly, and aim for a size that’s about one-third the thickness of the stock you’re joining. Use a brad-point bit for clean, accurate holes, and make sure the bit and dowel sizes fit together without slack.
Dowel Size Selection
For a strong, stable dowel joint, size your dowels to about one-third of the board thickness and match the drill bit exactly to the dowel diameter. Use common hardwood dowels in 1/4″, 3/8″, or 1/2″ sizes, depending on your stock.
This dowel size gives you enough strength without weakening the parts, and it leaves enough glue surface for a solid bond. Choose fluted dowels when you can, since they help spread glue and allow slight expansion for a tighter fit.
Keep your matching holes clean and aligned so the dowels seat fully. Also, make the dowel length at least two to three times its diameter, and match it to the material thickness.
Accurate sizing now prevents loose joints later in furniture builds.
Bit Matching Basics
Bit matching is where a clean dowel joint starts. You need the dowel diameter to match the drill bit exactly, or your holes won’t hold tightly. Use a brad-point bit when you drill; it centers well and cuts cleaner holes.
| Dowel size | Bit match | Result |
|---|---|---|
| 1/4 in. | 1/4 in. | Snug fit |
| 3/8 in. | 3/8 in. | Stable joint |
| 1/2 in. | 1/2 in. | Strong support |
Check every dowel before gluing. It should slide in with firm pressure, not wobble. Keep dowel length at least 1 1/2 times its diameter so the joint gets enough support. For hardwood work, use hardwood dowels so the glued fit strengthens as it sets.
Hardwood Dowel Choices
Once your bit matches the dowel, pick a hardwood dowel that fits the job: oak, maple, or birch work well because they’re strong and hold up in furniture joints.
Choose dowels about ⅓ the thickness of the stock so the joint keeps strength without crowding the wood. Match each dowel’s diameter to the drill bit exactly; a slightly undersized hole can weaken the fit and reduce holding power.
Use fluted dowels when you want extra grip, since they expand as the glue sets and increase contact inside the hole.
Before assembly, check alignment with dowel centers so your holes meet cleanly. That accuracy helps you build a strong connection with hardwood dowels that stays stable through repeated use.
Mark Dowel Locations Accurately
Start by marking both pieces carefully with a combination square so the dowel locations stay the same distance from each edge. Choose a spacing of 6-12 inches, based on stock thickness and joint load, and mark every point before you touch the drill. Use dowel centers to transfer each mark to the mating part, so you align the drilled holes cleanly during assembly. If a joint carries extra stress, offset a few dowels to strengthen the connection without crowding the edge.
| Check | What to confirm |
|---|---|
| Edge distance | Same on both parts |
| Spacing | 6-12 inches |
| Transfer | Dowel centers used |
| Layout | Offset where needed |
| Final check | Recheck before drilling |
Double-check all measurements and marks now; a small error can weaken the joint later.
Set Up Your Dowel Jig
Set your dowel jig to match the thickness of your stock, then clamp it firmly so it can’t shift during drilling.
Use a combination square to align it squarely on the edge of the board, and insert dowel centers to transfer the hole locations to the mating piece.
Set your drill stop for the correct depth and use brad-point bits so each hole is clean, accurate, and ready for a tight joint.
Jig Alignment Basics
Before you drill, make sure your dowel jig sits level and is clamped securely to the workpiece so every hole stays aligned. Place dowel centers on both parts, then mark their points to lock in accurate hole alignment. Set the dowel jig’s template guide to match the wood thickness, and confirm the hole pattern before you drill.
| Check | Target | Result |
|---|---|---|
| Jig level | Flat and steady | Confidence |
| Hole spacing | 2 or 3 dowels | Relief |
| Dowel size | Matches bit | Strength |
Use two dowels on pieces under 4 inches wide and three on 6–8 inch stock. Keep the drill bit matched to the dowel diameter so the joint fits snugly. Careful setup now saves rework later and gives you clean, repeatable furniture joins.
Drill Stop Setup
Dial in the drill stop so it matches the dowel length and keeps you from boring too deep into the workpiece. Set the stop on your bit, then measure again before you drill. Use a bit matching the dowel diameter so the fit stays snug and the joint gains strength.
Mark both workpieces carefully with a combination square, and keep your hole locations consistent. Clamp the dowel jig tightly; any shift will throw the holes off and weaken alignment.
Before you touch the final parts, drill test holes in scrap wood. Check depth, fit, and registration, then adjust the drill stop if needed. When the test joint looks right, move to the real pieces and drill with confidence, keeping every hole clean and repeatable.
Drill Clean Dowel Holes
Clamp your workpieces and mark the dowel locations with a combination square and dowel centers so the holes line up accurately. Use a doweling jig to guide your drilling holes for dowels, keeping each cut straight and evenly spaced. A brad-point bit helps you start cleanly and limits splintering at the entry point. Drill each hole slightly deeper than the dowel length so glue has room and the dowels seat without force. Clear shavings often from the bit and dowel holes to keep the cut open.
| Tool | Use | Result |
|---|---|---|
| Doweling jig | Align holes | Accurate fit |
| Brad-point bit | Start clean | Less splintering |
| Brush/air | Remove shavings | Open holes |
When you’re ready to joint together, clean, uniform holes give you stronger, repeatable results.
Dry-Fit the Joint First
Before you add glue, dry-fit the joint to check hole alignment and make sure the dowels seat snugly without wobble.
Clamp the pieces during the test fit so you can confirm the clamps reach properly and don’t shift the joint.
Then check that the faces sit flush and adjust any misalignment before final assembly.
Check Hole Alignment
Test the fit of your dowel joint before you add glue. Dry-fit the parts and check that the dowels, align, holes, and faces meet cleanly. Even a 1/16-inch error can weaken the joint, so inspect every edge for gaps or twist. If the pieces sit proud, tap them gently until they seat fully.
| Check | What to look for |
|---|---|
| Hole depth | Dowels don’t bottom out |
| Hole size | Dowels fit snugly |
| Surface contact | No visible gaps |
| Part position | Faces line up flush |
| Movement | Nothing shifts under hand pressure |
Use a consistent dry-fit every time. It helps you catch drilling errors, wrong dowel size, or over-deep holes before glue locks them in place.
Test Clamp Fit
With the dowels inserted but no glue applied, dry-fit the joint and use clamps to hold the parts together so you can check alignment, reveal gaps, and make any needed adjustments.
Before you test clamp fit, verify your dowels sit in the exact marked positions so the assembly stays consistent.
Apply enough clamping pressure to seat the parts without forcing them, then inspect the joint at every interface.
If you see gaps, shifting, or resistance, correct the hole locations, dowel length, or mating surfaces before proceeding.
A careful dry-fit lets you reassess the joint, confirm the pieces register properly, and avoid glue-time surprises.
When the parts meet cleanly under clamp pressure, you’re ready for final assembly.
Confirm Joint Flushness
Once your dry-clamped joint holds steady, check that the faces sit flush and the dowels fit snugly in their holes.
Dry-fit every joint before glue, and watch for gaps, twist, or wobble. Good flushness tells you the parts align; poor flushness means you need to correct the setup now, not later.
- Press the assembly together and inspect each seam for even surfaces.
- Move the pieces lightly; excess movement shows a loose fit.
- If the joint isn’t flush, sand the mating faces or verify dowels position before final assembly.
When the dowels seat cleanly and the joint stays stable, you’ll get a stronger bond and a more seamless build.
Catching problems during the dry fit reduces the risk of failure after glue goes on.
Glue Dowel Joints Without Slipping
To keep dowel joints from slipping during glue-up, apply a liberal, even coat of high-quality wood glue to both the dowel holes and the dowels themselves before assembly. You’ll get better coverage, fewer dry spots, and a stronger bond when the glue reaches every surface.
Before you commit, do a dry fit so you can check the fit and confirm the corresponding holes line up cleanly. If you use dowel centers, mark and drill accurately to reduce slippage.
Once assembled, clamp the parts firmly, but don’t over-tighten; you want pressure, not misalignment. Let the glue to dry fully before moving the piece, and wipe away excess glue while it’s still workable for a cleaner joint.
Clamp the Joint So It Stays Square
After the glue is in place, clamp the joint so the parts stay square while it cures. Use parallel or pipe clamps and set them to apply even pressure across the faces.
Before you fully tighten, measure diagonally from corner to corner; if both readings match, the joint’s aligned. Adjust the clamp position until the edges stay square, then snug the clamps just enough to hold.
Don’t over-tighten, or you’ll force out too much glue and leave a mess. Keep the pressure steady and let the joint dry under clamp pressure for at least 24 hours.
- Check square with diagonal measurements.
- Tighten clamps evenly, not forcefully.
- Leave the assembly untouched until fully cured.
Space Dowels for Stronger Frames
Space your dowels along the joint to strengthen the frame and keep the parts aligned as you assemble them. Place them 6-12 inches apart so each joint shares load evenly and keeps structural integrity high.
| Spacing | Benefit | Result |
|---|---|---|
| 6 in. | More support | Tighter joints |
| 9 in. | Balanced load | Better alignment |
| 12 in. | Cleaner layout | Strong frame |
Set each dowel to penetrate at least 1.5 times its diameter into both parts. That depth locks the joint more securely and helps you avoid relying on extra fasteners. With properly spaced dowels, you’ll keep your frame square, reduce seam failure, and get a cleaner, more professional finish.
Apply Dowel Joints to a Shaker Nightstand
For this Shaker nightstand, dowel joints give you a clean way to connect the legs and rails without visible fasteners. Use dowel joinery to keep the frame crisp and repeatable, and drill with a doweling jig so every hole matches.
When you’re using dowels, choose a species that suits the stock and supports a tight, durable fit. Properly aligning dowel holes helps you set the legs and rails with consistent offsets, which creates the shadow lines that define Shaker furniture.
- Mark each joint face carefully.
- Drill straight, equal-depth holes.
- Dry-fit, then glue and clamp the assembly.
During glue-up, work methodically so the parts seat fully before the adhesive grabs. Keep clamps snug, but don’t crush the shoulders.
During glue-up, work methodically so the parts seat fully before the adhesive grabs.
A precise setup gives you a sturdy nightstand and a professional finish.
Fix Misaligned Dowel Holes
If your dowel holes don’t line up, stop and check the layout marks and dowel center positions before you drill again. Use dowel centers to confirm the exact transfer points, then test the fit dry. If the misalignment is slight, open one hole with the correct bit just enough for the dowel to seat without forcing the joint.
| Problem | Fix |
|---|---|
| Minor offset | Enlarge one hole slightly |
| Major offset | Plug with wood filler |
| Repeated errors | Use a doweling jig |
| Before glue-up | Dry fit and confirm |
When the error is larger, fill the bad holes with wood filler, let it cure, and re-drill at the correct marks. A doweling jig helps you avoid the same mistake on future parts. Keep checking alignment before glue; that’s where you save the joint.
Add Offset Joints for a Cleaner Look
Offsetting dowel joints can give your work a cleaner, more refined look by moving the dowels away from the visible edge of the joint. You’ll use offset joints to hide the layout and create subtle shadow lines, while keeping the connection strong.
Take precise measurements before drilling, because even a small error can throw off the fit. A dowel jig with adjustable settings helps you place each hole at a consistent offset, so you can work accurately and repeatably.
- Mark the offset distance on both parts.
- Set the dowel jig to match that layout.
- Drill, test fit, and assemble for a seamless joint.
Use this approach on leg-rail joints when you want strength and a cleaner presentation.
Apply an Oil Finish
Brush on an oil finish to bring out the wood’s natural grain while adding a protective layer against moisture and wear. Before you apply it, sand the surface thoroughly so the oil finish bonds well and looks smooth. Use a clean cloth or brush, and choose linseed oil, tung oil, or Danish oil based on the durability and ease of application you want.
| Oil Type | Best Use | Result |
|---|---|---|
| Linseed | General furniture | Warm tone |
| Tung | High durability | Tougher surface |
| Danish | Fast application | Easy control |
Apply thin coats, then let each one dry a few hours to overnight. Build multiple coats for deeper color and stronger protection, wiping evenly to keep the finish balanced and clean.
Avoid Common Dowel Joinery Mistakes
A few common dowel joinery mistakes can weaken an otherwise solid project, but you can avoid them with careful setup and patience. Use a dowel jig to keep holes aligned and prevent misalignment. Match your dowels to the drill bit and wood thickness so the fit stays tight without forcing the joint.
- Drill accurately: check spacing, depth, and alignment before boring.
- Apply glue lightly: coat the dowels and holes evenly to avoid squeeze-out.
- Clamp and cure: hold the assembly until the glue fully sets, then handle it only after drying.
If you rush, skip clamping, or accept a poor fit, the joint loses strength fast. Precise preparation gives you repeatable, durable results every time.
Frequently Asked Questions
Are Dowel Joints Strong Enough for Furniture?
Yes, you can rely on dowel joints for furniture if you drill accurately and use enough dowels. They add glue area, align parts well, and hold tables and chairs securely under normal use.
What Are Some Common Dowel Joinery Mistakes?
Common dowel joinery mistakes? You misalign holes, size dowels wrong, use too little or too much glue, clamp sloppily, and rush curing. Use a jig, match bits carefully, and let joints dry fully.
What Is the Hardest Joint in Carpentry?
The mortise-and-tenon joint is usually the hardest joint in carpentry. You’ll need precise layout, careful cutting, and a tight fit, because even small errors weaken it, though it’s exceptionally strong and durable.
How Much Weight Can a Dowel Rod Hold?
A dowel rod can hold anything from a few pounds to hundreds; a ¾-inch hardwood dowel may support 300–800 pounds. You’ll get the best strength with tight joints, plenty of glue, and proper dowel placement.
Conclusion
You can build stronger, repeatable furniture when you choose the right dowels, mark your holes carefully, and drill with control. If a hole drifts, fix it before assembly so the joint still pulls tight. Use offset joints when you want a cleaner face, then finish the piece with oil for depth and protection. Keep your layout sharp and your technique steady, and your work will stand like a steam-powered cathedral: solid, aligned, and dependable.