
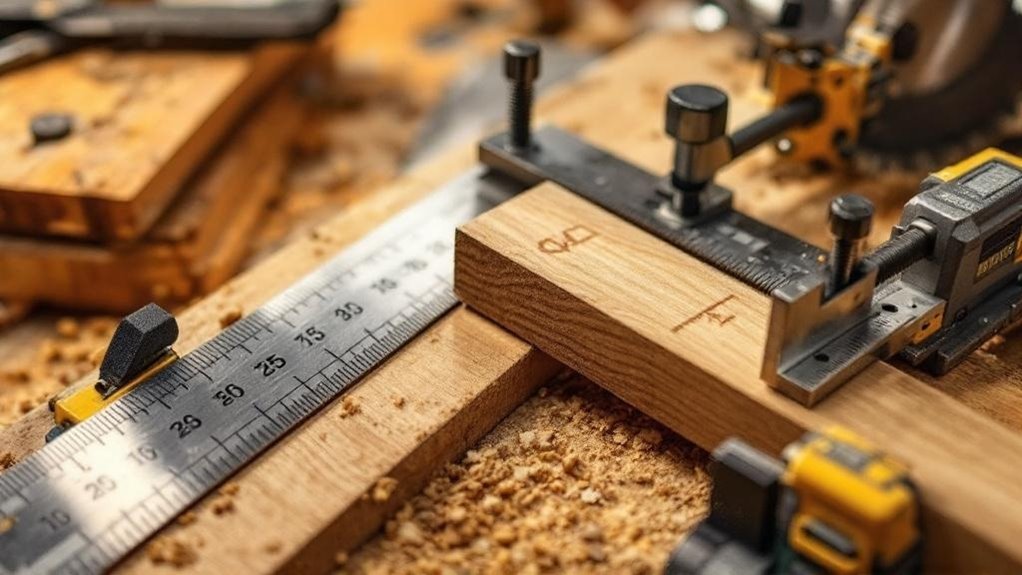
You’ll stop wasting material and time by adopting simple, repeatable measuring habits: measure twice, cut once, pick a consistent datum edge, and account for blade kerf. Use tapes, steel rules, calipers and durable etched tools, verify squareness and zero points before each session, and build jigs/templates with fixed stops for repeatable cuts. Label parts, keep a conversion chart, and run quick calibration checks to catch drift—follow these steps and you’ll save materials, time, and frustration while learning more.
Key Takeaways
- Measure twice, cut once: verify dimensions, account for blade kerf, and re-check before every cut.
- Use a consistent datum edge and index all measurements from that single reference point.
- Employ calibrated tools—steel rulers, squares, and calipers—and perform quick zero/squareness checks daily.
- Build and use jigs, templates, and fixed stops to ensure repeatable, accurate cuts and reduce setup time.
- Label parts, keep conversion charts (fraction/decimal), and follow simple checklists to prevent stacking errors.
Why Small Measuring Errors Cost Time and Material
A single 1/8-inch slip in your measurements can cascade into wasted panels, extra cuts, and hours of rework—costing professional shops 5–15% more in materials and labor.
You’ll find small errors create inconsistent joins and mismatched panels, not because your skill’s lacking but because measurement tolerances stack. High-end tools deliver down to 1/32-inch accuracy, yet human factors push variance toward 1/16 inch or more.
That gap eats material and time: extra cuts, reordered parts, and slower throughput. You’ll lower waste by adopting precise measuring habits and investing in reliable tools and techniques.
When you treat measuring as a repeatable process, you cut rework, use panels efficiently, and keep projects on schedule.
Quick Rules: Measure Twice, Cut Once (Kerf, References, and Checks)
When you set up to cut, verify every measure and note the blade’s kerf so the finished piece matches your layout; measuring twice isn’t superstition—it’s risk management. You’ll avoid rework by confirming dimensions, accounting for kerf, and marking the waste side before any blade spins.
Always be consistent when referencing edges: pick one face or edge as your datum and stick to it for all layout and cuts. Use simple checks—dry fits, test cuts on scrap, and fixtures or jigs for repeats—to catch errors early.
Keep surfaces clean and tools calibrated so small deviations don’t compound. If a measurement still feels off, stop, re-measure, and consult your reference lines rather than guessing.
Essential Measuring Tools : What to Use and When
If you’re setting up a project, choose measuring tools that match the scale and tolerance required: tape measures for layout and rough cuts, steel rulers and combination squares for short, repeatable dimensions and right angles, calipers for small joinery tolerances, and protractors for accurate angles.
Use a tape for overall lengths and a steel ruler when you need crisp, short measurements. Combination squares speed marking and squaring. Calipers give the repeatable accuracy required for precise joinery; protractors set bevels and miters.
Add simple jigs and templates to maintain consistency across repeats. For marking, use a marking knife and awl to scribe exact lines that resist tear-out.
Keep tools clean and checked so each measurement stays reliable.
Choose Durable Measuring Tools That Stay Accurate
Choosing durable measuring tools pays off in accuracy and lowers long-term costs, so pick stainless steel or anodized aluminum pieces with etched markings and solid locking mechanisms. You’ll want tape measures, rulers, combination squares, calipers, and protractors made from durable materials to resist bending and corrosion.
Etched or engraved markings won’t fade, so you can measure and mark repeatedly without losing readability. Choose tools with ergonomic designs and reliable locks so adjustments stay put and user error drops. Store them properly to avoid dings that compromise straight edges.
When you buy, prioritize construction and finish over low price: a well-made tool maintains calibration longer and helps you guarantee precise cuts and assemblies, preventing costly rework on projects.
Calibrate Tools Before Every Project (Quick Verification Checks)
Before you start, run quick calibration checks on your combo square, calipers, and tape to catch any drift.
Verify squareness against a known straight edge or reference block and confirm each tool’s zero point so cuts and fits stay true.
Keep tools and hooks clean and use a moisture meter to spot wood movement that could affect measurements.
Quick Calibration Checks
While a full calibration session isn’t always needed, you should do a quick verification check of your measuring tools before every project to catch errors early.
Use a known reference—a machinist’s block, a straightedge, or a verified ruler—to measure common lengths and confirm tape measures, calipers, and combination squares read correctly.
Marking a test line and measuring it back verifies both layout and tool function. If a tool drifts, adjust or replace it before cutting; small discrepancies cause wasted material and poor joints.
Repeat checks at key stages. Making this quick routine standard reduces the 5–15% waste many shops see from measuring errors and guarantees better-fitting joints, cleaner assembly, and consistent, predictable results across projects.
Verify Tool Squareness
A quick squareness check keeps your cuts true and prevents small misalignments from turning into wasted material and ill-fitting joinery.
You should calibrate tools before every project with a simple verification: use a combination square to confirm 90° on fences, miter gauges, and saw blades. Accurate tools catch errors early, so you’ll avoid costly rework and material waste.
Make it routine—check before cutting, after setup changes, and if a tool gets bumped. If a check fails, adjust the fence or gauge, re-lock, and re-check.
- Inspect table saw fence and miter gauge with a combination square
- Verify blade alignment and trunnion seating
- Repeat checks after adjustments or transport
- Log results to track tool stability over time
Zero-Point Confirmation
Start each project with a zero-point confirmation: verify your measuring tools and squares against known references so you catch errors before they cost material. You’ll calibrate your tape measure, combination square, and digital calipers with quick verification checks. Measure a certified block or machinist square, confirm right marking aligns with references, and log deviations. This routine prevents costly mistakes and reduces waste.
| Tool | Check |
|---|---|
| Tape measure | Compare against steel rule |
| Square | Verify 90° on reference block |
| Calipers | Zero on gauge block |
If a tool’s off, adjust or tag it out. Repeat checks weekly or before critical cuts. Consistent zero-point confirmation keeps accuracy high and waste low.
Wood Movement: Plan for Swelling, Shrinkage, and Gaps
Moisture-driven movement is the single biggest factor you must plan for when cutting and assembling wood, since hygroscopic boards swell and shrink—mostly across the grain—causing gaps, splits, or binding if you don’t allow for it. You must anticipate wood movement: let lumber acclimate for days, check species-specific rates, and use a moisture meter to reach equilibrium before measuring twice and cutting.
Orient grain to minimize troublesome movement across joins. Design in expansion gaps for panels, drawer bottoms, and table tops so swelling won’t stress glue lines or fasteners.
- Acclimate stock in your shop for several days before final cuts.
- Monitor moisture with a professional-grade meter.
- Place expansion gaps where panels meet fixed frames.
- Use grain orientation to reduce cross-grain movement.
Marking Methods to Reduce Measuring and Layout Mistakes
When you lay out a cut, mark the waste side with small, clear indicators and a round X on pieces to be discarded so you never cut the wrong part; use a marking knife for fine joinery to produce crisp lines that prevent tear-out, and reserve chalk lines for long, straight runs on large panels.
Adopt a consistent marking and measuring routine: standard symbols, abbreviations, and placement reduce confusion. Use a carpenter’s pencil for rough layout and dimension notes, but switch to a knife where accuracy matters. Keep marks small on the waste side so finished faces stay pristine.
Recheck critical lines before cutting, and train helpers to read your symbols. Clear, repeatable marks cut errors and save material.
Transfer Measurements Reliably Between Parts and Jigs
You’ve already tightened up your layout marks; now make those lines repeatable from one piece to the next by using jigs, templates, and physical gauges that carry reference points with you.
Use jigs and templates to transfer measurements consistently, reducing reliance on numerical readouts. Cut and label templates so markings rather than numbers guide repeated operations. Always establish a clear reference surface on the part and the jig to eliminate stacking errors.
- Mark and label jigs clearly to avoid misinterpretation.
- Measure adjustments from the part itself, not from past records.
- Use ruler stops and universal angle guides for repeatable setups.
- Employ physical gauges like a Rip Gauge-style template to move settings between stations.
This approach keeps parts uniform and assembly fast.
Jigs, Templates, and Rip Gauges for Repeatable Cuts
To keep cuts consistent, you’ll use jigs and templates as fixed reference points that remove guesswork and measuring errors.
Build custom jig templates for irregular profiles so every piece matches the pattern without recalculating dimensions.
Combine those with a rip gauge and swappable kerf tabs to set blade offset once and repeat accurate rip cuts quickly.
Repeatable Cut Accuracy
Although precision starts at the layout, using jigs, templates, and rip gauges will make your cuts repeatable and fast by giving you consistent physical references instead of relying on mental measurements.
You’ll get repeatable cut accuracy by setting fixed stops, using templates for profile work, and employing rip gauges with swappable kerf tabs that match blade width. That eliminates guesswork, reduces waste, and helps you Save Time on sheet breakdowns and repetitive parts.
Jigs streamline workflow so you maintain identical dimensions across runs; templates let you reproduce complex shapes reliably.
- Use a stop block jig for identical length cuts.
- Fit rip gauge kerf tabs to your blade for zero math.
- Clamp templates for router work.
- Index workpieces to reduce setup time.
Custom Jig Templates
A single well-made jig template will cut your setup time and errors in half by giving you a repeatable physical reference for every piece. You’ll use custom jig templates to lock in shapes and dimensions so you don’t keep drawing a line or re-measuring for each cut.
Tailor jigs to specific tools and tasks: add stop blocks for uniformity, incorporate Rip Gauge kerf tabs for foolproof track-saw adjustments, and swap tabs to avoid mental-math errors. That consistency reduces waste and speeds production, delivering identical parts ready for assembly.
When you test a jig, cut a trial piece and compare it to the drawing; refine until the finished piece fits without sanding or rework. Proper templates preserve material and time.
Fractional vs Decimal Measurements : Fast Conversions and Pitfalls
Measurement fluency matters: when you switch between fractional and decimal systems you’ll need quick, reliable conversions to keep cuts and assemblies accurate. You’ll use fractional measurements on blueprints and decimal measurements on digital calipers; knowing both prevents costly mistakes.
Keep a laminated conversion chart nearby—remember 1″ = 25.4 mm—and memorize common equivalents like 1/16″ = 0.0625″ and 1/32″ = 0.03125″. Practice converting mentally for speed, and always double-check transfers between tools.
- Label rulers and calipers with common fraction-to-decimal equivalents.
- Use decimals for machining, fractions for joinery tolerances.
- Keep a conversion chart for metric cross-checks.
- Mark critical parts with both systems during layout.
Stay disciplined: measure twice, convert once.
Workshop Systems: Labeling, Brand Consistency, and Checklists
Keep your measuring tools to a single trusted brand so you’ll be familiar with markings and minimize fit or calibration surprises.
Label parts with clear symbols or brief abbreviations and color-code status to speed assembly and reduce mistakes.
Use simple checklists for measuring and marking steps to catch oversights and keep accuracy consistent.
Consistent Tool Branding
Consistency in tool branding makes your shop more efficient and reliable: sticking to one or two trusted brands for calipers, squares, and rulers builds familiarity, simplifies communication, and reduces measurement discrepancies.
With consistent tool branding, you know each instrument’s feel and calibration standard, which makes it easy to trust readings every time. Your team will communicate specs without guessing which model or scale you’re using, cutting rework and delays.
Standardized brands also simplify calibration routines and spare-parts sourcing, so accuracy stays predictable.
- Choose one or two brands for primary measuring tools and stick with them.
- Train the team on those models’ quirks and calibration points.
- Keep replacement parts and manuals in a central, accessible spot.
- Schedule routine calibration checks to maintain precision.
Labeling And Checklists
Brand standards set the groundwork; now make sure everything in your shop is labeled and checklist-ready so people can find the right tool, part, or procedure at a glance.
Establish a clear labeling system that names tools, zones, and materials; add color-coding for task groups to prevent parts and measurements from getting mixed. Use standardized symbols and concise abbreviations so everyone reads labels the same way during collaboration.
Number workpieces to preserve assembly order, track progress, and cut rework risk.
Create simple, project-specific checklists that list required tools, measurements, and safety steps; review and update them before each shift.
Train your team to follow labels and checklists consistently — that discipline reduces mistakes, speeds setup, and protects margins.
Frequently Asked Questions
How Do I Measure Curved or Irregular Stock Accurately?
Use a flexible tape, calipers, and contour gauge to capture curves; mark multiple reference points, transfer profiles to paper, spline or template the shape, and verify with mockup before cutting so you won’t waste material.
Can Measuring Tools Be Used Safely With Power Tools?
Yes — you can safely use measuring tools with power tools if you clamp work, keep tools unplugged when measuring, use non-slip guides, maintain sharp bits, wear PPE, and follow manufacturer instructions to prevent movement or kickback.
What Environmental Factors Beyond Humidity Affect Accuracy?
Temperature, vibration, light, dust, and magnetic fields affect accuracy. You’ll want to control shop temperature, stabilize workpieces, guarantee steady illumination, keep tools clean, and avoid magnets or strong electrical interference to maintain precise measurements.
How Do I Teach Measurement Best Practices to Apprentices?
Start by showing an apprentice a ruined cabinet from a mismeasured panel. Teach step-by-step measurement routines, tool selection, double-check habits, reading shop drawings, and deliberate practice with feedback; you’ll supervise until they reliably reproduce accurate results.
When Should I Replace Worn Measuring Tools?
Replace worn measuring tools as soon as they lose accuracy, show corrosion, bent edges, unreadable markings, or cause repeated layout errors; you’ll check them regularly, calibrate when possible, and swap them out immediately if repairs won’t restore precision.
Conclusion
You’ve seen how tiny errors eat time and wood—remember when a 1/16″ kerf turned a 6-foot shelf into scrap? Treat measurements like a bank balance: small losses add up fast. Use calibrated tools, repeatable jigs, and clear labeling to protect your material budget. Measure twice, cut once, and verify with quick checks every setup. Consistency saves money and frustration—build systems that make accurate work the default, not an afterthought.