
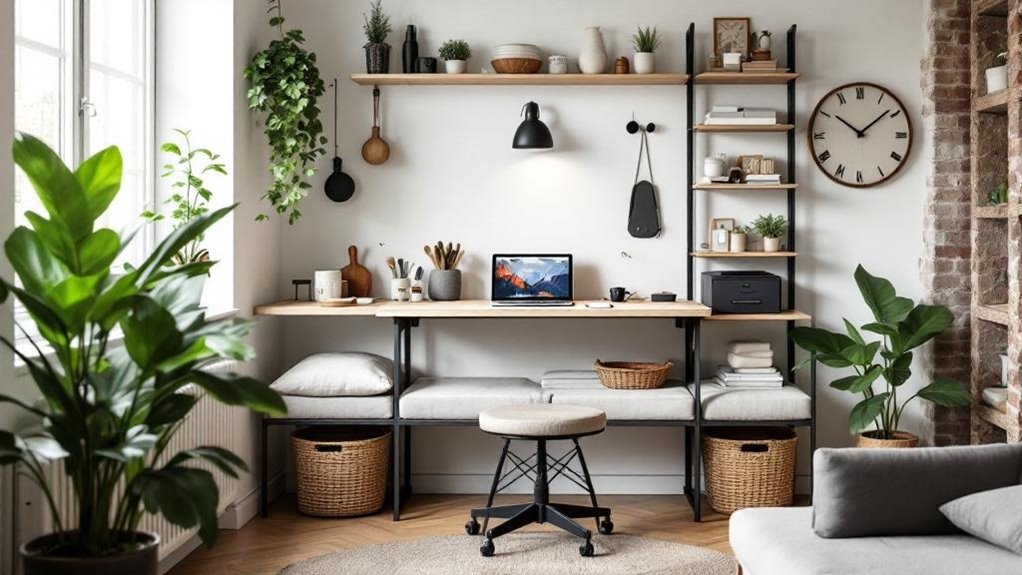
You’ll get compact, multiuse furniture plans that actually free up space and add storage without fancy skills. Pick convertible sofa beds, lift-up beds, nesting tables and benches with hidden shelves to combine seating, sleeping and storage. Build floating shelves, flip-top entry benches and wall-mounted foldaway desks on a weekend using basic chisels, brad nails and S2S lumber. Use fast-drying oil or water-based poly and light colors to keep things airy — keep going to learn plans, materials and timelines.
Key Takeaways
- Prioritize multiuse pieces like convertible sofa beds, lift-up beds, and expandable tables to maximize function in limited square footage.
- Build compact storage: entry benches with flip-top lids, under-bed drawers, and hidden drawer systems for seasonal items and linens.
- Choose fast assemblies using S2S/S4S lumber, folding brackets, and hidden hinges to finish projects quickly and reliably.
- Opt for lightweight, modular designs and nesting tables to maintain mobility and adapt to changing layouts.
- Use fast-drying water-based finishes, matte paints, and reclaimed or plywood materials for affordable, durable, and low-maintenance results.
Tiny-Home Furniture: Quick Decision Guide
Start by prioritizing function: choose pieces that pull double duty—like a lift-storage bed or a multi-functional sofa—so every item earns its footprint and gives you essential storage.
You’ll map needs first: sleeping, seating, work, and stowage. Pick modular designs you can reconfigure as needs change, and favor built-in options—fold-down tables and wall shelves—that free floor area.
For DIY furniture project ideas, use lightweight plywood or reclaimed wood for durability and easy handling; build tall bookshelves or hanging organizers to exploit vertical space.
When deciding, measure clearances, plan load-bearing points for wall units, and sketch assembly steps. Opt for pieces that transport easily and adapt, so your tiny home stays tidy and flexible.
Prioritizing Function: Which Multiuse Pieces to Choose
Which pieces should earn a permanent spot in a small home? Prioritize multiuse furniture that solves multiple needs without visual clutter.
Pick a convertible sofa bed for nightly comfort and daytime seating, and an ottoman with extra storage for blankets and magazines.
Choose a dining table that doubles as a workspace or expands when guests arrive, keeping footprint minimal otherwise.
Add a bench with built-in shelving and hooks in an entry or at the foot of a bed to combine seating and organizational function.
Keep nesting tables on hand for flexible surface area that tucks away.
For bedrooms or studios, consider a murphy bed or wall-mounted desk you can fold up to free floor space.
Focus on durability, measured dimensions, and easy adaptations.
7 Weekend Builds for Small Rooms (With Timelines)
Plan each weekend build with clear build-time estimates so you know which projects fit your schedule — a plywood side table or throw pillow shelf can be done in a few hours, while a rustic X coffee table may take the full weekend.
Prep materials and tools ahead (cut lists, screws, glue, drill/mitre saw, rope) to avoid stopping mid-project.
Finish choices should save space and clean up visually — think low-sheen stains, thin-profile hardware, and sealed edges for durability.
Build Time Estimates
If you’ve only got a weekend, choose projects that match the hours you can realistically commit—most small-room builds fall between 6 and 12 hours, with simple shelves done in 2–4 hours and more involved pieces like compact tables taking up to a full 8‑hour day including finish drying. Plan with realistic DIY build time estimates so you won’t rush fits or finishes. Prioritize function: floating shelves (2–4 hrs), ottoman/storage (5–6 hrs), compact coffee table (8 hrs). Always add time for setup and drying.
| Project | Typical Time |
|---|---|
| Floating shelf | 2–4 hrs |
| Entryway shelf | 2–4 hrs |
| Ottoman/storage | 5–6 hrs |
| Compact table | ~8 hrs |
Material Prep Checklist
Start by measuring the space you’ll use—spend about 30 minutes to confirm dimensions and clearance so every piece fits without crowding the room.
Next, draft a material prep checklist: list wood types, screws, hinges, glue, sandpaper, paint, brushes and any hardware. Expect about an hour to finalize quantities and cut lists.
Clear and organize your work area—remove clutter, set up clamps, saw, drill and a stable work surface; allow 20 minutes.
Pre-cut all wood to plan dimensions; allocate 1–2 hours depending on complexity.
Finally, schedule finishing time—sanding and painting can add 2–4 hours for prep, coats and drying.
For efficient home DIY projects, stick to the checklist and realistic time blocks.
Space-Friendly Finishes
When you’re short on space but want a weekend win, choose finishes and build methods that maximize function while minimizing bulk and drying time.
Pick fast-drying oils or water-based polyurethane for a plywood side table so you can sand, seal, and use its open shelf for storage the same day.
For a crate locker, seal crate edges with clear lacquer to protect stacked joints without adding weight.
Use wall-mounted brackets and quick-curing finish on a ladder display so you hang blankets immediately.
On a small entryway shelf, choose matte finishes to hide wear and avoid bulky trim.
For a rustic wood vanity, prefinish panels before assembly to cut install time.
These space-friendly approaches keep projects compact, durable, and ready to use fast — even under a storage bed.
Storage-Focused Builds: Beds, Benches & Hidden Drawers
Maximizing storage in a small home means thinking vertically and mechanically: lift-up beds, benches with hidden compartments, and integrated drawer systems let you stash linens, shoes, and everyday clutter out of sight while keeping surfaces clear.
Build a Bed, storage-focused platform with a gas-lift or hinged top to access full-depth underbed space—ideal for seasonal bedding. Construct entry benches with flip-top lids or side drawers to combine seating and shoe storage; use reinforced plywood and soft-close hinges for durability.
Integrate hidden drawer systems into sofas, side tables, or beneath window seats to keep common items organized without visual clutter. Add built-in shelving or shallow cabinetry above beds and seating to exploit vertical space, keeping floors open and traffic flow unobstructed.
Foldaway & Wall-Mounted Furniture (Tables, Desks, Murphy Beds)
A few well-placed foldaway and wall-mounted pieces can free up essential floor area while giving you full-function furniture on demand; think drop-leaf tables, fold-down desks, and Murphy beds that tuck away when not in use.
You can reclaim up to 20 square feet by choosing a Murphy bed, turning a bedroom into a workspace or living area in seconds.
Choose a Murphy bed to reclaim up to 20 square feet and instantly convert a bedroom into a workspace or living area.
Design foldaway furniture with integrated storage—drawers under a wall-mounted table or cubbies inside a bench—to keep surfaces clear.
For work-from-home setups, wall-mounted desks that fold down give you a stable workspace without permanent footprint.
Use lightweight plywood for panels and simple hardware for smooth operation; that keeps installation manageable and daily use effortless in compact homes.
Materials, Tools & Budget-Saving Tips for Tiny Homes
Keep your tool kit tight: a few chisels, a hand saw, clamps and a tape measure will handle most tiny-home builds without needing noisy power tools.
Choose S2S or S4S lumber or affordable plywood and reclaimed boards to save time and money while keeping edges square for quick assembly.
Opt for multiuse hardware—folding brackets, removable legs, and hidden hinges—to make furniture that packs functions into minimal footprint.
Compact Tool Essentials
Start by narrowing your toolkit to the essentials that do the most work for the least space: a compact workbench (think a folding VIKA-style table), a set of sharp chisels, reliable measuring tools, a few quick-grip clamps, and a basic handsaw or jigsaw.
You’ll avoid clutter by favoring quality hand tools over a closet full of power tools you rarely use. Choose S2S or S4S lumber so you skip initial milling, saving time and bench space.
Prioritize multi-use items—combination squares, block planes, and a cordless drill that doubles for driving and light routing.
Store tools vertically or on wall-mounted panels to free floor space. For budget-conscious builds, pair reclaimed boards with minimal tool setups to make compact, functional furniture without excess gear.
Affordable Material Choices
Choose materials that stretch your dollar and square footage: plywood gives you strong, flat panels for cabinets and fold-outs; reclaimed boards add character and cut costs; and simple 2x4s can form frames, legs, and shelving without specialty lumber. You’ll pick affordable material choices that suit each furniture piece and reduce waste. Buy plywood sheets for large surfaces, use reclaimed planks for visible faces, and reserve 2x4s for internal structure. Keep tools minimal—a miter saw, drill, sander—and plan cuts to avoid offcuts. Watch supplier sales and salvage yards, and measure twice to save money and space. Below is a quick comparison to guide choices.
| Material | Best use | Cost level |
|---|---|---|
| Plywood | Cabinets, fold-outs | Low–Medium |
| Reclaimed wood | Facades, accents | Low |
| 2x4s | Frames, shelving | Very Low |
Multiuse Hardware Solutions
Although you’ll lean on plywood and reclaimed wood for sturdy panels and visible faces, the right hardware—folding hinges, heavy-duty slides, quick-release pins, and folding-leg brackets—lets a single piece perform multiple roles without cluttering your footprint.
You’ll pair those parts with a drill, sander, and mitre saw to build multiuse furniture that’s reliable and precise. Source local materials and choose collapsible or modular designs to cut costs and labor.
- Use heavy-duty slides for pull-out desks and hidden storage—smooth action keeps compact spaces tidy.
- Fit folding-leg brackets to tables that drop against walls to free floor area.
- Employ quick-release pins for removable backs, turning a sofa into a guest bed or storage bench.
These choices boost function in any home improvement plan.
Measure Right: Layouts, Templates & Modular Tricks
Measurement is everything in a small home, so grab a tape measure and record room dimensions, door swings, window placements, and the footprint of any existing furniture before you buy or build.
Work in inches or centimeters consistently, noting clearance needs for walkways and doors. Cut cardboard or kraft paper templates to test layouts, moving pieces until sightlines and traffic flow feel right.
Try simple digital floor-planning apps to iterate faster and avoid costly mistakes. Prioritize modular furniture that breaks into smaller units or reconfigures for different tasks — a bench that splits into stools, or shelving that stacks horizontally or vertically.
Always double-check final measurements against templates and doorways before you commit to cuts or purchases.
Finish & Style: Color, Scale, Rustic-to-Modern Picks
When you’re planning finishes and furnishings, think beyond looks to how color, scale, and material choices affect perceived space and daily use.
You’ll pick a light color palette—whites or soft pastels—to open sightlines; reserve darker tones for a single cozy anchor.
Choose scaled-down proportions: narrow consoles, compact sofas, and a single multifunctional piece of DIY furniture that doubles as storage.
Favor open-leg designs and light materials like glass or metal to let light flow.
- Prioritize multifunction: ottoman-storage, shelving coffee tables, pieces that serve two roles.
- Mix rustic accents (reclaimed wood trim) with sleek modern finishes for warmth without clutter.
- Keep hardware minimal and finishes matte to maintain a clean, space-conscious finish & style.
Common DIY Pitfalls & Quick Fixes for Tiny Homes
If you skip careful planning, you’ll quickly end up with furniture that blocks walkways, feels oversized, or can’t be adapted to changing needs; take precise measurements, sketch full-scale templates, and mock up clearances before cutting a single board.
Start by measuring sightlines and door swings, then compare actual dimensions to your sketches to avoid overestimating space. Prioritize multi-functionality: build storage benches, fold-down desks, or convertible tables so each piece earns its footprint.
Choose lightweight materials and modular joinery to keep items movable and repairable. Simplify assembly—pick designs with straightforward hardware and clear steps to prevent wasted time.
If something’s off, trim nonstructural edges, swap heavy panels for thinner plywood, or add casters to restore flow without rebuilding.
Frequently Asked Questions
How to Furnish a Tiny Home?
Furnish your tiny home with multi-functional, modular pieces: loft a bed over a desk, use storage ottomans, install built-ins and under-bed drawers, pick lightweight movable items, and choose light colors plus reflective surfaces to maximize perceived space.
How Much Would It Cost to Build a 20X20 Tiny House?
You’d typically pay $30,000–$50,000 to build a 20×20 tiny house; DIY can drop it near $10,000. Plan $5,000–$15,000 more for utilities, budget permits, land, finishes, and smart storage solutions.
What Design Principles Make a Tiny House Feel Spacious?
You prioritize open sightlines, light colors, and natural light; you use multifunctional furniture, vertical storage, mirrors, and minimal partitions to maximize flow and reduce clutter, making your tiny house feel airy, organized, and larger than it is.
Is It Cheaper to Build or Buy a Tiny Home?
Usually it’s cheaper to build—if you’ve skills, time, and patience. Picture reclaimed wood, measured cuts, and DIY finishes saving thousands; but buying wins if you value speed, warranties, and professional craftsmanship without project stress.
Conclusion
You’ve picked smart solutions that quietly stretch every inch without shouting for attention. Keep choosing multiuse pieces, foldaways and clever storage so your rooms feel generous, not cramped. Measure twice, cut once, and favor durable, simple finishes that age gracefully. When a project nudges you into compromise, treat it as a tasteful edit, not a setback. Small-home living isn’t about limits—it’s about refined choices that make space feel intentional.