
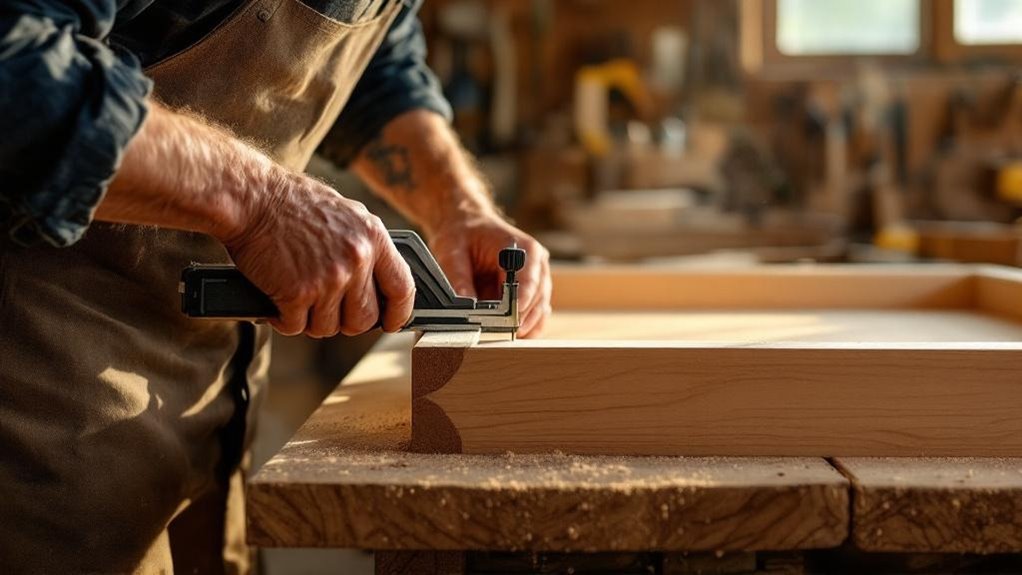
You’ll improve build quality most by starting with stable hardwood, straight grain, and checked moisture content, then joint and plane the stock flat before cutting anything. Sand with the grain through finer grits, vacuum often, and test stains or finishes on scrap from the same board. Use precise joinery like dovetails, biscuits, or dominoes, keep router bits sharp, and hand-finish details. Get those basics right, and the next steps get even more useful.
Key Takeaways
- Choose straight-grained hardwoods and verify moisture content to reduce warping, splitting, and finish defects.
- Joint and plane stock flat first, creating reliable reference faces and consistent thickness for accurate assembly.
- Use grain-aware joinery like dovetails or dominoes, and dry-fit before glue-up for stronger, cleaner joints.
- Sand progressively with the grain, finishing around 400 grit, to eliminate scratches and improve finish adhesion.
- Apply thin finish coats with light sanding between layers, and test stains or sealers on scrap before committing.
Choose Wood That Finishes Well
The right board sets the tone for the entire finish. When you’re choosing the right hardwood, pick oak or cherry for strength, stability, and lasting visual appeal.
Look for straight, consistent grain; it gives you a cleaner look and lowers the chance of blotching when you apply finish. Check each board’s species traits too, since moisture content and density affect how evenly it takes stain and topcoat.
You should also test stains on scrap from the same stock before committing, because wood color response can vary widely. High-quality lumber gives you a dependable base and helps your finish look uniform, rich, and deliberate.
If you start with sound material, you’ll reduce surprises and keep the final result predictable, durable, and professional throughout.
Prep Wood for a Better Finish
Start by making the wood itself as true and even as possible. To prep wood for a better finish, begin with solid lumber or veneer that’s stable and cleanly cut. Joint and plane faces until they’re flat, square, and free of twist, because uneven stock telegraphs through every finish.
Check moisture content before you proceed; if the wood isn’t settled, it can warp or crack after coating. Then file edges, corners, and carved details so you get crisp lines and no torn fibers.
Sand by hand with progressively finer grits, working methodically until the surface feels uniform. You’re not just smoothing; you’re creating a reliable base that lets the finish bond evenly and look clear, controlled, and durable.
Sand Wood to a Smooth Base
Move to sanding with purpose, beginning with 80 to 120 grit to knock down rough spots, tool marks, and small imperfections. You should follow the grain on every pass, because cross-grain scratches will show through later.
Use sanding blocks for hand sanding; they keep the surface flat and give you better control on broad panels and tight details. After each stage, vacuum the surface and wear a dust mask so you’re not working in debris.
Then step through finer grits, moving toward 220 or 320 grit for a cleaner base. Finish with 400 grit if you want an extra-smooth surface ready for finish.
These sanding techniques improve adhesion, reduce visible defects, and bring out the wood’s natural texture and color.
Flatten Panels With Jointing and Planing
Jointing gives you a true reference face by flattening one side of the board first, and that flat surface then guides every later cut. You use jointing to remove twist, bow, and warp, then planing to bring the opposite face parallel and consistent. Feed the stock against the grain; you’ll reduce tear-out and get a cleaner surface.
| Step | Tool | Result |
|---|---|---|
| 1 | Jointer | Flat face |
| 2 | Jointer | True edge |
| 3 | Planer | Even thickness |
| 4 | Planer | Parallel faces |
| 5 | Check | Accurate panel |
Keep both machines calibrated and sharp. When you maintain them regularly, you’ll make flatter panels, tighter joints, and more dependable builds every time.
Use Routers for Cleaner Cuts
Routers let you cut grooves, shape edges, and refine joinery with a level of control that makes parts fit cleaner and look more professional.
You’ll get the best results when you match the bit to the task: use straight bits for grooves and profile bits for edges to reduce tear-out and leave crisp lines. A guide or template helps you hold depth and alignment steady, so your cuts stay consistent across each part.
Choose handheld routers when you need maneuverability for tight details, and use table-mounted routers when you want stability on larger workpieces.
Keep router bits sharp, because dull cutters worsen surface quality, strain the tool, and compromise safety. Properly set routers improve finish quality fast.
Build Accurate Joints With Jigs
You’ll get cleaner joints when you set each jig with exact measurements and lock it down before cutting.
Once the jig is dialed in, you can repeat the same cut path for every piece, keeping joints uniform and strong.
Always dry-fit the parts first so you can catch alignment errors before glue-up.
Jig Setup Precision
A well-set jig is the backbone of accurate joinery. In advanced woodworking, jig setup precision starts with choosing the right jig for the joint: mortising for square recesses, dovetail for angled tails, or another specialized layout.
You need stable reference points, so align the jig carefully, then double-check every measurement before you cut. Calibrate your tools first; a small offset can throw off the entire joint.
Adjustable jigs help you lock in exact angles and dimensions, but only if you verify the settings against your layout. Clamp the workpiece firmly during setup so nothing shifts under pressure.
When you take time to establish precise alignment, you reduce errors, improve fit, and build cleaner, stronger joints with confidence.
Repeatable Joint Cuts
You should build the jig around the joint, not the other way around, because repeatable joint cuts rely on fixed registration and consistent spacing.
With a router and the right guide, you can cut mortises, dovetails, biscuit slots, and dowel holes with far less drift than freehand work.
A solid jig also cuts setup time and removes repeated measuring, so you can produce a whole batch of parts with the same dimensions.
That consistency matters: uniform joints transfer load evenly, strengthen the assembly, and help your project stay square under stress.
Dry-Fit Alignment Checks
Before the glue comes out, assemble the joint dry to verify fit, square, and registration. During dry-fit alignment checks, use jigs to hold parts in the same position every time, so you can spot tiny errors before they become permanent.
Check the assembly from the front, side, and top:
- flush faces without steps
- tight joints with no gaps
- correct orientation and order
Mark parts as you go, and keep the sequence clear so you don’t swap components during glue-up.
If one corner lifts or a shoulder binds, correct it now, not later.
Repeat these dry-fit alignment checks often; the habit sharpens your eye, reduces mistakes, and helps you build cleaner, more accurate joints with less stress at final assembly.
Master Dovetails, Dominoes, and Biscuits
Three core joinery methods—dovetails, dominoes, and biscuits—give you a practical range of options for strength, speed, and alignment.
Use a dovetail joint when you need mechanical lock, especially in drawer construction, where pull-out forces can fail weaker connections. Cut it with a router jig or dedicated attachment to keep the pins and tails crisp.
Choose a domino when you want fast, accurate loose-tenon joinery; it centers parts well and suits cabinet workflows.
Reach for a biscuit when you need quick alignment across wide panels or tabletops, since the biscuit fits matching grooves and helps keep surfaces flat.
Why Grain Direction Matters
You need to respect grain direction because wood’s strength runs along the grain, and cuts across it can split or weaken the part.
Choose and orient boards carefully, since quartersawn stock usually stays flatter and more stable than flat-sawn stock.
When you sand, move with the grain so you don’t scratch the surface or weaken the finish.
Grain Direction And Strength
Grain is the backbone of wood, and its direction directly shapes how strong and stable a piece will be. You need to read the grain direction before you cut, fit, or clamp anything. Wood resists stress best along the grain, so you should align parts and joints to keep loads working with the fibers, not against them.
- Long-grain joints hold tighter under strain
- Cross-grain cuts can invite splitting
- Correct orientation reduces warp and cracking
When you match joinery to grain patterns, you improve durability and keep the build stable over time.
You also preserve cleaner lines, because the piece moves and ages more predictably. If you ignore grain direction, you weaken the structure and risk failure where the wood is least forgiving.
Sanding With The Grain
A smooth finish starts with the stroke you choose, and sanding with the grain keeps the surface clean, even, and free of visible scratches. When you follow the wood’s fibers, you avoid raised fuzz and preserve its natural look. Start with a coarser grit to level defects, then move to finer grits for refinement.
| Grit | Action | Result |
|---|---|---|
| Coarse | Remove defects | Flat surface |
| Medium | Refine marks | Fewer scratches |
| Fine | Finish pass | Smooth sheen |
Use hand sanding for tight details, where control matters most. Machine sanding can wander across the grain and disturb the surface. If you stay aligned with the fibers, your sanding with the grain improves finishing quality and gives your project a professional, durable appearance.
Stain Wood Without Blotches
To keep stained wood free of blotches, start by applying a pre-stain wood conditioner, which seals the fibers and helps the stain absorb evenly.
This is the simplest way to stain wood without blotches, especially on softwoods like pine. Choose an oil-based stain for deeper penetration and steadier color. Test it on a scrap piece first so you can catch blotchy areas before touching the project.
- Use a clean, lint-free cloth or foam brush.
- Work in small sections and wipe off excess promptly.
- Hand-sand lightly with 220-grit or finer between applications.
You’ll control absorption, reduce uneven color spots, and get a smoother, more consistent result.
Seal Wood With Durable Finish Coats
Once the stain is even and dry, you can lock in that color with durable finish coats that protect the wood from moisture, scratches, and everyday wear. When sealing the wood, choose polyurethane or lacquer to match the species and use. Test each sealant on scrap wood first to confirm color and compatibility.
| Coat | Purpose |
|---|---|
| Thin first coat | Anchors the finish |
| Light sanding | Improves adhesion |
| Second coat | Builds protection |
| Final coat | Adds durability |
| Dry time | Prevents defects |
Apply multiple thin coats, not one heavy layer, so you don’t trap flaws or add thickness. Sand lightly between coats, then let each layer dry fully before continuing. Oil-based finishes penetrate deeply for durability; water-based options dry faster.
Build Smooth Paint Layers
To build smooth paint layers, you need a clean, stable surface and a quality primer that gives the topcoat a uniform base.
Apply thin, even coats with a lint-free cloth or foam brush, and let each layer dry fully before you continue.
After every coat, hand-sand with progressively finer grits, starting at 220 and finishing at 400, so you remove flaws and keep the finish flat.
Surface Prep Matters
Smooth paint starts with careful prep. You’ll get a flatter, cleaner finish when you treat surface preparation as a process, not a shortcut.
Sand the wood with progressively finer grits so you level fibers instead of chasing defects later. Seal the surface first to lock in grain and cut uneven moisture absorption, which helps the paint lay down uniformly.
- Wipe every panel with a clean, lint-free cloth
- Sand by hand between paint layers for better adhesion
- Inspect edges for dust, fuzz, or raised grain
When you apply paint, keep your tools clean and your strokes controlled. Dust, debris, and residue can telegraph through the coating and ruin the look.
Careful prep gives you a smoother surface, stronger adhesion, and a more durable result.
Thin Coats, Sand Between
Thin, even coats are what keep a finish looking clean instead of heavy or uneven. You should apply thin coats with a lint-free cloth or foam brush, so dust and lint don’t settle into the surface.
Let each coat dry fully, following the manufacturer’s timing, because rushing traps flaws and weakens durability. Then hand sand between coats with progressively finer grits, using at least 220-grit to level the film without scratching it.
Wipe away every trace of dust before the next pass. This routine cuts streaks, bubbles, and runs while improving adhesion for subsequent layers.
Repeat the cycle with patience, and you’ll build smooth paint layers that look sharper, feel finer, and hold up better over time.
Add Wax and Polish to Wood
A thin coat of natural wood wax can add a protective sheen while shielding the surface from moisture and dust. To add wax and polish to wood, work in thin, even coats so you don’t create buildup that dulls the finish or feels sticky.
Use a beeswax and carnauba blend when you want a durable, water-resistant layer that still lets the wood breathe. After the wax sets, polish it with a soft cloth to deepen the grain and bring out a clean, lustrous surface.
- Wipe on a light coat with a clean cloth
- Buff gently until the sheen looks even
- Repeat regular polishing to reduce minor scratches
You’ll preserve color, improve clarity, and keep the surface looking carefully maintained over time.
Distress Wood for a Rustic Finish
You can distress wood with sanding, scraping, wire brushing, or light strikes from a chain or hammer to add worn marks and uneven texture.
Focus on the edges, corners, and grain so you create believable age without weakening the piece.
Apply your finish after distressing, since paint washes or Real Milk Paint will settle into the crevices and the topcoat will help protect the rustic look.
Distressing Tools and Methods
Rough edges and timeworn marks give distressed wood its rustic appeal. When distressing wood, use tools and techniques with control: strike with a hammer, drag a chain, or nick edges with a chisel to add dents and grooves without weakening the piece.
Then refine the surface with a wire brush or sandpaper to lift soft fibers and expose grain. A torch can scorch selected areas for depth and added moisture resistance, but test first.
Dry brush paint or stain over high spots to emphasize wear while keeping the aged look. Always trial each method on scrap wood before you commit.
- Hammered dents
- Brushed grain
- Scorched texture
Rustic Finish Application Tips
Once the wood is distressed, apply a dark stain to settle into the nooks and crannies and make the wear stand out. You’ll get the best rustic finish by first distressing wood with controlled hammer taps, a wire brush, chisels, chains, or sandpaper.
Work in stages so you can judge depth and avoid overdoing the damage. After staining, wipe back excess finish to preserve the highlighted edges and recessed marks. Then add a light glaze or natural wax to deepen color, bring out texture, and protect the surface.
If you want more character, combine scratching, coloring, and varied abrasion on different zones. That contrast makes the piece look aged, not random. Keep your pressure consistent, and test each step on scrap before you commit to the final surface.
Burnish Wood for a Smoother Surface
Burnishing gives wood a tighter, smoother surface by pressing the fibers down with a hard, slick tool or even a folded cloth, so you can refine the finish without adding more sanding.
When you burnish wood, you compress loose grain, reduce small flaws, and get a cleaner, more even look. It’s especially effective on softer woods, where the fibers respond quickly to pressure.
- Use a smooth tool or cloth and rub firmly along the surface.
- Work methodically so you cover edges, flats, and corners evenly.
- Stop when the wood feels denser, less fuzzy, and more polished.
This simple step can also help the surface resist moisture and dirt because the fibers sit closer together.
Skip it on very hard stock if another approach fits better.
Glaze Wood to Bring Out Grain
Glaze wood to add depth and make the grain stand out beneath the stain. When glazing wood, you apply a transparent or semi-transparent layer over a fully sanded, stained surface, so the figure reads more clearly.
Mix paint, varnish, or stain with the right solvent until it flows evenly, then brush or wipe it on in thin coats. Prepare the surface carefully first; good sanding and staining improve adhesion and produce a richer result.
If you want more depth, hand-sand lightly between glaze applications and build layers without muddying the grain. Always test the glaze on a scrap from the same board before committing. That check lets you verify color intensity, control, and final appearance before you finish the project.
Use Hand Tools for Fine Details
For fine details, reach for hand tools when you need control that machines can’t match. You can shape tiny profiles with chisels and hand planes, and you’ll feel each cut as it happens. That tactile feedback helps you trim only what’s needed, so your adjustments stay exact and your craftsmanship stays sharp.
Use hand saws for detailed cuts when you want cleaner edges and less splintering in joinery. Finish the surface with hand sanding to keep it even without overworking the wood.
- Pare a shoulder until it seats flush.
- True a corner with a sharp plane.
- Feather a surface by hand for a uniform finish.
When you bring hand tools into your workflow, you can refine details that power tools often miss, and your project looks tighter and more deliberate.
Avoid Common Finish Mistakes
A few careful habits can prevent the most common finish flaws. You can avoid finish mistakes by applying thin, even coats and giving each layer enough time to dry before you add the next.
Between coats, lightly hand-sand to level raised grain and improve adhesion, but stop before you cut through edges or fine details. Test stains on scrap wood first so you can confirm the color and avoid surprises on the finished piece.
Keep your workspace clean and dust-free; even small particles can mar the surface and dull clarity. If you sand too aggressively, you’ll weaken the finish instead of refining it.
Work methodically, inspect each stage, and correct problems early. Precise preparation usually produces the cleanest, most durable result.
Choose the Right Finish for Each Project
Choosing the right finish starts with the wood’s location and the way you plan to use the piece. To choose the right finish for each project, match performance to purpose: oil-based finishes penetrate deeply, while water-based finishes dry fast and keep color clear without yellowing.
Test stains on scrap wood first so you can verify color and see how that species accepts the finish.
- Outdoor pieces: use UV-resistant sealants.
- High-traffic surfaces: choose durable polyurethane.
- Decorative items: consider natural wax for a softer sheen.
For indoor work, pick a finish that highlights grain without adding unnecessary buildup. Hand-sand between coats to improve adhesion and leave the surface smoother.
That careful sequence helps you control appearance, fit, and final quality.
Maintain Finished Wood for Long-Term Durability
You should clean finished wood regularly with a soft, lint-free cloth to remove dust and grit before they can dull the surface.
Reapply a protective coat like polyurethane or varnish as needed to guard against moisture, scratches, and everyday wear.
If you spot minor scuffs, repair them promptly so the finish stays intact and the wood keeps its durability.
Regular Cleaning
Regular cleaning keeps finished wood looking sharp and protects its surface from premature wear. You should dust it often with a soft, lint-free cloth so grit doesn’t build up and scratch the finish.
When grime remains, use a gentle cleaning solution made for wood; it preserves the surface without discoloration or damage.
- Wipe spills immediately so moisture can’t soak in.
- Check for scratches and wear during routine inspections.
- Keep the surface free of debris that can dull sheen.
If you catch problems early, you’ll limit staining, warping, and finish breakdown. Clean methodically, work lightly, and avoid soaking the wood.
Consistent upkeep keeps the finish clear, the grain visible, and the piece protected from unnecessary deterioration over time.
Reapply Protective Coats
When you reapply protective coats, you extend the life of polyurethane or wax finishes and preserve the surface’s appearance. Inspect the wood first, so you can spot scratches, dull patches, or open seams that need attention.
Lightly hand sand with fine-grit paper to improve adhesion and smooth the surface. Then wipe away dust with a clean, lint-free cloth before applying the new coat.
Use the same method indoors and outdoors, but adjust timing: renew exterior finishes every 1-3 years and interior finishes every 3-5 years, based on use and exposure.
This disciplined approach maintains protection, stability, and a cleaner final look.
Frequently Asked Questions
Which Joint Is Strongest for Tabletop Expansion and Contraction?
A breadboard end joint handles tabletop expansion and contraction best. You’ll let the panel move while keeping the ends aligned. Use elongated slots and sturdy joinery, and don’t glue the entire width tight.
When Should I Choose Dominoes Over Biscuits for Joinery?
Choose dominoes when you need stronger alignment, more glue surface, or real structural support; choose biscuits for quick panel registration, light-duty joints, and fast assembly. You’ll reach for dominoes on frames, cases, and stress-prone joints.
How Do I Align Sliding Dovetails Without Gaps?
Can’t you test-fit and mark both mating faces first? You’ll avoid gaps if you plane the dovetail slightly proud, wax it, tap from the wide end, and fine-tune with chalk, shims, and repeated dry assemblies.
What Router Bit Works Best for Precise Joinery Cuts?
You’ll get the cleanest precise joinery cuts with a sharp, solid-carbide straight bit or spiral upcut bit; use a compression bit for plywood. You’ll need a router bushing or fence and multiple light passes.
How Tight Should Woodworking Joints Fit Before Glue-Up?
You want joints to slide together by hand with light pressure, not require hammering. Aim for zero visible gaps and enough clearance for glue film—about a few thousandths—so you don’t starve the joint.
Conclusion
When you choose straight-grained wood, prep it carefully, sand it smooth, and flatten every panel, you give your project a clean, honest foundation. Routers and hand tools help you shape crisp edges and fine details, while the right finish brings out the wood’s depth like morning light on polished grain. Avoid common mistakes, maintain the surface, and your work won’t just look better—it’ll stay strong, smooth, and beautiful for years.