
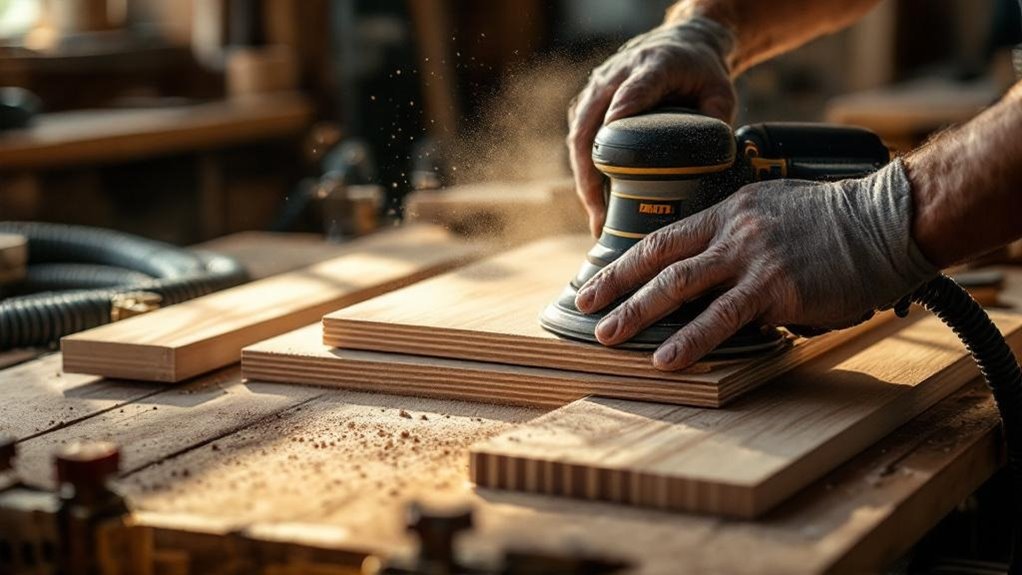
To get better finish results, you should match grit, speed, pressure, and cleanup to the workpiece. Start with the coarsest grit needed, then move through each step without skipping. Keep RPM low enough to limit heat, and use light pressure so the abrasive cuts cleanly. Remove dust between grits with a quick vacuum or blow-off. Protect veneers and thin edges, inspect in raking light, and finish by hand for a smoother sheen. More refinements follow.
Key Takeaways
- Progress through grits in order, from 80–100 to 180–220, to remove scratches without creating deeper marks.
- Use light, controlled pressure and steady speed to minimize heat, burning, and uneven surface damage.
- Clean dust between grit changes with a vacuum or quick blow-off to prevent contamination and new scratches.
- Sand with the grain and use proper tools, like soft blocks or folded sheets, for flat, corner, and detailed areas.
- Choose quality abrasives, such as ceramic, aluminum oxide, or mesh discs, for consistent cutting and better finish results.
Start With the Right Sanding Grit
Start with a coarse grit, usually 80 or 100, to remove rough surfaces and surface defects efficiently. Then move in sequence through 120 and 150, so each pass clears the scratches left by the previous one.
During sanding, you should keep your progression controlled, because skipping a grit leaves deeper scratches that can show through the finish. For proper sanding, finish with 180 to 220 grit to refine the surface and improve coating uniformity.
Keep sanding progression controlled; skipping grits leaves deeper scratches that can show through the finish.
If you’re working with pine or another softwood, stop near 180 grit to reduce burnishing. Hardwoods can accept 220 grit or higher when you want a finer final appearance.
This stepped approach creates a predictable scratch pattern, improves leveling, and gives you a cleaner substrate for the next finishing stage.
Why Sanding Speed Matters
You’ll get the best finish when you keep sanding speed in the ideal RPM range, around 500 rpm for 150 mm bowls and 800 rpm for 50 mm spindles.
Lower speeds reduce friction, so you generate less heat and minimize surface damage such as heat checks.
If you hold a steady speed and use gentle pressure, you’ll preserve the abrasive’s cutting action and improve the final surface quality.
Optimal RPM Range
Sanding speed matters because RPM directly affects heat buildup, scratch consistency, and surface quality. For best results, you should match speed to the workpiece: around 500 RPM for 150mm bowls and 800 RPM for 50mm spindles.
Lower speeds reduce heat buildup and help you control abrasive contact, so you get more uniform scratch patterns and fewer finish defects. Keep your feed steady and apply only gentle pressure; that combination lets the abrasive cut cleanly without loading the surface.
If you run too fast, you can create heat checks and radial marks that compromise the finish.
Systematic speed selection keeps abrasion consistent, preserves wood integrity, and helps you maintain repeatable sanding performance across different shapes and diameters.
Heat And Surface Damage
When speed climbs too high, sanding can generate enough heat to damage the surface, causing burns, heat checks, and other finish defects. You should keep larger bowls near 500 rpm and smaller spindles around 800 rpm to control heat buildup.
Apply only gentle pressure so the abrasive cuts cleanly instead of polishing the surface and creating tool marks. Move through the grit sequence systematically; if you skip steps or linger too long at high speed, you can amplify scratches instead of removing them. Each pass should reduce, not compound, surface damage.
Use Light Pressure While Sanding
Light pressure is one of the most important controls in sanding because it keeps heat buildup low and reduces the chance of burns, dents, or other surface damage.
You should let the abrasive cut, not force it, so you get a cleaner surface with less wear on the paper. Use a controlled touch to keep the tool gliding evenly and avoid swirl marks.
- Keep the sander flat and steady.
- Apply only enough force to maintain contact.
- Let the tool’s weight do most of the work.
Consistent light pressure helps you remove material uniformly, which prevents low spots and uneven patches.
When you stay disciplined, you improve surface quality and preserve abrasive life.
Progress Through the Grits
A proper grit progression starts with aggressive stock removal and then moves systematically to finer abrasives, such as 80 or 100 grit followed by 120, 150, and up to 180, 220, 320, or even 400, depending on the wood and finish. You should follow this grit sequence to prevent deep scratch lines from telegraphing through the coating and to build a smooth surface efficiently.
| Grit | Typical Use | Result |
|---|---|---|
| 80-100 | Initial leveling | Removes marks |
| 120-150 | Refinement | Reduces scratches |
| 180-400 | Final prep | Smooth surface |
Inspect after each change and confirm prior abrasions are gone. Softwoods often stop near 180 grit; hardwoods may progress to 320. Self-wetting finishes can accept slightly lower final grits when your progression stays consistent.
Clean Dust Between Every Grit
After each grit change, remove all loose dust before you sand again. You’ll prevent stray particles from scratching the workpiece and preserve a uniform scratch pattern.
Use efficient cleaning methods that don’t force dust into grain or pores; compressed air or a vacuum works well for debris removal. A quick blow-off after each sanding grade is usually enough, and you don’t need aggressive cleaning.
Keep the surface clear so sandpaper cuts consistently instead of clogging, which extends abrasive life and reduces project time.
- Clear dust from edges and flats.
- Inspect for residue before changing grit.
- Reclean lightly if particles remain.
This disciplined cleaning routine improves finish adhesion and lowers the risk of surface defects.
Sand Freehand Without Marks
Sand freehand with the grain so you don’t leave cross-grain scratches that show through the finish. Use advanced sanding techniques: start at 120 grit, inspect for tool marks, then move through finer grits to 400. Keep your hand sanding strokes controlled and even, maintaining about a 7 o’clock position on open areas and shifting to 5 o’clock near the lathe bed for steady pressure.
| Grit | Task | Check |
|---|---|---|
| 120 | Remove machining marks | No ridges |
| 220 | Refine scratch pattern | Uniform sheen |
| 400 | Finish-smooth surface | No visible scratches |
Before each grit change, verify that every previous abrasive mark is gone. If you spot irregularities, stay on the current grit until the surface reads clean and consistent.
Sand Spindles With the Grain
Move along the spindle with the grain so you don’t cut visible cross-grain scratches into the surface.
Keep your sanding pads aligned with the spindle axis, and apply steady, even pressure to prevent deep scratches from abrasive edges.
Start at 120 grit, then move through 180, 240, 320, and 400, inspecting after each pass.
Use a cork block or your fingers for hand sanding between grits so you can maintain contact along the full length.
Use a cork block or your fingers between grits to maintain full-length contact and a smooth sanding surface.
- Hold 7 o’clock for general sanding.
- Shift to 5 o’clock near the lathe bed.
- Check for tool marks before advancing.
You’ll get a cleaner, flatter finish when you remove every previous scratch pattern before changing grits.
Sand Bowls With a Drill
Fit a sanding arbor to your cordless drill, run the lathe at about 500 rpm, and hold the drill at full speed for controlled interior sanding.
Place the right pad on the right side of the bowl and the left pad on the left side to reduce radial marks as you work the curves.
Move through a grit sequence from about 120 to 400, and inspect the surface between changes to confirm each previous scratch pattern is fully removed.
Drill Arbor Setup
Mount a sanding arbor in your cordless drill and use it to reach the bowl’s interior with controlled, efficient sanding. Set the drill arbor securely, then run the bowl near 500 rpm so you don’t overheat the surface. Keep the abrasive aligned to reduce marks and maintain cutting consistency.
- Start with 120-grit and remove all prior abrasive marks completely.
- Advance through finer grits only after each pass leaves no visible defects.
- Recheck the surface under strong light before changing grits.
Use the right-side pad on the bowl’s right side and the left-side pad on the left side to limit radial marks. That orientation, combined with disciplined grit progression, gives you a smoother interior and better finish control.
Bowl Side Positioning
For bowl sanding with a drill, place the abrasive pad on the right side when you’re sanding the bowl’s right half and on the left side when you’re working the left half; that orientation helps minimize radial marks and leaves a smoother finish.
Keep the drill fully powered and run the lathe at about 500 rpm so the pad tracks cleanly across the interior. This side-specific placement also improves control near sanding edges, where contact angle matters most.
As you move from one half to the other, reposition the pad before each pass instead of reaching across the centerline with your hand. That approach reduces chatter, limits heat buildup, and helps you maintain consistent pressure on small bowls without gouging the surface.
Grit Progression Sequence
Begin with a suitable starting grit, usually 120, then work upward in sequence through at least 400, removing every scratch from the previous grit before you advance. You control the grit progression by inspecting each pass under raking light and correcting missed marks with sanding blocks when needed.
Keep the drill near 500rpm to limit heat and preserve the bowl surface.
- Sand at 120, then 180, 240, 320, and 400.
- Between grits, hand sand along the grain for uniformity.
- Use gentle pressure so the pad cuts cleanly without warming the wood.
Match the pad to the bowl side, right to right and left to left, to reduce radial marks. This sequence gives you a consistent, refined finish.
Set Up Rotary Bowl Sanding
To set up rotary bowl sanding, fit a Simon Hope–type rotary sanding arbor so the pad can freewheel against the work, which is ideal for bowls and vases.
Set your lathe near 500 rpm on small bowls; that speed cuts efficiently without excessive heat or surface damage. Hold the pad slightly off-center so it spins as you sand the outer curves, which helps you achieve a smooth finish that orbital sanders can’t match in tight forms.
Start with coarse grit, then step through finer abrasives in sequence to remove radial marks cleanly. Keep your hands clear of the vase interior at all times; you don’t need to reach inside, and doing so risks injury.
Use steady pressure and let the abrasive do the cutting.
Choose the Right Sanding Pad
You need to match pad shape to the work surface, because a foam pad conforms to contours while a hard pad keeps flat panels uniform.
Use hook-and-loop pads when you want fast pad changes and consistent attachment on your sander.
Then choose the grit progression to fit the task, since the wrong pad and grit combination can leave scratches, swirl marks, or uneven finish lines.
Pad Shape Matters
Pad shape directly affects how evenly the sanding pad contacts the workpiece, so matching the pad to the surface is essential for a clean finish. When you choose the right pad shape, you control contact area, edge reach, and pressure transfer as the finish is applied.
- Flat pads suit broad, flat panels because they maintain uniform contact.
- Contoured or shaped pads access curves, recesses, and fine details more precisely.
- Softer, flexible pads distribute force evenly, reducing marks and surface damage.
If you use a pad that’s too hard on a curved profile, it can bridge high spots and leave scratches.
Test different pad shapes on scrap material to improve efficiency, accuracy, and surface quality in detailed woodworking.
Match Pad To Surface
Choosing the right sanding pad starts with matching its material, density, and grit to the surface and the task, because each combination affects control, cut rate, and finish quality.
You should use softer sanding pads on contoured or uneven surfaces, where compliance lets the pad track the profile without digging in. For flat panels, firmer pads improve pressure distribution and give you tighter control, which helps produce a uniform finish.
When you’re refining delicate details, choose fine-sanding pads to reduce scratch depth and avoid damaging the workpiece. Select a grit that matches the operation: coarse for leveling, high-grit for final finishing.
Also, verify that the pad fits your sander; orbital sanders need compatible pads to deliver swirl-free results and avoid excess tool strain.
Sand Bowl Interiors Without Burning
When sanding bowl interiors, keep the lathe around 500 rpm to limit heat buildup and reduce the risk of burning the wood. Use these sanding tips to achieve a smooth, defect-free interior with controlled abrasion and minimal friction.
Keep the lathe around 500 rpm to reduce heat buildup and avoid burning the bowl interior.
Mount a cordless drill with sanding arbors, then work slowly so you maintain precise contact without overheating the surface.
- Start with at least 120 grit and remove tool marks.
- Inspect the bowl often, then step to 180 and 240 grit only after abrasive marks disappear.
- Apply light pressure and keep the abrasive moving to prevent burn marks.
You’ll get better control at low speed, and you’ll preserve the bowl’s curvature while refining the surface efficiently.
Flatten Panels With a Belt Sander
A 4-in. x 24-in. belt sander is the right tool for flattening multi-board panels after glue-up, because it can remove high spots quickly and leave a level surface when you use it correctly. Use belt sanders with a fresh, tensioned belt, and make light passes so material removal stays controlled. Keep the tool moving across the panel, then shift with the grain to reduce scratch visibility.
| Check | Action | Result |
|---|---|---|
| Belt condition | Inspect and tension it | Consistent contact |
| Pass pressure | Apply minimal force | Even stock removal |
| Flatness | Verify with a straightedge | No high spots |
Check flatness often. If you press hard, you’ll create hollows or uneven sanding. Consistent technique gives you a flatter panel and a cleaner surface for later finishing.
Align Glue Joints Before Sanding
Before you sand, make sure glue joints are flush and tightly aligned, because even small offsets can leave visible ridges or gaps in the finished work.
During Surface Preparation, you should align glue joints with 1-1⁄2-in.-square battens across each seam while the assembly cures. This keeps pressure even and helps prevent joint creep.
For repeatable results:
- Position battens perpendicular to the joint line.
- Use packing tape on laminated battens so glue won’t bond to them.
- Check each joint for flushness before the adhesive sets.
When you align glue joints accurately, you create a more uniform surface, reduce sanding corrections, and preserve the final appearance.
Precise alignment also limits the chance that finishing work will reveal changes between glued parts.
Fix Misaligned Joints After Glue-Up
If a joint still ends up offset after glue-up, you can usually correct it by sanding the high edges of the boards until the surface is flush.
After initial curing, inspect the seam carefully and mark any proud areas. Use a sander aggressively only where needed; a belt sander can remove material efficiently along the joint, but keep it flat to avoid creating a hollow.
Inspect the seam after curing, mark proud spots, and sand only where needed to keep the joint flat.
Then switch to a random orbital sander with 120-grit, working across the repair and extending beyond it to feather the blend. Progress through finer grits until the surface blends seamlessly.
During glue-up, 1-1⁄2-in.-square battens and partial clamp tightening help limit misalignment, but if you still see unevenness, precise post-glue sanding will restore a uniform, ready-to-finish surface.
Match the Sander to the Surface
Choosing the right sander for the surface at hand improves both efficiency and finish quality. When you’re sanding, selecting the right tool controls cut rate and surface integrity.
Use a random orbital sander on flat panels and furniture faces; it tracks evenly and helps you avoid visible swirl marks. For vertical or curved work, choose a lightweight multi-sander so you can maintain pressure and reach contours without fatigue.
- Use belt sanders for aggressive stock removal and joint leveling on large areas.
- Use detail sanders for corners, profiles, and tight recesses.
- Match each tool to the surface geometry to keep contact consistent and reduce rework.
Pair the tool with a durable abrasive, such as aluminum oxide, to support consistent sanding and longer service life.
Choose Sandpaper That Cuts Cleanly
Choose ceramic or aluminum oxide abrasives when you need aggressive, consistent cutting, because they resist wear and leave a smoother surface with fewer deep scratches.
For cleaner dust evacuation and less clogging, you’ll get better performance from mesh discs, which keep the abrasive face open and maintain cutting efficiency longer.
Match the grit to the material and finish stage, starting coarse for stock removal and stepping up to finer grits so you don’t leave visible scratch patterns.
Clean-Cutting Abrasive Types
A clean-cutting abrasive keeps your sanding efficient by removing material quickly without loading up or glazing over. When you choose clean-cutting abrasive types, aluminum oxide and ceramic give you durable, aggressive cutting that stays effective longer.
Match the grit to the task:
- 80–120 grit for rapid stock removal.
- 150–220 grit for refinement.
- 320+ grit for final smoothing.
Open-coat paper can also help because it leaves space for dust and debris, reducing clogging during dusty work.
If you need consistent performance, select quality discs or sheets that maintain sharp cutting edges and resist breakdown. That lets you sand faster, control surface quality, and finish with less rework.
Mesh Disc Performance
Mesh sandpaper can take the same clean-cutting approach a step further by keeping dust moving instead of packing it into the abrasive. That open structure improves airflow, so you get less clogging, longer disc life, and more consistent mesh disc performance.
| Benefit | Effect |
|---|---|
| Dust escape | Cleaner surface |
| Open weave | Less clogging |
| Faster cut | Quicker removal |
| Stable grit | Smoother finish |
| Quality brand | Best results |
When you choose mesh discs from reputable brands, you reduce premature wear and maintain a uniform scratch pattern. Tests show they cut cleaner than standard paper, so you spend less time between grits. Use them for aggressive leveling or fine finishing, and you’ll get efficient removal, better cleanliness, and repeatable control.
Avoid Common Sanding Mistakes
What sanding mistakes most often ruin a finish? When you sand by hand, avoid common sanding mistakes by moving through each grit in order; skipping stages leaves scratches that finish coats expose.
- Clean the surface before each grit change so loose dust can’t contaminate the next pass.
- Use light, even pressure; excessive force builds heat, burns the surface, and can create uneven wear.
- Inspect the work under raking light before finishing to catch tool marks and residual scratches early.
Over-sanding weakens the material, especially in softer woods, so keep your strokes controlled and consistent.
Stop as soon as the surface is uniformly refined. Precise progression, disciplined pressure, and frequent inspection give you a flatter surface and a cleaner final appearance with less rework.
Protect Veneers and Thin Edges
When you sand veneer, start at 150 grit or finer so you don’t cut through the thin surface layer or trigger chip-out.
On thin edges, keep pressure light, sand with the grain, and use a sanding block to distribute force evenly and avoid rounding.
Step through finer grits, such as 220 to 320, to refine the surface without exposing the substrate.
Safe Grit Choices
For veneer sanding, start at no lower than 150 grit so you smooth the surface without cutting through the thin face layer. Your grit choices should advance in sequence: 150, then 180, then finer. Skipping grits leaves scratches that show through delicate finishes.
- Begin with 150 grit on flat veneer panels.
- Move to 180 grit or higher to refine scratch patterns.
- Use hand sanding for intricate areas where machine abrasives can bite too hard.
On thin edges, pair the abrasive with a sanding block or pad so you spread pressure evenly and reduce gouging.
This controlled approach helps you preserve edge integrity while maintaining a uniform scratch pattern. Keep each pass deliberate, and let the abrasive do the cutting without forcing the surface.
Light Pressure Control
Use light, consistent pressure to keep veneer surfaces and thin edges intact while you sand. With light pressure control, you reduce gouging, burnishing, and accidental cut-through on fragile stock.
Keep your abrasive at 150 grit or finer on veneer, and let the abrasive do the work instead of forcing the tool. Hold a steady hand, use a detail sander or sanding block, and maintain greater control across the workpiece.
When you reach a thin edge, angle the sander slightly so you spread contact and avoid rounding the profile. Check the surface often, and adjust pressure immediately if you see sheen loss, edge wear, or uneven removal.
This disciplined approach protects the veneer layer and preserves crisp edges throughout the sanding pass.
Use Sanding Accessories to Save Time
Well-chosen sanding accessories can cut setup time and improve control at the same time. When you use sanding accessories to save time, you reduce tool swaps and keep your workflow consistent.
- Velcro-backed timber pads let you change abrasives quickly on internal surfaces, so you stay focused on the cut.
- Drill chuck mounted sanding arbors free both hands, which gives you tighter control on natural edges and bowl bases.
- Custom jigs and rotary systems, such as a Simon Hope Type setup, improve repeatability on bowls and vases while preserving detail.
If you don’t have a disc sander, homemade MDF sanding discs mounted to a sanding table add versatility for shaping edges and components.
With the right fixture, you’ll work faster, accurately, and with less fatigue.
Check the Surface in Raking Light
After sanding, inspect the surface in raking light by placing a low-angle light across the workpiece so it throws defects into sharp relief. You’ll see tool marks often missed under direct light, plus sanding scratches that disrupt surface texture and indicate where you need more work. Move the light slowly and change your viewing angle to read the grain and detect inconsistencies. Use this quick check before finishing to verify the surface is truly ready.
| Defect | What you see | Action |
|---|---|---|
| Scratch | Thin, bright line | Re-sand area |
| Tool mark | Raised or torn trace | Level carefully |
| Dull patch | Uneven sheen | Refine surface |
This step saves time because you correct flaws now, not after coating.
Finish by Hand for a Smooth Sheen
Once machine sanding has done the heavy removal, you should finish by hand with 320- or 400-grit paper to erase the fine scratches it leaves behind and improve the final sheen.
Use hand sanding with a soft block on flat surfaces, then a folded sheet in corners. Move back and forth along the grain, keeping pressure light so you don’t burnish the wood or create heat checks. This manual pass also blends shifts where the machine stopped, so the surface reads as one plane.
Use a soft block on flat areas and a folded sheet in corners, sanding lightly with the grain.
- Inspect scratch patterns before you begin.
- Sand in controlled strokes, following grain direction.
- Check often, then stop when the texture feels uniform.
On intricate details, slow your pace and keep the abrasive aligned.
Before finishing, wipe the dust away and confirm the sheen stays even.
Frequently Asked Questions
What Is the Golden Rule of Sanding?
The golden rule of sanding is that you should progress through grits systematically, never skipping grades, so you avoid deep scratches and achieve a smooth, defect-free surface with each finer abrasive pass.
What Is the Pencil Trick When Sanding?
You mark the wood with pencil, then sand until those marks vanish; where they linger, you’ve found high spots. You’ll spot unevenness fast, guide your sanding precisely, and achieve a flatter, more uniform surface.
What Is the 100 Grit Rule?
The 100 grit rule means you shouldn’t skip more than one grit size when sanding; you progress sequentially, like 80 to 120, to avoid deep scratches and get a smoother, more consistent surface finish.
What Are the 5 Most Common Mistakes People Make With a Random Orbital Sander?
You’ll commonly over-sand, skip grit stages, leave dust between grits, vary speed or pressure, and sand against the grain. You can avoid scratches, swirl marks, and weakened surfaces by staying controlled and systematic.
Conclusion
When you sand with the right grit progression, light pressure, and controlled speed, you reduce scratch patterns and improve finish adhesion. You’ll also save time by using sanding accessories and checking the surface in raking light before moving on. One useful benchmark: about 80% of finish defects trace back to poor surface prep, not the coating itself. If you clean dust between grits and hand-finish the final pass, you’ll get a smoother, more durable result.