
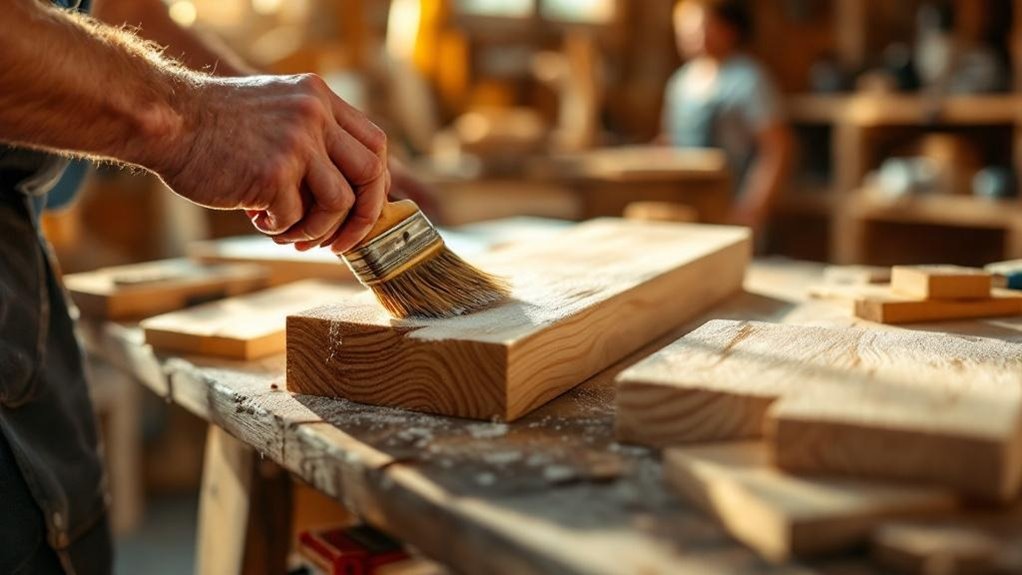
For flawless wood finishing, start by sanding the wood smooth with the grain, using a sanding block and grits from coarse to fine. Level rough spots first with a hand plane or scraper, then remove dust with a vacuum, brush, and tack cloth. Test stain on scrap wood, apply finish in thin coats, and lightly sand between coats with 320-grit paper. Fix drips or brush marks as you go, and keep the surface protected for lasting results; there’s more to master.
Key Takeaways
- Sand with the grain, starting coarse and progressing to fine grits for a smooth, scratch-free surface.
- Use planes or scrapers first to level rough spots and remove imperfections before final sanding.
- Raise the grain lightly with a damp cloth, let it dry, then sand again to prevent roughness after finishing.
- Remove all dust with vacuum, brush, tack cloth, and compressed air so stain and finish adhere cleanly.
- Test stain on scrap wood, then apply thin finish coats and sand lightly between coats for a flawless result.
Why Smooth Wood Matters
Smooth wood makes every part of finishing easier and better. You get richer stains, more even paint, and a smooth finish that looks deliberate, not rushed.
Proper sanding helps you remove scratches, ridges, and torn fibers so your wood surfaces stay safe to handle and won’t leave splinters or sharp edges. It also improves adhesion, so glue and finishes bond stronger and last longer.
When you smooth wood carefully, you raise the quality of the whole project and avoid the look of amateur work. That attention to detail lets you show the wood’s natural beauty instead of masking it.
For durable, professional results, treat smoothing as a required step, not an optional touch-up. It pays off in appearance, strength, and everyday use.
Gather the Right Sanding Tools
You’ll get better results when you use the right sanding tools, like hand planes or cabinet scrapers for fine control and sanding blocks to keep pressure even.
Start with 120–150 grit to smooth the surface, then move to 180–220 grit for a cleaner finish.
Keep both a power sander for quick removal and a mix of sandpaper types, like aluminum oxide and garnet, so you can match the tool to the wood and the job.
Essential Sanding Tools
A well-stocked sanding setup starts with the right mix of hand tools, blocks, and abrasive paper. You’ll move faster and keep control when you choose the right sanding tools for each surface.
Use a hand plane or cabinet scraper when you need precise removal and a silky finish. Wrap paper around sanding blocks to keep pressure even and avoid low spots.
If you use a power sander, stay alert; it can remove material fast and damage edges if you linger.
Pick aluminum oxide for general sanding jobs, and reach for garnet when you’re hand sanding fine details.
Match the grit to the task: coarse grades cut old finish, while finer ones prepare wood for stain or paint.
Choosing Sandpaper Grit
Choosing the right sandpaper grit keeps each stage of finishing efficient and controlled. Start with coarse grit, 40–60, on sanding pads to cut deep scratches and strip old finish.
Move to medium grit, 80–120, to smooth the rough shape and even the surface.
Then switch to fine grit, 180–220, when you’re ready for stain or paint; it reduces marks and leaves the wood cleaner. For final touch-ups, use extra fine 320+ to get an ultra-smooth result.
Choose aluminum oxide for most general sanding because it lasts and cuts consistently. Save garnet for delicate hand-sanding where you want a softer touch.
Work through grits in order, and you’ll build a cleaner surface with less effort and better finish quality overall.
Choose the Best Sandpaper Grits
Start with coarse sandpaper in the 40–60 grit range when you need to strip deep scratches or old finish from the wood. Then move to 80–120 grit to smooth the surface evenly after the rough work is done.
Use a sander for large, flat areas, and switch to grit sandpaper by hand where you need better control. After shaping, choose 180–220 grit to prepare the wood for stain or paint and remove the last visible marks.
For final touch-ups, use 320 grit or finer to leave an ultra-smooth surface ready for finishing. Pick aluminum oxide for general sanding because it cuts well and lasts, and use garnet for fine hand sanding on finished surfaces.
Move through each grit in order, and don’t skip steps.
Sand Wood With the Grain
Always sand with the grain so you don’t leave scratch marks that show through stain or paint.
Start with a coarser grit around 120–150 to knock down rough spots, then move to finer grits up to 220 while keeping your strokes aligned with the wood’s natural lines.
Use a sanding block or flexible pad, and check your work often so you catch any rough areas before they turn into visible flaws.
Grain Direction Matters
Sand with the grain so you don’t leave scratches that’ll show up after stain or finish goes on. Grain direction guides your sanding, helps you achieve a smooth surface, and protects the wood from raised fibers. Start with a coarser grit, then step finer while staying aligned with the grain direction. That steady motion keeps the piece clean and professional.
| Grit | Use | Result |
|---|---|---|
| 80 | Shape rough areas | Fast removal |
| 120 | Refine marks | Even surface |
| 180 | Prep for finish | Smooth touch |
Keep pressure light and strokes long. Cross-grain passes can create whiskers that slow you down and demand extra cleanup. When you follow the grain consistently, your finish bonds better and the final piece looks sharper, cleaner, and more polished.
Avoid Scratch Marks
When you sand with the grain, you cut down on scratch marks that would otherwise jump out once stain or finish hits the surface.
Keep your sanding aligned with the wood grain so you don’t carve cross-grain scratches into the face. Start coarse only when needed, then move to finer grits along the same path for a cleaner final finish.
- Check the board for visible scratches.
- Sand in long, steady passes with the grain.
- Feel the surface with your hand for rough spots.
- Rework any marks before you apply stain.
This approach helps the wood absorb finish evenly and keeps the natural look intact.
If you rush or change direction, you’ll leave patterns that stain can magnify. Stick with the grain, and you’ll get a smoother, more professional result.
Level Rough Spots With a Hand Plane
A hand plane lets you knock down rough spots with control, shaving off thin layers until the surface feels level and smooth. Set the blade sharp and adjust it so it cuts cleanly, not deeply.
Work with the grain every time; that keeps tear-out down and leaves a better surface. Guide the plane over rough patches with even pressure, letting the tool do the work instead of forcing it.
After a few passes, stop and feel the wood for flatness and smoothness. If one area still stands proud, take another light pass there. Keep checking as you go so you can reach a flawless finish before hand sanding.
A steady, precise touch now saves time later and improves the final result.
Scrape Off Tough Imperfections
Use a cabinet scraper to knock down raised grain and other tough imperfections without clogging the way sandpaper can.
Hold it at about a 45-degree angle so you get thin shavings and stay in control of the cut.
Keep the blade sharp, then finish with a light pass of 220–320 grit sandpaper and a tack cloth.
Removing Raised Grain
Raised grain can show up after the first coat of moisture swells the wood fibers, leaving the surface rougher than you want. When you’re removing raised grain, use fine sanding to level those fibers and keep your finish smooth.
- Let the wood dry fully after pre-wetting with a damp cloth.
- Sand lightly with 220-320 grit, following the grain.
- Use even pressure so you don’t cut low spots.
- Inspect the surface and touch up rough patches as needed.
Work in short passes, then wipe away dust before you apply more finish.
If a few tough imperfections remain, scrape them off carefully and resand the area. Keep your strokes controlled, and you’ll preserve the board’s texture while preparing it for even coats and a cleaner final look.
Cabinet Scraper Use
When sandpaper can’t quite clean up stubborn ridges or tear-out, reach for a cabinet scraper to shave them off cleanly.
You’ll use this cabinet scraper to prepare the surface without clogging, especially on figured woods and tricky grain. Hold the flat metal blade at a low angle to remove more material, or raise it for finer smoothing.
Keep the edge burnished so the hook stays sharp and cuts cleanly. Then pull the scraper with steady pressure across the wood surface, watching thin shavings curl away.
Check your progress often and stop before you overwork the area. Used correctly, this simple hand tool leaves a smoother finish than sanding alone and helps your woodworking projects move from rough to ready.
Raise the Grain Before Final Sanding
Before you do your final sanding, lightly dampen the wood with a clean cloth to raise the grain, especially on porous species like oak and ash.
Lightly dampen the wood before final sanding to raise the grain and smooth lifted fibers early.
This simple step helps you smooth lifted fibers now, not after finish goes on. Use a damp cloth, then let the surface dry about 30 minutes before final sanding.
- Wipe the surface evenly.
- Wait for the fibers to stand up.
- Sand with 180–220 grit.
- Test first on scrap wood.
If you skip this, stain moisture can lift fibers unevenly and leave a rough texture.
Remove Dust Before Staining
Dust is the enemy of a clean stain job, so remove it after sanding and before you apply finish. Use a vacuum with a brush attachment first, then follow with a tack cloth to catch the fine dust and debris that hides in pores and corners. For tight joints, hit them with compressed air.
| Tool | Use |
|---|---|
| Vacuum | Lift larger particles |
| Tack cloth | Trap fine dust |
| Damp cloth | Clean stubborn residue |
| Compressed air | Clear tight spots |
| Drying time | Prevent fiber raise |
If you use a damp cloth, let the surface dry completely before wood finishing continues. Don’t rush this step; skipped dust removal leaves visible imperfections under stain and weakens the final look. Clear, clean wood gives you smoother absorption and better results every time.
Test Stain Color on Scrap Wood
Test stain color on a scrap piece before you touch the real project, because the same stain can look very different from one wood species to another. Choose scrap wood from the same species and grain pattern as your build, then test stain color exactly as you’ll use it on the finished surface.
Test stain on matching scrap wood first, so the final color is no surprise.
If you’re deciding between stain or paint, this check helps you compare results honestly.
- Apply it with the same tool.
- Leave it on for the same time.
- Wipe it the same way.
- Record the mix and method.
When you’re applying wood finish, this quick test shows how fast the wood drinks color and helps you avoid oversaturation or a surprise shade. Save your notes so you can repeat the result on the project.
Apply Finish in Thin Coats
Apply finish in thin, even coats so it levels out cleanly without drips or runs. Use a high-quality brush, load it lightly, and apply finish in thin coats along the wood grain. Aim for about 2-3 mils per coat; that’s enough to cover without pooling.
If you need to touch up a rough spot, wait until it dries, then use a power sander only on the bare wood or a separate test piece, not the fresh finish. For water-based finishes, give each coat 1-2 hours to dry; oil-based products need longer.
After the coat cures, lightly sand between coats with 320-grit paper to help the next layer grip and stay smooth. Keep your strokes steady and even.
Sand Between Coats
Once a coat is fully dry, lightly sand it with 320-grit paper to smooth out dust nibs and give the next layer a better grip.
When you sand between coats, keep the pressure light so you don’t cut through the finish or leave scratches on the surface. Use 320-grit sandpaper for every coat you can.
Sand lightly between coats with 320-grit paper to protect the finish and ensure strong adhesion.
- Let the coat dry fully.
- Sand the surface evenly.
- Clean the surface with a tack cloth or damp cloth.
- Apply the next coat.
This routine improves adhesion and helps each layer bond well, so the finish won’t flake or peel later.
If you work carefully after each coat, you’ll keep the finish flat, consistent, and ready for the next application.
Fix Brush Marks, Bubbles, and Runs
Brush marks, bubbles, and runs can usually be corrected with a few careful adjustments. To fix brush marks, use a high-quality bristle brush and lay on thin, even coats in the direction of the grain.
If you see bubbles, don’t shake the can; stir it gently so you don’t trap air. For runs and drips, let the finish dry completely, then level the area with 320-grit sandpaper before you apply a touch-up coat.
Between coats, use light sanding to smooth the surface and help the next layer bond better. Keep your pressure even, check edges and corners closely, and stop as soon as the surface feels uniform.
After the last coat, hand-sand with 400-grit for a cleaner, more even result.
Protect Your Finished Woodwork
After you’ve smoothed the final coat, keep the wood looking good with simple, consistent care. To protect finished woodwork, treat it like a finished tool: clean it, shield it, and control its environment. Water based, low odor Wood Finishes still need regular upkeep.
- Wipe surfaces with a soft, dry cloth to lift dust before it scratches.
- Keep pieces out of direct sunlight so the finish won’t fade or discolor.
- Wipe spills right away, and use coasters or placemats to block heat and moisture.
- Hold room temperature and humidity steady to reduce warping and finish failure.
Skip harsh cleaners, and don’t leave damp items on the surface. With small habits, you’ll extend the life and appearance of every project.
Frequently Asked Questions
How Do You Get a Super Smooth Finish on Wood?
You’ll get a super smooth finish by sanding from 120 to 220 grit, following the grain, then using a hand plane or scraper, wiping dust off, and lightly hand-sanding with 400 grit after finishing.
What Does Vinegar Do to Wood Finish?
Vinegar can soften and strip some wood finishes, and it’ll clean grime off wood too. You should test first, though, because too much can dry the wood, change color, and affect grain.
What Are Some Common Mistakes When Using Wood Finish Paint?
Common mistakes? You skip sanding, leave dust behind, use the wrong brush, rush drying between coats, and never test color first. You’ll trap debris, cause bubbles, get tacky layers, and end up with unwanted tones.
Can I Use WD-40 to Seal Wood?
No, you shouldn’t use WD-40 to seal wood. It won’t form a durable barrier, and it can leave an oily film that attracts dust. Use a proper wood sealer or finish instead, and clean residue first.
Conclusion
So there you have it: the glamorous world of wood finishing, where one skipped grit can turn your “masterpiece” into a tactile apology. You’ve sanded, planed, coated, and sanded again, because apparently smooth wood doesn’t happen by wishful thinking. Still, if you keep the grain in mind, stay patient, and fix the ugly spots before they become “character,” you’ll end up with a finish that looks intentional—and not like a raccoon got loose in your workshop.