
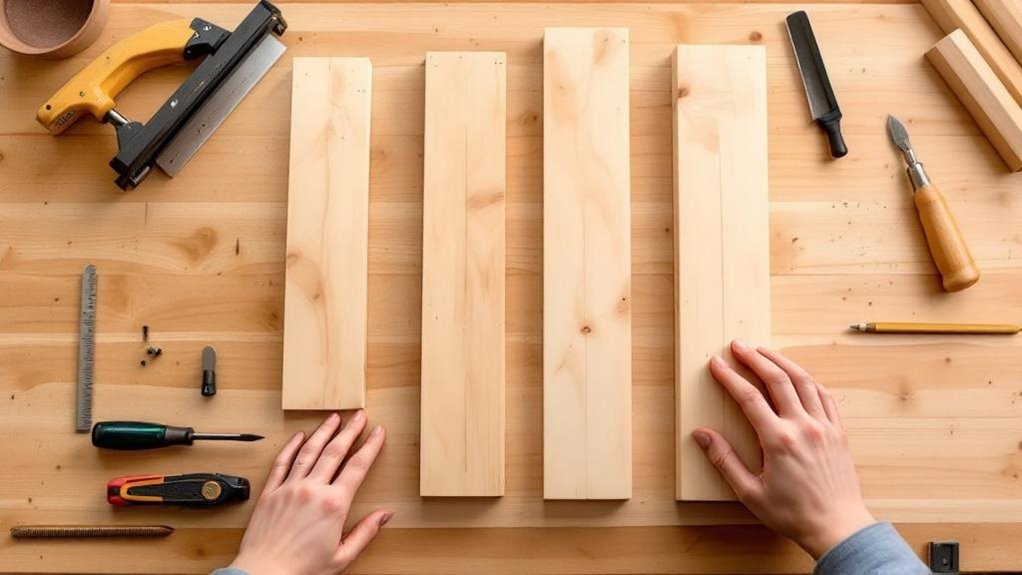
Start with fast, strong, simple joints: butt, rabbet, half-lap, miter and a basic dado. They cover most small projects and suit common tools like a circular saw, miter saw or table saw plus clamps and a square. Learn glue-up, consistent clamping and simple reinforcements—dowels, biscuits or pocket holes—to avoid weak end-grain connections. Practice layout and test-fits on scrap until cuts are precise, then move on to more advanced joinery for heavier or decorative work.
Key Takeaways
- Start with butt and miter joints for quick, low-tool projects and basic corner skills.
- Learn rabbet and dado grooves next to improve panel alignment and fixed-shelf strength.
- Practice half-lap and bridle joints for stronger, flush frame connections with simple cuts.
- Progress to box (finger) joints for durable interlocking corners in drawers and cases.
- Master dovetails and mortise-and-tenon last for high-strength, load-bearing or decorative joinery.
What Beginners Want: Fast, Strong, Simple Joinery
If you’re starting out, you want joints that go together quickly, hold up under use, and don’t demand fancy tools. You’ll begin with butt joints — the simplest option: two boards butting together, glued or screwed, needing only a saw and basic clamping.
For pieces needing neat corners and hidden end grain, miter joints cut at 45 degrees give a clean look and work well for lightweight frames. When you need more glued surface and strength for boxes, box joints (finger joints) increase glue area and resist racking; you can cut them reliably with a simple jig.
Each of these choices balances speed, strength, and simplicity, letting you build confidence before moving to more complex joinery.
Choosing Your First Joints: Match Project to Tools
Your toolbox should guide your choice of first joints: pick joints you can cut reliably with the tools you own so you finish projects and learn skills, not wrestle with setup.
Start with simple, quick cuts—use butt joint and basic half-lap techniques for picture frames or planter stands when your tools are limited. If you have a miter saw, add miter joints for cleaner corners.
Start with simple, quick cuts—butt joints and half-laps for frames; add miter joints if you have a miter saw
When you own a table saw or router, learn rabbet joint and dado cuts for shelves and cabinet backs to increase strength. If you can set up jigs and fences, try box joint or finger-joint patterns for strong interlocking corners on small boxes.
Match projects to tools, build confidence, then expand to more complex joinery as your shop grows.
Butt Joint: How to Make a Reliable Basic Connection
You’ve matched a simple project to limited tools, so start with the butt joint—the quickest way to join two boards by simply butting their ends together.
You’ll work with square stock, mark dowel locations, and apply wood glue to the endgrain before assembly. Clamp the pieces square while the glue sets; endgrain soaks glue quickly, so use enough but avoid squeeze-out mess.
For a reliable joint, drill straight dowel holes using a guide or jig so alignment stays true.
Add screws or nails if the joint must bear load, positioning them to avoid splitting. Remember a bare butt joint lacks interlock, so reinforcement is normal.
This method gets you fast, serviceable connections while you learn stronger joinery.
Rabbet Joint: Align Edges and Add Strength
A rabbet joint gives you a quick way to align edges and add real strength by cutting a notch along a board’s edge so the mating piece seats flush and gains extra glue surface. You’ll use rabbet joints in cabinet backs and drawer assemblies where alignment and increased adhesive area beat a simple butt joint.
Cut the rabbet at least one-third of the board thickness for reliable mechanical strength. You can make precise cuts with a table saw, router, or chisel; measure and set fences carefully. Clamping is straightforward because the joint self-aligns.
- Practice making consistent depths to guarantee fit and strength.
- Use adequate glue coverage on the mating surfaces.
- Test-fit before final assembly and clamping.
Miter Joint: Get Crisp Corners and Hide End Grain
You’ll start by cutting precise 45° angles with a miter saw or table saw and checking fit before you glue.
Reinforce the joint with a spline or biscuit if the corner needs extra strength beyond adhesive.
Finish by sanding and blending the seam so the corner reads as one continuous surface.
Cutting Accurate 45° Angles
Cutting accurate 45° miters starts with proper setup and careful cutting—set your miter or table saw to exactly 45°, secure the workpiece with clamps or a stop, and make a light test cut on scrap to confirm the angle and fence alignment.
You’ll cut two pieces with matching angles, then clamp them together to check for gaps at the joint. Use a shooting board and hand plane to refine the miter edge for perfect fit and alignment. Seal end grain with a diluted glue coat before final glue-up to reduce weak bonding.
- Use a miter gauge or precise fence to control the cut and maintain the angle.
- Clamp assemblies while checking alignment continuously.
- Consider splines only if additional strength is needed.
Reinforcing Mitered Corners
One reliable way to make mitered corners both crisp and strong is to reinforce the joint with splines or biscuits while sealing the end grain first. You cut the two pieces at 45° so the 90° corner hides end grain; before final glue-up, wipe a 50/50 glue-and-water mix into the end grain to improve adhesion.
Use a mitered shooting board to guarantee precise cuts at the correct angle and reduce gaps. Slot and fit a spline or biscuit to align faces and add shear strength, especially where the joint will see stress.
Clamp square, checking the fit with a combination square as the glue cures. These steps keep miter joints tight, stable, and visually seamless.
Sanding And Seam Blending
Start by checking that both mating faces sit flush at the 45° cut. Then sand the edges lightly to remove any high spots that will show as gaps once glued.
You should seal end grain with a diluted glue mixture so the joint absorbs less and holds strong. Apply main glue, clamp with a strap clamp to align corners, and wipe squeeze-out before it skins.
After cure, blend the seam with fine-grit sanding to remove ridges and make the corner feel seamless. Take light passes across the joint, keeping the angle intact and avoiding rounding the corner.
- Pre-assembly sanding: remove high spots for tight fit
- Glue sealing: thin glue coat on end grain first
- Final sanding: fine grit to blend seam seamlessly
Half-Lap Joint: Simple Cuts for Strong Frames
Half-lap joints let you join two boards by removing half their thickness at the meeting point so they overlap flush, giving a clean, strong corner that’s easy to cut with basic tools like a table saw.
Half-lap joints join two boards by removing half their thickness so they overlap flush for a clean, strong corner
You’ll mark and cut matching notches on each board so they seat flush; accuracy in depth and length is key. Use a table saw or handsaw and chisel for control, then dry-fit to confirm alignment.
Apply glue into the mating surfaces and clamp square while it cures; add screws or nails if the project needs extra reinforcement.
Half-laps work well for picture frames and planter stands, hide end grain better than butt joints, and give durable, attractive results with minimal tooling and straightforward technique.
Bridle Joint: A Beginner-Friendly Step Toward Tenons
If you’ve cut half-laps, you’ll find the bridle joint a natural next step that adds strength by increasing long-grain contact. You’ll see how bridle joints combine half-lap simplicity with mortise-and-tenon principles to join wood for frames and stretchers.
You can cut the mortise and matching tenon with a table saw, router, or hand tools; choose whatever gives you control. Measure carefully and mark shoulder and cheek lines, then remove waste in small passes to maintain accuracy. Glue and optional fasteners will reinforce the joint for structural use.
- Tools: table saw, router, miter saw, or handsaw and chisel
- Uses: furniture frames, stretchers, load-bearing connections
- Tips: measure, test-fit, then glue and clamp for best results
Box/Finger Joints: Fast, Repeatable Box Joinery
Box (finger) joints give you fast, repeatable box joinery by cutting matching interlocking fingers into two boards so they seat tightly and present lots of long-grain surface for glue. You’ll cut box joints quickly with a table saw and a simple jig, producing consistent interlocking wood profiles that fit snugly. The long-grain contact gives glue to hold well, making these stronger than butt joints and ideal for drawers, cases, and decorative boxes. Beginners can learn this without complex setups and still get professional results. Practice spacing and test fits for clean corners. Use clamps and full-coverage adhesive on the fingers for maximum strength.
| Feature | Benefit |
|---|---|
| Speed | Fast repeatability |
| Strength | Lots of long-grain glue surface |
| Ease | Simple jig setup |
| Uses | Drawers, cases |
| Fit | Tight interlocking wood |
Dado vs. Groove: Supports for Shelves and Panels
You’ll choose a dado or a groove based on purpose and placement: dados cut across the grain for fixed shelf support, grooves run with the grain for panels or drawer bottoms.
Compare cutting techniques—table saw or router with a fence gives precise dados, while a straight bit along the board edge or a router plane suits grooves.
Consider strength and fit: dados typically give stronger cross-grain support and allow minimal edge treatment, while grooves let the panel move with the grain for a cleaner, flexible fit.
Purpose And Placement
Choosing the right slot—dado or groove—depends on how you need the shelf or panel to carry load and move with the wood. You’ll pick dado joints when shelves must bear weight across the cabinet’s width; dados cut across the grain, with two shoulders and deeper penetration (often ≥1/3 thickness) to resist sagging.
You’ll choose grooves for panels and backers; grooves run with the grain, also have two shoulders, and allow seasonal movement. Both increase glue contact and overall rigidity when placed properly, especially with plywood or solid stock.
Place dados where vertical support and alignment matter; place grooves where panel expansion and consistent alignment are priorities.
- Dado joints: deep, cross-grain shelf support
- Grooves: long-grain, movement-friendly panels
- Placement: prevents sagging, guarantees alignment
Cutting Techniques Compared
When you cut dados or grooves, pick the technique that matches the load and movement needs of the piece: dados are routed or sawn across the grain with two shoulders to bear lateral weight, while grooves run long-grain and let panels expand.
You’ll use dado joints where shelf loads and lateral stress matter; their shoulders give secure bearing. Use grooves when a panel needs to float with seasonal movement.
Depth matters: dados should be at least one-third of board thickness, and grooves follow similar depth rules for stability.
In both cases measure precisely and choose appropriate cutting techniques—router, table saw, or dado stack—to match stock and accuracy needs. Proper setup and repeatable cuts keep fit consistent in cabinetry and shelving.
Strength And Fit
The choice between a dado and a groove comes down to how the shelf or panel will bear load and move. You’ll pick a dado when vertical strength matters: cut across the grain, at least one-third into the board, so shelves sit firmly and carry weight. Use screws or glue for extra strength.
Choose a groove when you need a long, sliding fit with two shoulders—ideal for panels in frames and for allowing expansion and contraction without stressing joints. Consider load direction: dado resists vertical loads; groove handles horizontal support and movement.
- Dado: robust shelf support, can be glued and screwed for heavy loads
- Groove: lengthwise fit, accommodates panel movement
- Both: glue improves joint strength and stability
Dowels, Biscuits, and Pocket Holes: Easy Reinforcements
Three simple reinforcement methods—dowels, biscuits, and pocket holes—give you reliable, easy-to-learn ways to strengthen and align joints.
You’ll use dowels as cylindrical pegs that fit precise holes in both parts, producing strong, well-aligned connections when drilled accurately.
Dowels: cylindrical pegs fit precise holes in both pieces for strong, accurately aligned joints when drilled well.
With biscuits you cut matching slots and insert a compressed oval wafer that swells with glue to tighten the joint and improve alignment.
Pocket holes require drilling angled holes in one piece and driving screws into the mating part, letting you assemble quickly without complex setups.
Both dowels and biscuits demand careful drilling and alignment, often aided by jigs, while pocket holes trade setup for speed.
Choose the method that matches your project’s strength, appearance, and workflow needs.
Tool Checklist and Simple Jigs to Speed Setup
You’ll want a short list of essential hand tools—marking gauges, combination squares, and reliable clamps—to measure, mark, and hold pieces before cutting.
Add quick table saw jigs like a sled or miter gauge setups and simple router jigs for repeatable cuts such as dados and box joints.
Finish with simple clamping fixtures or stop-blocks to speed assembly and keep joint alignment consistent.
Essential Hand Tools
A sturdy table saw and a reliable miter saw form the backbone of your beginner toolkit, while clamps, a drill, and a few precision measuring tools let you cut, align, and secure joints with confidence.
For essential hand tools, focus on items that handle common joinery tasks and support basic joint cutting techniques. A combination square and marking gauge keep your layout accurate; clamps hold parts during glue-up with even pressure.
Simple jigs—dowel guides and a basic miter sled—speed setup and improve repeatability without complex builds.
- Combination square and marking gauge for precise layout
- Clamps and clamping strategy to prevent misalignment during glue-up
- Dowel jig and simple miter sled for repeatable cuts
Quick Table Saw Jigs
Start with a short checklist so you’ve got the essentials at hand: a reliable miter gauge, a crosscut sled, and a zero-clearance insert, plus a simple push stick and panel guide.
With those, you’ll speed setup and make repeatable cuts for basic joints. Use the crosscut sled for true edge-to-edge cuts and consistent lengths.
A panel guide keeps sheets square and lets you treat large stock like one piece. Build a DIY doweling jig from two blocks and a clamp to align holes for dowel joints.
Add a tapering jig when you need angled legs or decorative profiles. Keep jigs simple, register them off the fence or miter gauge, and test on scrap to verify fit before cutting your actual parts.
Simple Clamping Fixtures
After you’ve got basic saw jigs sorted, clamp fixtures are the next fast way to lock parts in place and speed glue-ups. You’ll find simple clamping fixtures boost joinery by delivering even pressure and consistent alignment, which makes glue bonds stronger and assembly repeatable.
Build fixtures from plywood, wood screws and everyday clamps; use sandwich clamps with plywood faces and hinges for flat panels, or adjustable clamping blocks to handle varying joint sizes. Specific jigs—dowel or box-joint templates—cut setup time and guarantee accuracy.
Keep designs minimal: a base, fixed stop, and clamping faces. Use common clamps to apply pressure rather than relying on ad hoc methods. Proper fixtures make finishing faster and reduce rework.
- Sandwich clamp with hinges
- Adjustable clamping blocks
- Dowel/box-joint templates
Common Beginner Mistakes (And How to Avoid Them)
Although mistakes are part of learning, you can avoid the most common ones by focusing on measurement, fit, and glue-up procedures from the start.
Check measurements twice before cutting; one misplaced mark ruins fit and alignment.
Pick the right joint type for the job—don’t use a simple butt joint where a rabbet or reinforced joint is needed.
Set up your saws and router fences precisely so miters and rabbets seat cleanly.
Consider grain direction: it affects strength and glue adhesion, so orient pieces for maximum contact.
Use clamps—glue alone won’t assure strength.
Apply consistent pressure, confirm excess squeeze-out, and let adhesives cure fully.
Practice layout and clamping on scrap until your cuts and glue-ups are predictable and repeatable.
Next Skills: Dovetails, Mortise-and-Tenon, Through-Tenons
Frequently, the jump from basic joints to dovetails, mortise-and-tenon, and through-tenons marks a real step up in both strength and appearance, so you’ll want to focus on precision and repeatability as you learn them.
You’ll start with the dovetail joint for drawers and visible box corners—its interlocking shape resists racking and looks professional when cut tight.
Move to mortise and tenon for frames and load-bearing connections; accurate layout and snug shoulders make the joint durable.
Through-tenons expose the tenon end for extra mechanical strength and a decorative element. Use jigs and templates to repeat cuts consistently, and practice measuring and test-fitting on scrap before committing to final pieces.
- Learn layout and test cuts
- Build simple jigs for consistency
- Practice tight fits on scrap
Frequently Asked Questions
What Joints Are Best for Beginners?
Start with butt, half lap, miter, dado, and box joints. You’ll learn simple assembly, increased strength, clean corners, shelf support, and interlocking durability; they’re practical, progressively challenging, and teach essential cutting, fitting, and gluing skills.
What Is the Easiest Joinery for Beginners?
About 70% of beginners start with the butt joint because it’s simplest—you’ll just butt two boards, glue or screw them, and get instant results; it’s fast to learn, needs minimal tools, and teaches basic alignment.
What Are Common Wood Joinery Mistakes?
You’ll miscalculate angles, misalign dowels, rush glue on dirty or uneven surfaces, over-tighten clamps, and skip pilot holes for screws—each mistake weakens joints, causes gaps, warping, or splits, so measure, align, clean, and clamp properly.
What Is the Easiest Joint to Build?
The easiest joint to build is the butt joint; you’ll just square and glue or fasten two ends together. It’s quick, needs minimal tools, and you’ll get faster with practice before tackling stronger, precise joints.
Conclusion
You’ve got a solid starting kit: simple joints that’ll make your builds fast, strong, and honestly life-changing for your shop confidence. Start with butt, rabbet, and miter joints, then add dowels, biscuits, or pocket holes for reinforcement. Use basic jigs and the right tools to save time and avoid common mistakes. Practice deliberately, keep measurements precise, and you’ll be ready to tackle dovetails and mortise-and-tenons before you know it.