
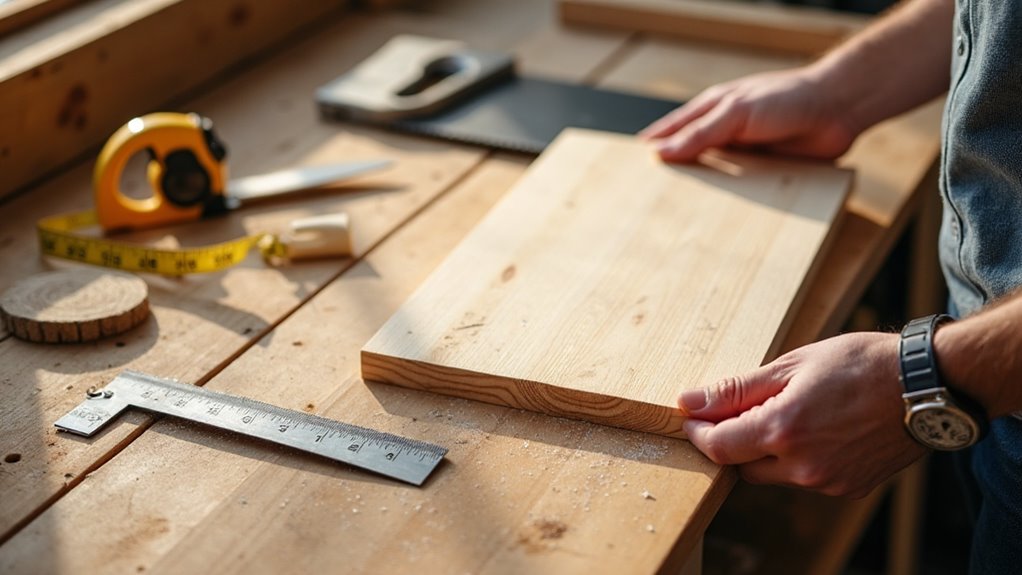
You should start by mastering accurate measuring and marking, safe cutting with hand and power saws, and basic joinery like butt, dado, and mortise-and-tenon. Learn to sand progressively (80 to 220–320 grit), keep surfaces level, and sharpen chisels and plane blades regularly. Set up a ventilated, well-lit workspace, use proper PPE, and practice clamping, drilling, and glue-ups to avoid misalignments. These fundamentals will keep you safe and make your first projects succeed, with more practical steps ahead.
Key Takeaways
- Measure and mark accurately using a square and tape measure to ensure precise cuts and fits.
- Learn safe, controlled sawing: rip, crosscut, miter, and bevel techniques before using power saws.
- Master basic joinery: butt joints, dados, and simple mortise-and-tenon or dowel reinforcements.
- Practice progressive sanding (80 to 220–320 grit) and always sand with the grain for smooth finishes.
- Use proper safety and workshop setup: PPE, dust control, good lighting, organized tools, and secure clamping.
What to Learn First: 7 Essential Woodworking Skills
Start by mastering a few core skills that will keep your projects accurate and safe: measuring and marking, basic sawing, fundamental joinery, sanding and finishing, and proper tool handling with PPE.
You’ll learn the basics by practicing precise tape-measure use and clear layout marks so pieces fit together. Start with hand saws to develop control before moving to power saws, and focus on straight, repeatable cuts.
Study simple joinery—butt, dado, mortise-and-tenon—to build strong connections. Sand progressively with finer grits to prepare surfaces for stain or paint.
Always prioritize tool safety: grip tools correctly, maintain sharp blades, and wear eye, hearing, and dust protection.
Build skills deliberately, stay cautious, and you’ll avoid common mistakes.
Setting Up a Simple, Safe Home Workshop
Pick a dedicated spot—garage, shed, or a ventilated corner of your workspace—and outfit it with basic tools like a miter saw, cordless drill, and a Kreg Jig for common projects.
If space is limited, set up sawhorses and a sheet of plywood as a temporary workstation, and organize tools on pegboards or labeled containers for quick access.
Prioritize safety by using PPE, learning each tool’s safety features, keeping the area clutter-free, and installing dust management like a shop vacuum or air filters.
Workshop Space Essentials
A dedicated workspace—whether a corner of your garage, a backyard shed, or a well-ventilated outdoor area—gives you the room and safety features you need to use tools and assemble projects without crowding or unnecessary risk.
For workshop space essentials, pick a flat, well-lit area with good ventilation and room for a basic dust collection or extraction fan to protect air quality. Set up a temporary workbench using sawhorses and plywood for small projects before building permanent benches.
Keep tools include a miter saw, cordless drill, clamps, and PPE stored on shelving or pegboards so everything’s reachable and off the floor.
Plan clear walking paths, secure heavy items, and maintain a clutter-free layout to work efficiently and reduce hazards.
Basic Safety Setup
Because you’ll be working with sharp tools, dust, and loud equipment, set up a dedicated, well-ventilated workspace and make safety the first priority before you cut or finish any piece.
Choose a garage or shed, arrange consistent lighting, and maintain proper ventilation to control fumes and airborne dust. Install a dust collection system or keep a shop vacuum handy.
Store tools on pegboards and shelves to avoid trips, and keep a clear work surface. Always wear safety glasses, a dust mask, and hearing protection when operating machines.
- You’ll feel more confident in an organized space.
- You’ll breathe easier knowing proper ventilation is in place.
- You’ll avoid accidents with tools stored neatly.
- You’ll respect the work by controlling dust and fumes.
- You’ll protect your eyes and ears every time.
Essential Woodworking Hand Tools Beginners Should Master
Start by mastering essential measuring tools like a marking gauge and reliable square so your cuts and joinery line up every time.
Learn safe cutting and sawing techniques to make accurate, controlled cuts with a hand saw.
Practice chisel use and regular sharpening, and pair it with a mallet for controlled strikes to shape and clean joints without damaging the workpiece.
Essential Measuring Tools
Measure twice, cut once—so keep a reliable set of measuring tools within reach to make accurate layouts, straight cuts, and safe joins. You’ll rely on a measuring tape (clear imperial and metric markings) for overall dimensions and quick checks.
A combination square verifies 90° angles, measures depths, and helps transfer marks for precision. Use a marking gauge to scribe consistent lines parallel to edges so joints align.
Calipers give fine measurements of thickness for tight-fit assemblies. A level guarantees surfaces and assemblies sit true, preventing wobbles and functional failures.
- Pride when your pieces fit perfectly
- Confidence in every joint you make
- Relief from rework and wasted material
- Satisfaction of a stable, level project
- Safety knowing measurements are reliable
Cutting And Sawing
Choose the right saw and learn to control it: mastering handsaws and power saws like miter and circular models will make your cuts accurate, efficient, and safe.
You’ll learn woodworking faster when you practice proper cutting and sawing techniques. Start by matching blade tooth count to the task—coarse teeth for rip cuts, fine teeth for crosscuts—to improve finish quality.
Keep a steady grip, square stance, and firm control to reduce wander and kickback risk. Mark lines clearly and use guides or jigs to repeat precise cuts.
Inspect blades before use and keep them sharp; dull blades force you to push harder and increase accident risk. Always clamp work, wear eye and hearing protection, and follow tool-specific safety steps every time you cut.
Chisels And Sharpening
A sharp chisel is one of the most useful tools you’ll own for carving, paring, and fitting joints, so learning proper handling and sharpening pays off quickly.
You’ll learn types—bench, mortise, bevel-edged—and match them to tasks.
Practice paring and bevel-down cuts to gain control and cleaner results.
Sharpening on a whetstone or system keeps edges keen; a sharp chisel needs less force and is safer.
Try 25°, 30°, and 35° angles to find what suits your work.
Always clamp work, keep hands behind the cutting edge, and wear eye protection.
- Pride when a perfect shaving peels off
- Relief from fewer tear-outs
- Confidence using the right chisel
- Satisfaction after a quick resharpen
- Calm from safer, controlled cuts
Essential Woodworking Power Tools to Learn First
Anyone starting out in woodworking will want to get comfortable with a handful of power tools that make cutting, fastening, and shaping safer and more accurate: a miter saw for precise crosscuts and angled cuts, a cordless drill for drilling and driving screws, a jigsaw for curves and intricate shapes, a router for edge profiles and joinery, and a band saw for straight and complex cuts through varying thicknesses. You’ll learn basic safety: secure work, eye and ear protection, and correct blade bits. Start slowly, practice on scrap, and master setups before real cuts. The right sequence boosts confidence and woodworking skills.
| Tool | Primary use |
|---|---|
| Miter saw | Precise crosscuts |
| Router | Edge shaping |
Reading a Tape Measure and Measuring Accurately
When you’re starting a project, read the tape measure carefully and start from the “0” end so your layout stays accurate; the casing can hide the true beginning of the blade.
You’ll learn both imperial and metric markings, recognize common fractions like 1/8, 1/4, 1/2 inches, and convert when needed. Align the tape measure firmly against the wood, use both hands, and keep the blade flat to avoid error.
Measure twice before cutting to catch mistakes and protect material and yourself. Be methodical, patient, and safety-minded; accurate measuring prevents wasted wood and dangerous rework.
- Pride in precise layout
- Relief from avoiding mistakes
- Confidence in clean cuts
- Satisfaction from tight joints
- Calm knowing you checked twice
Preparing Boards: Jointing, Planing, and Flattening
Start by getting your boards flat and square—jointing, planing, and flattening are the steps that turn rough stock into reliable parts for accurate joinery.
Begin by inspecting each board for twist, cup, or bow; mark high spots and secure the work safely. Use a jointer (or a straight edge and hand plane) to create a true reference edge for glue-ups.
After jointing, run boards through a thickness planer to remove material evenly, producing consistent thickness and parallel faces. For boards wider than your machines, flatten by alternating hand planing and checking with a straightedge until the face is true.
Measure frequently to confirm squareness and absence of twist. Practice patience and machine safety—sharp tools and steady feeds produce the best, safest results.
Basic Cuts to Practice (Rip, Crosscut, Miter, Bevel) and Safety
Start by practicing rip cuts (along the grain) and crosscuts (across the grain) so you can accurately size boards for width and length using a table, circular, or miter saw.
Then work on miter and bevel cuts to make precise angled ends and edge profiles for frames, trim, and joints.
Always wear PPE, confirm blade guards and fences are set, and use push sticks and proper feeds to keep your hands clear and minimize accidents.
Rip vs Crosscut
Practice four basic cuts—rip, crosscut, miter, and bevel—to build confidence and control before tackling larger projects, and always keep safety front and center.
You’ll use rip cuts to cut parallel to the grain and resize boards, typically on a table or circular saw, and crosscuts to shorten boards perpendicular to the grain with a miter saw or handsaw.
Choose the right saw, set fences and stops, clamp the workpiece, and wear safety glasses and ear protection.
Keep fingers clear and feed wood steadily; don’t force the blade. Learn to read grain direction to avoid tear-out and use push sticks on narrow rip cuts.
- Proud when a clean edge appears
- Calm as you control the feed
- Confident with proper PPE
- Satisfied by tight joints
- Safe knowing clamps hold steady
Miter And Bevel
Two essential angled cuts you’ll master next are miter and bevel, and you’ll want to approach them with the same safety-first mindset you used for rip and crosscuts. You’ll learn to set precise angles: miter cuts rotate the workpiece or blade for neat decorative joints; bevel cuts tilt the blade to slice through thickness for tight-fitting edges. Use measuring tools and mark clearly before cutting. When using power tools, confirm blade angle and fence alignment, wear eye protection, and keep hands clear. Practice on scrap until you consistently hit angles. Below is a quick comparison to help you focus practice and safety priorities.
| Cut Type | Purpose |
|---|---|
| Miter | Corner joints, frames |
| Bevel | Edge joints, furniture |
| Practice | Scrap setup |
| Safety | PPE, hands clear |
Safe Cutting Practices
When you’re learning rip, crosscut, miter, and bevel cuts, treat safety and setup as the first skills to master: measure and mark clearly, confirm blade and fence settings, and always wear eye and hearing protection.
You’ll practice rip cuts along the grain on a table or circular saw, crosscuts with a miter saw or crosscut sled, miter angles for trim, and bevels by tilting the blade. Use push sticks, hold pieces firmly, and never reach past the blade.
Maintain sharp blades and proper guards on both power tools and hand tools. Start slow, check each setup, and make test cuts on scrap until you’re confident.
- Heart-racing respect for the blade
- Quiet satisfaction after a clean cut
- Pride in precise angles
- Calm from safe routines
- Confidence in your progress
Fundamental Joinery: Butt Joints, Dados, Rabbets, Pocket Screws
Although these four joints vary in complexity, mastering butt joints, dados, rabbets, and pocket screws gives you reliable options for most basic projects. You’ll use butt joints for quick assemblies but reinforce them with glue, screws, or dowels for strength. Cut dados for strong shelf joints, and rabbets when you need clean edge fits for frames or cabinets. Use pocket screws to create concealed, fast assemblies with less clamping. Always measure twice, clamp securely, and wear eye protection.
| Joint | Best for | Safety tip |
|---|---|---|
| Butt joints | Simple frames | Reinforce and clamp |
| Dados | Shelves | Use stop blocks |
| Rabbets | Cabinets/frames | Keep blade guards on |
| Pocket screws | Fast hidden joins | Drill guides reduce slip |
Classic Joinery Intro: Dovetails and Mortise-and-Tenon
You’ll start with hand-cut dovetails by laying out tails and pins, then saw and pare carefully to those 14–20° angles for a snug fit.
For mortise-and-tenon, you’ll lay out the mortise, drill or chisel the cavity, and shape the tenon to test-fit before gluing.
Use the right marking, chisels, saws, and clamps, and keep workpieces secure and your hands clear of cutting paths.
Hand-Cut Dovetail Basics
Because dovetails lock together mechanically, they give you a joint that’s both strong and visually attractive, so they’re ideal for drawers and fine cabinets.
You’ll use hand tools to lay out precise tails and pins, then saw and pare carefully to join two pieces of wood. Keep your dovetail saw sharp, use a marking gauge for consistent lines, and pare waste with chisels for a snug fit. Work slowly, check fit frequently, and clamp safely to avoid slips.
- Pride when a joint fits perfectly
- Satisfaction from mastering a classic skill
- Confidence building with each successful cut
- Calm focus during careful layout and paring
- Joy in creating lasting, beautiful furniture
Practice patiently; accuracy beats speed for durable, safe dovetails.
Mortise And Tenon Steps
If you enjoyed the fitting precision of dovetails, you’ll find mortise-and-tenon joinery equally satisfying for frames and tables.
Begin by marking both members precisely, then cut the tenon shoulders and cheeks with a saw so the projection matches your layout.
Next, lay out the mortise on the mating piece and remove waste either by drilling relief holes or carefully chopping with a chisel and mallet.
Test-fit frequently; the tenon should enter snugly but not bind. Make the mortise slightly deeper than the tenon to allow for glue and seasonal movement.
Trim the tenon for a flush finish and clean the mortise walls for full contact.
Use proper woodworking tools, keep cutting edges sharp, wear eye protection, and work methodically for durable, safe joints.
Tools And Layout Techniques
Start by assembling the right tools and laying out your cuts with care: a sharp marking knife or pencil, a combination square, marking gauge, coping or dovetail saw, chisels, a mortise gauge, and a mallet will give you the precision you need for both dovetails and mortise-and-tenon joints.
You’ll rely on measured, repeatable layouts to achieve snug fits; accuracy and sharp tools are non-negotiable for strength and appearance. Practice marking, sawing, and chopping slowly, checking fit frequently.
Stay safe: clamp work, keep fingers clear, and sharpen blades regularly. These tool and layout techniques form the backbone of essential woodworking and prepare you for more advanced joinery.
- Pride when a joint fits tight
- Calm focus during precise layout
- Satisfaction after a clean cut
- Confidence from repeated practice
- Joy in creating lasting furniture
Drilling, Clamping, and Glue-Up for Strong Assemblies
Good drilling, clamping, and glue-up habits make the difference between a strong, square assembly and a weak, wobbly one, so you should learn the right bits, clamp types, and glue techniques before you join parts.
For drilling, pick the proper drill bit for dowels, screws, or hinges, use a drill guide or stop collar for depth, and drill straight to guarantee accurate fit.
For clamping, choose bar or pipe clamps to suit your project and position clamps to apply even pressure across the joint; uneven clamping causes shifting and misalignment.
Spread a thin, even layer of wood glue on both mating surfaces, assemble, and tighten clamps just enough to close the joint. Respect the manufacturer’s drying time for a durable bond.
Sanding and Finishing Basics for Durable Results
Why sand this carefully? You’ll remove rough spots and set the stage for a durable finish. Start with about 80-grit, move progressively to 220–320 grit, and always sand with the wood grain to avoid scratches.
Use an orbital sander for large areas and hand-sand detailed spots. Clean dust with a tack cloth or vacuum before finishing. Apply multiple thin coats, let each dry, and sand lightly between coats for a smooth, long-lasting wood surface.
- Pride in a silky, even finish that looks professional
- Confidence knowing you followed safe, correct steps
- Satisfaction when joints and grain pop after finishing
- Relief from fewer runs, bumps, or sticky spots
- Joy at a project that lasts and resists wear
Sharpening and Maintaining Tools for Top Performance
Because sharp, well-maintained tools cut cleaner and safer, you’ll want to make sharpening and routine care a regular part of your woodworking practice. You’ll sharpen tools like chisels and plane blades with a stone or honing guide, keeping an edge around 25 degrees. Use honing compound to polish edges after sharpening for longer life. After each use, clean metal parts to prevent rust and inspect tools for wear or damage. Regular maintenance reduces effort and improves safety.
| Task | Recommendation |
|---|---|
| Sharpening tools | Use stone/honing guide, ~25° |
| Polishing | Apply honing compound |
| Cleaning | Wipe dry, oil metal |
| Inspection | Check for chips, loose handles |
| Frequency | Sharpen as needed, clean every use |
Common Beginner Mistakes : How to Fix Them
Many beginners make avoidable mistakes that slow progress or create unsafe conditions, but you can fix them by focusing on measurement, preparation, tool care, planning, and practice.
Learn to measure precisely—master fractions and use your tape correctly—to avoid wasted wood. Always prepare surfaces: joint and sand edges before glue-up for stronger joints. Keep blades sharp and maintain tools to make cuts clean and safe.
Don’t rush: create a cut list and scale drawing so you follow a clear plan. Finally, practice foundational techniques and accept that you’ll make mistakes; each one teaches you.
- Frustration when a cut is off—double-check measurements.
- Regret from rough joints—prepare before gluing.
- Fear of dull tools—maintain blades.
- Chaos from no plan—draw it out.
- Impatience—practice patiently.
6 Beginner Projects to Build Skill and Confidence
After you’ve learned to measure, prepare surfaces, and keep your tools sharp, put those skills to use with projects that build confidence without overwhelming you. Start with cutting boards to practice milling, gluing, and flattening; they’re forgiving and give you a useful result.
Move to simple box building to focus on basic joinery and accurate fitting—practice clamps and test fits before glue.
Try picture frames to hone miter cuts and precise assembly; use scrap pieces first.
When you’re ready, tackle shop cabinets to learn more complex joinery, layout, and storage design while keeping safety in mind—secure large panels and lift with help.
Finally, build a bookshelf as a mid-level project to teach stability and load-bearing layout.
These beginner projects expand your woodworking experience steadily and safely.
Frequently Asked Questions
What Is the 5’7″ Rule in Woodworking?
The 5’7″ rule in woodworking says you should make board width about five sevenths of its thickness, so you maintain balanced proportions, reduce warping risk, and build safer, more stable furniture—don’t ignore design needs, though.
What Are the Basic Woodworking Skills?
You’ll learn measuring, sawing, chiseling, drilling, basic joinery (butt, mortise-and-tenon, dovetail), sanding, planing, finishing, and tool safety; don’t forget sharpening blades and using guards so you’ll avoid accidents while gaining confidence.
Does Woodworking Lower Cortisol Levels?
Yes — woodworking can lower your cortisol by focusing attention, using repetitive motions, and fostering accomplishment; stay safe by using proper PPE, taking breaks, and following tool guidelines so stress relief doesn’t come with unnecessary injury.
How to Start Woodworking With No Experience?
Start small, start safe, start simple: set up sawhorses and plywood, get a miter saw, cordless drill and Kreg Jig, learn accurate measuring, choose softwood, follow tutorials, take a class, wear PPE, practice basic cuts and joints.
Conclusion
You’ll learn quick wins and slow, steady habits—precision with a tape measure versus the patience of a perfect finish. Start small, practice safety, and balance hand skills with power tools. Keep blades sharp and your workspace tidy so projects feel easier, not more dangerous. When mistakes happen, fix them calmly and learn the technique that prevented them. Build simple projects, stay curious, and you’ll turn basic skills into confident craftsmanship—safely.