
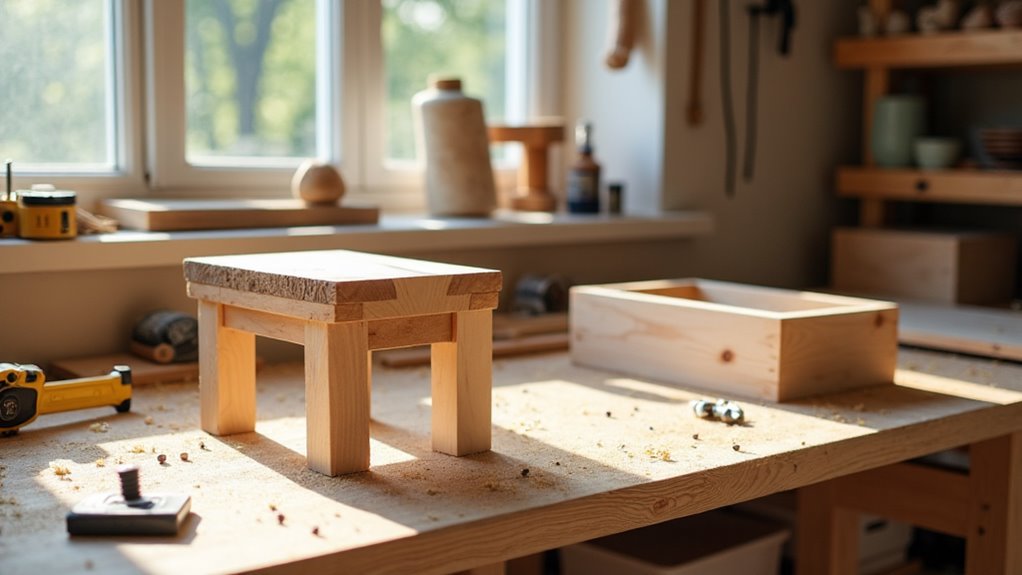
You can build useful, attractive pieces with just straight cuts, a drill, sander, tape measure and basic hand tools. Start with pine or plywood, glue and screws, and set up good lighting and ventilation. Try a desk organizer, peg rail, simple shelf or kids’ picnic table—each uses simple cuts, predrilled holes and clamps or weights for glue-ups. Wear goggles and a dust mask, double-check measurements, and sand through grits for a smooth finish. Keep going to pick up tips for finishes, fixes and scaling skills.
Key Takeaways
- Choose projects with straight cuts and butt joints, like shelves, crates, or simple stools, to minimize tool complexity.
- Use common, inexpensive materials (pine boards and plywood) and standard fasteners (wood glue plus screws) for easy sourcing.
- Rely on basic tools: a miter or hand saw, drill, sander, tape measure, and clamps for accurate, safe assembly.
- Keep dimensions simple and reusable—use a clear cut list and pre-drill holes to prevent splitting and speed construction.
- Finish with progressive sanding and a clear oil or varnish for durability and a beginner-friendly, attractive result.
What You Need to Start Woodworking (Tools, Materials, Space)
To get started woodworking, you’ll need a few essential tools, some basic materials, and a simple, safe workspace.
Start with a miter saw for precise cuts, a drill for fastening, and a sander to smooth surfaces. Add measuring tools like a tape measure and a square plus basic hand tools—hammer and chisels—for fine adjustments.
Start with a miter saw, drill, and sander — add tape measure, square, hammer, and chisels for precision.
Stock wood such as pine or plywood, wood glue for strong joints, and screws for extra strength.
Set up a workspace with good lighting, adequate bench space, and ventilation when you use finishes or adhesives.
Keep safety gear handy—goggles, gloves, and ear protection—to protect yourself from dust and noise.
These basics let you tackle simple projects confidently.
Basic Shop Safety + Tool Substitutes for Tiny Setups
Before you start any project, put on safety goggles and a dust mask and clamp your workpiece so it won’t move while cutting.
Double-check your measurements and cut lines to avoid mistakes and wasted wood.
If you’ve got a tiny setup, rely on a basic toolkit—hammer, screwdrivers, drill, and hand saw—and use a straightedge guide when you don’t have a miter saw.
Shop Safety Essentials
1 simple rule will keep your little shop safer than you might expect: always protect your eyes and ears, keep the space ventilated, and clear debris regularly so trips and dust exposure don’t become problems.
For shop safety essentials, wear safety glasses and ear protection whenever you use power tools; that prevents eye injuries and hearing damage.
Keep windows or a fan running to reduce dust and fumes, and sweep or vacuum scraps so cords and offcuts don’t become trip hazards.
Use a sturdy workbench with clamps to hold pieces securely, which makes cuts more accurate and safer.
In tiny setups, you can favor hand tools to cut noise and electrical risk, but don’t skip PPE or good ventilation.
Tool Substitutes Guide
When you’re working in a tiny shop, smart substitutes keep your projects moving without sacrificing safety, so always pair any tool swap with the right PPE and good ventilation.
For easy woodworking projects, wear goggles and gloves to block splinters and dust. Use a handsaw instead of a power saw for small boards or tight spaces; it gives control and reduces noise. Replace a power drill with a hand drill for quieter, portable hole-making.
If you lack clamps, stabilize glued joints with heavy books or weights to maintain alignment while drying. For intricate cuts in thinner stock, swap a jigsaw for a coping saw to gain precision without bulky tools.
These simple swaps help you complete beginner projects safely and efficiently.
10 Easy Woodworking Projects With Simple Cuts
You’ll find plenty of quick, beginner-friendly builds—like tabletop frames, book racks, and boot racks—that use only a few straight cuts and simple assembly.
Use basic tools (a miter saw or handsaw, drill, and measuring tools) and focus on measuring, cutting, and fastening techniques to build confidence.
Follow step-by-step plans and apply tips for safe cutting—secure the workpiece, wear eye protection, and cut slowly—to keep each project easy and injury-free.
Quick Beginner-Friendly Builds
Because simple straight cuts get you far, quick beginner-friendly builds are perfect for learning woodworking basics without overwhelming your toolset.
You’ll tackle Easy, DIY wood projects like a pencil caddy, birdhouse, boot rack, or tabletop picture frame that need only a few straight cuts and basic joinery. Follow plans with step-by-step instructions so you can measure, cut, and assemble with confidence.
Use readily available lumber and simple hardware to keep costs low and progress fast. These projects teach layout, safe cutting habits, and glue-and-screw assembly while delivering functional pieces for your home.
Start small, finish quickly, and build skills—each successful project prepares you for slightly more complex work without intimidating tools or techniques.
Basic Tools And Techniques
After you’ve completed a few quick, straight-cut projects, it’s time to focus on the basic tools and techniques that make those builds repeatable and safe. Familiarize yourself with basic tools like a miter saw, drill, and measuring tape; they give you precise cuts and accurate measurements.
Start with softwoods such as pine or cedar—they cut cleanly and forgive beginner mistakes. Learn core techniques: measuring, marking, cutting to length, and simple joint making so your assemblies fit snugly. Use pre-made plans to simplify the cutting list and clarify steps before you begin.
Wear goggles and gloves and practice proper tool handling to reduce risk. With the right tools, materials, and habits, you’ll build confidently and improve quickly.
Tips For Safe Cutting
Always wear safety goggles and a dust mask, and keep a sharp blade in your saw—these simple precautions cut the chance of injury and give cleaner, more predictable results.
Measure and mark cuts clearly with a pencil so you hit your lines the first time. Clamp the wood securely in a vise or with clamps to stop movement and reduce tear-out. Know your tool: whether you use a circular saw or a scroll saw, read the manual and learn its limits before starting.
Replace dull blades promptly to lower kickback risk and improve finish. Work at a steady pace, keep hands away from the blade path, and double-check measurements. These steps keep your projects safe and satisfying.
Quick Builds for Home: Desk Organizer, Peg Rail, Shelf
Start with three quick builds—the desk organizer, peg rail, and magazine shelf—that you can finish in an afternoon to tidy your home and build basic woodworking skills.
For a desk organizer, try a simple beginner project: cut a few panels, glue or screw them into compartments, and add a small planter slot to bring greenery to your workspace.
For a DIY peg rail, choose the length and material, drill evenly spaced holes for pegs or use turned dowels, mount it at eye level, and hang coats or bags to clear clutter.
For a magazine shelf, use round dowel rods and a simple frame to create a minimalist holder that keeps reading material neat.
Each plan uses minimal cuts and straightforward assembly, so you’ll gain confidence quickly.
Small Gift Projects: Carved Bowl, Bag Charms, Serving Board
Once you’ve knocked out a few quick home builds, try making small gift projects that sharpen skills while producing something personal and useful.
Start with a carved wooden bowl—select a soft hardwood, trace a simple shape, remove material with a gouge, sand smooth, and finish with food-safe oil; it’s great for jewelry or office bits.
For wooden bag charms, cut small shapes, sand edges, drill a hole, and attach hardware; you can paint or wood-burn initials for customization.
Refurbish a serving board found cheap: strip old finish, sand to reveal grain, round edges, and apply a durable oil finish so it’s food-safe.
Each project teaches finishing, shaping, and personalization while yielding thoughtful, usable gifts.
Kid-Friendly Projects to Build Together in an Afternoon
Pick one or two simple projects you can finish in an afternoon and you’ll give kids a hands-on way to learn measurement, safe tool use, and creative problem-solving.
Choose kid-friendly projects like a DIY Wooden Toy Car or Pencil Caddy to teach basic cuts, sanding, and painting. Use templates for quick layout and let kids help mark and clamp pieces so they practice measuring and following lines.
For slightly bigger tasks, a Birdhouse adds lessons in angles and structure while keeping steps short. Try imaginative builds—Monster Truck or Video Game Control Holster—to encourage design thinking.
Finish with useful items like a Wooden Spatula or Door Stop so kids see practical results. Supervise, set clear safety rules, and celebrate each finished piece together.
DIY Kids Picnic Table: Materials, Cut List, Assembly
You’ll gather pine 2x4s and a few basic supplies, then cut parts to the exact measurements from the provided cut list so everything fits together cleanly.
Use a miter saw for accurate cuts and round sharp edges with a router or sandpaper for kid-safe seating.
Follow the step-by-step assembly tips to finish the table in about two hours, with dimensions sized for Grade 4 children.
Materials And Lumber Sizes
Materials matter: for a kids’ picnic table you’ll usually work with affordable pine 2×4s cut to a simple list of tabletop planks, bench slats, legs, and supports, so gather everything and confirm dimensions before you start.
You’ll pick straight, dry boards and check for knots or warping. Use common tools—a miter saw for cuts and a drill for fastening. Round edges with a router or sandpaper for safety.
- Lumber: pine 2×4s—easy to cut and inexpensive.
- Fasteners: exterior screws or wood screws plus glue.
- Tools: saw, drill, sander/router, measuring tape.
- Safety: sand all edges; wear eye and hearing protection.
Keep materials organized and prepped to make assembly smooth and stress-free.
Cut List And Measurements
Before you cut anything, lay out the full cut list on paper so you know exactly how many pine 2×4s you’ll need and the precise lengths for each part.
For a kids picnic table, list two long table-top boards (e.g., 48″ each), four legs (cut to 18″), and cross supports: two short aprons at 24″ and two long stretchers at 40″. Include seat slats or supports if your design has them.
Mark quantity, length, and purpose beside each line so you won’t mix pieces during assembly. After cutting, round edges with a router or sandpaper for safety.
Double-check measurements before cutting; a correct cut list saves time, material, and keeps the project safe and sturdy for kids.
Assembly Steps And Tips
Start by organizing your workspace and laying out all cut pieces so you can assemble the picnic table methodically; having parts arranged by function (tabletop, benches, legs, stretchers) cuts confusion and speeds the process.
Follow these assembly steps to build confidently and safely:
- Clamp tabletop planks, apply wood glue, then screw them together for a tight, stable surface.
- Sand edges and surfaces to remove splinters and guarantee a smooth finish before fastening benches and legs.
- Attach legs and stretchers with screws and wood glue, checking that each leg is square and level as you go.
- Mount benches, confirm everything is plumb and firm, then give a final sanding and wipe before finishing.
Finish Like a Pro: Sanding, Edges, and Simple Finishes
Sanding properly makes the difference between a backyard project and something you’d proudly display, so work through grits from about 80 up to 220, always sanding with the grain to remove tool marks and avoid new scratches.
Start coarse to level surfaces, then progress to finer grits for smoothness. Round over sharp edges with a router or by hand with sandpaper to prevent splinters and give a professional touch—gentle curves look and feel better.
Choose a finish—oil, varnish, or polyurethane—based on sheen and protection needs. Always test the finish on scrap wood to confirm color and interaction.
Apply thin, even coats, lightly sanding between coats with fine grit, and wipe dust before each application for a clean, lasting result.
Fix Common Beginner Mistakes (Splits, Miscuts, Gaps)
While mistakes are normal when you’re learning, you can prevent most splits, miscues, and gaps by working deliberately and checking your setup at every step.
You’ll save time and avoid frustration if you adopt a few consistent habits.
- Pre-drill holes with a bit slightly smaller than the screw to prevent splits and reduce wood stress.
- Keep your saw blade sharp and aligned; clamp the workpiece to stop miscues while cutting.
- Measure twice, mark once, and use a square to maintain right angles and minimize gaps in joints.
- Apply wood glue to fill minor gaps and clamp pieces until the glue fully cures for stronger joints.
Check measurements regularly and correct problems early to build confidence and better results.
How to Scale Skills From Simple Cuts to Furniture
Fixing splits, miscues, and gaps builds habits you’ll rely on as projects get bigger, so keep checking setups and measuring carefully as you move up in complexity. Start with easy wood projects like a pencil caddy or birdhouse to learn basic cuts, then add cutting boards and organizers to study material behavior. Use project plans and videos to learn joinery before attempting a DIY desk or farmhouse bench. Challenge yourself with multi-skill builds—a workshop utility cart mixes cutting, joinery, and design decisions. Track progress, tools needed, and skills practiced in the table below to stay organized and confident.
| Project Level | Skills Focus | Next Step |
|---|---|---|
| Beginner | Basic cuts, glue | Cutting board |
| Intermediate | Joinery, measuring | Desk |
| Advanced | Multi-piece assembly | Bench/Cart |
Frequently Asked Questions
Can I Sell Items I Make From Beginner Plans Online?
Yes—you can sell items you make from beginner plans online, as long as you respect copyrights and any commercial restrictions. Check plan licenses, credit creators when required, and verify your work meets safety and quality standards before selling.
How Do I Source Affordable Wood Sustainably?
Start by sketching a supply chain map to visualize sources. You’ll buy reclaimed or FSC-certified wood, visit local mills, check salvage yards and Craigslist, compare prices, and prioritize sustainably certified, kiln-dried pieces for consistent, affordable results.
What Household Items Can Replace Clamps Temporarily?
You can use heavy books, ratchet straps, bungee cords, rubber-banded joists, C-clamp substitutes like vice-grip pliers, or even stacked bricks and webbing; position, protect surfaces with scrap wood, and tighten gradually to hold pieces securely.
Are There Community Spaces Offering Beginner Tool Access?
Like finding a toolbox hidden like treasure, yes—you can join makerspaces, community workshops, library tool-lending programs, and vocational school open labs. You’ll get beginner-friendly tools, guidance, safety training, and supportive peers to help you learn.
How Do I Photograph Projects for Social Media Sales?
Use natural light, steady your phone or camera, and shoot multiple angles including close-ups of details. Clean backgrounds, consistent styling, and clear captions help. Edit minimally, add size reference, and post regularly to build sales.
Conclusion
You’re standing at your finished shelf, fingers dusted with sawdust, and you can already picture a row of projects growing across your workshop like a small forest. Start with simple cuts and steady habits; each small build teaches you how wood behaves, how tools respond, and how to fix hiccups without panic. Keep practicing, protect your hands, and finish pieces cleanly—soon you’ll move from tiny gifts to real furniture with quiet confidence.