
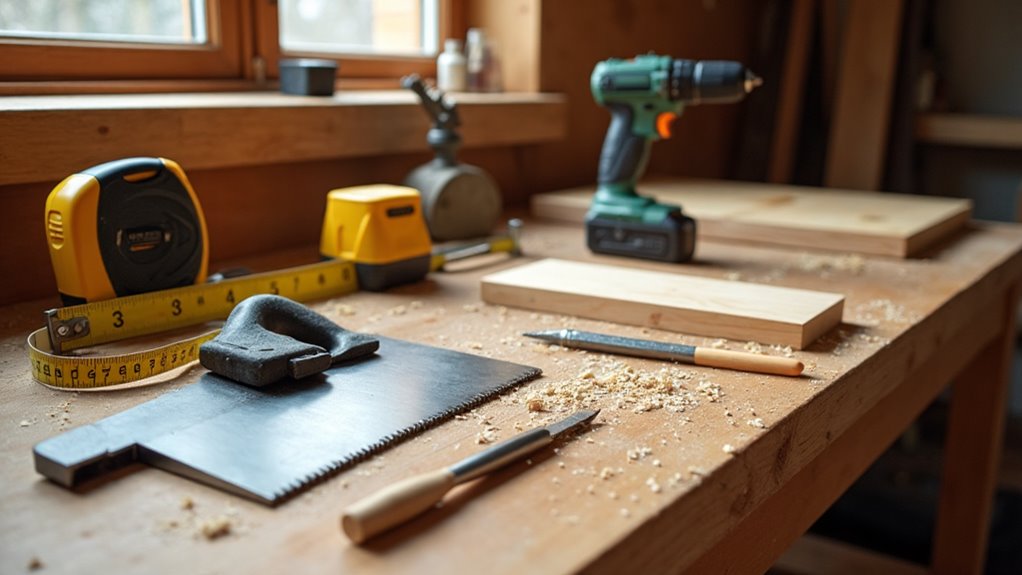
You should start with a tight, practical set: a 25-ft tape measure, carpenter’s square, clamps, an 18‑volt cordless drill, a quality circular saw, and a random orbital sander. Add basic chisels, a block plane, PVA glue, sandpaper (80–400 grit), safety glasses, earmuffs, and a dust mask. Buy used to save money but inspect for rust and function. Start small to learn skills and avoid wasted tools, and more guidance is available if you want it.
Key Takeaways
- Start with a compact toolkit: tape measure, carpenter’s square, set of clamps, reliable cordless drill, and circular saw.
- Prioritize accuracy: buy a 25-foot tape, combination square, marking knife, and a marking gauge for repeatable cuts.
- Choose versatile power tools: 18-volt drill, circular saw, jigsaw, and random orbital sander to cover most beginner projects.
- Focus spending on quality over quantity: budget $300–$500 for durable core tools and add specialty tools as needs arise.
- Always include safety and finishing supplies: safety glasses, dust mask, ear protection, PVA glue, and sandpaper (80–400 grit).
What to Buy First: A Minimal Starter Toolkit
When you’re getting started, stick to a minimal toolkit that covers measuring, cutting, fastening, clamping, and smoothing: a reliable tape measure, a carpenter’s square, a set of clamps, an 18-volt cordless drill, a circular saw with a carbide-tipped combination blade, and a random orbital sander will let you tackle most beginner projects without overspending.
You’ll want those essential woodworking tools because they cover the basics: accurate measurements, square layouts, secure joints, powered cutting, and finish sanding.
Choose an 18-volt drill for balanced power and portability, a quality circular saw for straight cuts in sheet goods, and clamps sized to your projects.
This focused selection of beginner woodworking tools keeps costs down and helps you build skill efficiently before expanding.
Why Start Small: Avoid Wasted Tools and Expense
Although it’s tempting to buy every tool you see, starting small keeps your costs down and your learning curve manageable. You’ll avoid clutter and wasted purchases by focusing on essential tools that cover many tasks.
Pick versatile items—a circular saw, drill, and sander—that let you tackle most beginner projects and build skills. Buy quality for tools you’ll use often so they last, but don’t hoard specialty gear you won’t need yet.
As you complete projects, add tools driven by real needs; that keeps your workspace efficient and your spending sensible. This approach helps beginner woodworkers gain confidence and finish projects without getting buried under unused equipment.
- Circular saw for cutting boards
- Cordless drill for fastening
- Random orbital sander for smooth finishes
- Combination square for layout
- Handsaw and chisels for detail
Set Priorities and a Beginner Budget
Start by listing the essential, versatile tools you’ll use on most projects—tape measure, circular saw, drill, a good carpenter’s square and clamps.
Aim to spend about $300–$500 initially, prioritizing quality hand tools and combo kits or used finds over a pile of inexpensive power tools.
Buy incrementally and avoid purchases for hypothetical projects so your budget stretches as your skills grow.
Budgeting For Essential Tools
If you want to get woodworking off the ground without blowing your budget, set priorities around a short list of foundational hand tools (tape measure, carpenter’s square, clamps) and two versatile power tools—a circular saw and a drill/driver—then aim for a beginner budget in the $200–$500 range.
You’ll focus your budgeting on tools every beginner woodworker needs first, buy quality over quantity, and avoid impulse purchases. Hunt used tools or clearance to stretch funds.
Make a list tied to your first projects so each purchase has purpose.
- Tape measure, carpenter’s square, basic clamp set
- Cordless drill/driver with battery
- Circular saw (or track-friendly alternative)
- Basic safety gear (glasses, ear protection)
- Small selection of hand planes/chisels
Prioritizing Versatility Over Quantity
You’ve already mapped out the must-haves and a beginner budget; now focus on buying fewer tools that do more. Choose versatile power tools—a circular saw and a reliable power drill or drill/driver combo—before collecting single-purpose gadgets. These will handle ripping, crosscutting, drilling, and driving for most starter projects.
Pair them with a random orbital sander and core hand tools: tape measure, carpenter’s square, and clamps. Spend more on quality where accuracy and durability matter; cheap junk wastes money and time.
Plan purchases around the projects you actually want to build so each tool earns its keep. Buy gradually, prioritize multipurpose items, and avoid impulse buys that clutter your shop and undermine your beginner budget.
Measuring Tools Every Beginner Woodworker Needs
Everyone needs a few dependable measuring tools to get accurate, repeatable cuts and tight-fitting joints. You’ll start with a 25-foot tape measure for general layout—measure twice, cut once—and a combination or carpenter’s square to verify 90° and transfer measurements.
Add a marking gauge to scribe consistent lines from edges for repeatable joinery. A marking knife gives a fine, defined line that resists wandering when you cut. Finally, calipers let you check material thickness and fit parts precisely during assembly.
Buy decent quality for durability; cheap tools give inconsistent results. These measuring tools form the backbone of reliable layout and fitting, so prioritize accuracy over gadget count as you build skills.
- 25-foot tape measure
- Combination/carpenter’s square
- marking gauge
- Marking knife
- Calipers
Marking Tools That Improve Accuracy
To get accurate cuts you’ll rely on precise layout tools like marking knives and gauges that give crisp, tear-free lines.
Use measuring and checking tools — combination and try squares, bevels, and reliable tape measures — to confirm angles and distances before you cut.
For consistent joinery, mark from the edge with a marking gauge or knife rather than relying on a pencil line.
Precise Layout Tools
A few simple marking tools will dramatically improve the accuracy of your cuts and joints, so get comfortable using a marking knife, combination square, marking gauge, tape measure, and bevel gauge.
You’ll rely on clean layout lines more than guesswork: the marking knife scores fibers for crisp saw starts, while the combination square lets you mark and check 90° and 45° reliably. A marking gauge keeps marks parallel to edges for consistent thickness.
Use a steel tape measure for durable, repeatable lengths. A bevel gauge transfers angles from a template or existing piece so complex joints fit first time.
- Marking knife: crisp, tear-free layout lines
- Combination square: measure and square up cuts
- Marking gauge: parallel edge lines
- Tape measure: durable length checks
- Bevel gauge: angle transfer and setup
Measuring And Checking
When you measure and check carefully, you’ll avoid wasted material and frustrating rework; a retractable steel tape, a good carpenter’s square, and a sharp marking knife are the core tools that make that possible.
Use the tape for all primary measuring, follow “measure twice, cut once,” and lock the blade before marking. The carpenter’s square—combination or speed—lets you verify 90° and guide straight cuts.
Prefer a marking knife over a pencil for layout lines; its fine cut line prevents overcutting. A marking gauge keeps parallel lines consistent for joinery, while a bevel gauge or protractor handles non‑standard angles.
Check layout against reference faces and re-measure critical dimensions before cutting. These simple tools raise your accuracy immediately.
Edge Marking Methods
You’ve already seen how accurate measuring and checking saves time; now focus on how you put those measurements onto the wood.
Edge marking matters: a marking knife gives exact, thin layout lines that guide saws and chisels better than pencils, and marking gauges scribe consistent distances from an edge for repeatable joinery.
Use a combination square to transfer measurements and confirm squareness. Keep a high-quality mechanical pencil for fine detail and a carpenter’s pencil for rough stock.
After scribing, a sharp chisel can pare a crisp shoulder for perfect fits.
- Scribe a line with a marking knife before sawing.
- Set marking gauges for tenons and shoulders.
- Verify 90° with a combination square.
- Use mechanical pencil for fine work.
- Clean edges with a sharp chisel.
Essential Hand Tools: Chisels, Planes, Mallet, Saws
Tools like chisels, planes, a mallet, and saws form the backbone of beginner woodworking, giving you the control and precision needed for clean joinery and smooth surfaces.
Start with a set of chisels in varying widths so you can pare shoulders, clean mortises, and fine-tune joints. Pair those with a jack plane (No. 5) for flattening and a block plane (60½) for trimming end grain and small faces.
Use a wooden or rubber mallet to strike chisels without mushrooming their steel, which keeps edges true. For cutting stock, keep hand saws for rip and crosscut work; they’re versatile for both rough breakdown and accurate finish cuts.
Together they teach control and fundamental techniques.
Which Handsaw to Buy First: Ryoba, Backsaw, or Crosscut?
Pick the first handsaw based on the cuts you’ll make most: a Ryoba gives you two-edge versatility for both rip and crosscuts, a backsaw gives you the reinforced spine and control needed for precise joinery, and a crosscut is optimized for quick, clean cuts across the grain.
Check TPI—higher (10–12) for smoother finish, lower (4–6) for faster work in thick stock.
For most beginners, a backsaw or Ryoba will cover the widest range of tasks while you learn control.
Ryoba: Two-Edge Versatility
If you want one saw that covers both rip and crosscuts, the ryoba is a smart first choice: its double-edged, thin blade combines rip teeth on one side and crosscut teeth on the other, letting you switch tasks without changing tools, while the low-friction design and wooden handle give you efficient, controlled cuts across a range of woods.
You’ll save space and money while getting versatile performance. The ryoba’s dual teeth and thin plate help you make clean, precise cuts in both ripping and crosscutting. Its balance and grip reduce fatigue, so you can work longer and maintain control.
For starting hand-tool work, it’s a practical, cost-effective saw to learn on.
- Double-edged blade for rip and crosscuts
- Thin blade reduces friction and binding
- Rip side for fast stock removal
- Crosscut side for clean end grain
- Wooden handle for comfort and control
Backsaw: Joinery Precision
When you need tight-fitting joints and repeatable accuracy, a backsaw is the right first saw to reach for: its reinforced spine keeps the blade from flexing so you can cut straight lines for dovetails, tenons, and miters with confidence.
You’ll get controlled, precise cuts that matter for joinery work; backsaws are made for small, accurate strokes rather than fast ripping. Choose between dovetail and miter styles and pick tooth count based on your projects: higher TPI for fine, delicate cuts, lower TPI for quicker work in thicker stock.
For a beginner, a well-made backsaw teaches cutting discipline and improves joint fit, making it a more immediately useful purchase than a general-purpose handsaw or a crosscut-focused option.
Crosscut: Quick Rip/Crosscuts
Crosscutting is about speed and clean ends, so you’ll want a saw that slices across the grain without tearing the fibers out. For straightforward board-to-length work a dedicated crosscut saw is best: tooth geometry and set optimize clean, fast cuts.
A Ryoba gives you versatility—rip on one edge, crosscut on the other—so it’s useful if you need both. A backsaw won’t be your go-to for long crosscuts, but it delivers the precision you need for joinery.
Pick a saw around 10–12 PPI for general-purpose projects. Consider the wood thickness and the types of saws you’ll use most before buying.
- Fast, clean ends on boards and panels
- Dual-purpose Ryoba for flexibility
- Backsaw for fine joinery
- 10–12 PPI recommended
- Match saw to project material
Five Handheld Power Tools That Cover Most Projects
Five handheld power tools will let you tackle most woodworking projects with speed and accuracy: a cordless drill for holes and screws, a circular saw for straight cuts, a jigsaw for curves and intricate shapes, a random orbital sander for smooth finishes, and a trim router for decorative edges and joinery.
Start with an 18-volt cordless drill — it balances power and runtime for drilling and driving. Choose a circular saw with a carbide-tipped combination blade for clean crosscuts and rip cuts. Use a jigsaw when you need tight curves or detailed cutouts.
Buy a random orbital sander to remove tool marks and prep surfaces; it minimizes swirl marks. A compact trim router adds profiles and basic joinery without high cost.
Circular Saw vs. Track Saw for Breaking Down Stock
When breaking down sheet goods, you’ll choose between the portability and lower cost of a circular saw and the superior accuracy and straightness a track saw delivers.
Consider setup and portability—circular saws are quick to grab and move, while track systems take more setup but hold the line for cleaner edges and less tear-out.
Factor cost and versatility: a circular saw does many jobs on a budget, but a track saw pays off if you need repeatable, professional results.
Accuracy And Straightness
Although both tools will let you break down sheet goods, a circular saw gives you portability and good-enough straight cuts for general work, while a track saw uses a guide rail and anti-splinter features to deliver higher accuracy and cleaner edges for precise projects.
You’ll choose based on the finish and tolerance you need. For rough framing or quick panels, a circular saw with a straightedge is fast and economical.
For cabinetry, veneers, or final parts, a track saw’s guided cut and adjustable depth reduce tearout and produce repeatable, crisp edges.
Both break down stock, but the track saw raises the bar for straightness and edge quality when accuracy matters.
- Circular saw with a straightedge for quick, affordable cuts
- Track saw plus rail for guided precision
- Anti-splinter edges on track saws
- Adjustable depth for controlled cuts
- Use circular for rough, track for finish
Setup And Portability
A circular saw gets you cutting fast and on the move, so if you need to break down full sheets at a job site or move pieces between workstations you’ll appreciate its light weight and simple setup; a track saw, by contrast, demands a bit more prep — laying out and aligning the rail — but gives you cleaner, straighter cuts that reduce finish work once it’s in place.
You’ll choose based on how much handling and setup you can tolerate. Circular saws win when you need speed, portability, and simple ripping or crosscuts with minimal gear.
Track saws win when you need repeatable, low-tear cuts and can justify the added setup time and rail to achieve professional edges on larger or delicate panels.
Cost And Versatility
If you’re watching your budget and need a single tool to handle ripping and crosscutting sheet goods, a circular saw gives you the most bang for your buck—it’s cheaper, versatile, and can tackle most breakdown tasks with a good blade and a straightedge guide.
You’ll get a cost-effective, versatile tool that covers rip and cross cuts, handles various materials, and stays useful as your skills grow. A track saw buys accuracy and cleaner edges but costs more and targets sheet work. Use a guide with your circular saw to close the gap.
Choose based on project needs: budget and broad capability, or higher precision for frequent cabinet‑grade work.
- Low initial cost and broad capability
- Rip and crosscut with one tool
- Works on plywood, MDF, solid wood
- Improve accuracy with a straightedge
- Track saw for repeat, cleaner cuts
Why a Cordless Drill/Driver Combo Is Essential
Think of a cordless drill/driver combo as your most useful starter tool — it lets you drill clean holes and drive screws with speed and control, so you can tackle most woodworking tasks without switching between tools.
You’ll get versatility: drilling, driving, and basic fastening for a wide range of woodworking projects. An 18-volt model gives ample power while keeping mobility; no cord means you can work in tight spots or outdoors.
Use the multiple speed settings and adjustable clutch to set torque precisely and avoid overdriving screws. Modern ergonomic, lightweight designs cut fatigue, so you can work longer as you build skill.
Buying a combo also saves money and space versus separate tools, making it a practical first purchase.
Sanders and Routers: When to Buy Which
Wondering which to buy first? Start with a random orbital sander. It’s cheap (often under $100), easy to handle, and instantly improves surface quality. You’ll use it on nearly every project.
Buy a router later as your projects demand shaping edges, joinery, or decorative profiles. Routers add capability but require skill and setup. Prioritize impact: sanding now, routing when ready.
- You’ll smooth rough boards and prep finishes quickly with a random orbital sander.
- Sanding fixes fit issues and prevents finish problems before assembly.
- A router lets you add profiles, rabbets, and precise joinery later.
- Expect a learning curve and accessories when you move to routers.
- Plan purchases: sanders for immediate gains, routers for advanced detailing.
Clamps, Workbench, and Jigs That Boost Small-Shop Productivity
Three essentials will make your small shop far more productive: clamps, a sturdy workbench, and a handful of jigs.
You need clamps to hold workpieces securely during cutting and assembly; keep at least four quality clamps (F-style, bar, or pipe) so you can manage multiple parts without losing accuracy.
Keep at least four quality clamps (F-style, bar, or pipe) to secure parts and maintain accuracy during cutting and assembly
Your workbench is the backbone—solid top, sturdy legs, and integrated clamping options give you a stable platform for layout, assembly, and sanding.
Jigs boost accuracy and speed: simple featherboards, sleds, and stop-block jigs let you repeat cuts and create clean joints with less measuring.
Invest in a few trusted jigs tailored to your tools to reduce errors and save time. Together, these items multiply productivity in a small shop.
Stationary Tools to Consider Later: Table Saw, Planer, Jointer
When you’re ready to move beyond hand tools and small benchtop gear, three stationary machines—the table saw, planer, and jointer—will transform how quickly and accurately you can prepare and cut stock.
You don’t need them at the start, but each fills a distinct role: the table saw for precise ripping and crosscuts (with sleds and jigs), the jointer for flattening a face and squaring an edge, and the planer for thicknessing to uniform dimensions.
Invest when repeatability and speed matter. Learn safe operation, proper setup, and routine maintenance before you buy.
- Table saw with a ripping blade and crosscut sled for repeatable cuts
- Jointer to flatten faces and establish a reference edge
- Planer to bring boards to consistent thickness
- Dust collection and push tools for safety
- Space and outfeed support planning
Basic Glues, Finishes, and Finishing Supplies to Keep on Hand
A small bottle of PVA wood glue, a selection of sandpaper, and a couple of brushes will cover most finishing tasks you’ll encounter as a beginner: PVA gives consistently strong joints, sandpaper (80–400 grit) preps and smooths surfaces, and brushes or foam applicators lay down polyurethanes and varnishes without streaking.
Keep 120–250ml PVA, a glue brush or small roller, and a squeeze bottle for precision. Stock sandpaper sheets in 80, 120, 220, 320, 400 grit and a sanding block.
For types of finishes, have one oil-based and one water-based polyurethane plus a traditional varnish to compare durability and look on scrap wood. Use rags for wiping and clean brushes promptly per product instructions. Test finishes on scraps and work in ventilated spaces.
Safety Gear You Must Use From Day One
Since you’ll be working with power tools, dust, and sharp edges from day one, you should outfit yourself with basic safety gear that you actually wear: safety glasses to protect your eyes, hearing protection (earmuffs or plugs) to prevent noise-induced hearing loss, a dust mask or respirator for wood dust and VOCs, fitted gloves for grip and abrasion protection, and a stocked first-aid kit for minor injuries.
Wear the gear every session; it’s quick and non-negotiable. Pick comfortable, properly rated items: impact-rated safety glasses, NRR-rated earmuffs or disposable plugs, N95 or P100 respirators depending on finishes, snug gloves that don’t impede dexterity, and a compact first-aid kit within reach.
- Impact-rated safety glasses
- NRR-rated earmuffs or disposable plugs
- N95/P100 dust mask or respirator
- Fitted, cut-resistant gloves
- Compact, stocked first-aid kit
Buy Used Tools Safely: What to Inspect and Test
Start by giving the tool a careful once-over so you don’t end up paying for someone else’s problems. Inspect and test every visible surface for rust, cracks, dents, or worn parts that affect fit or safety.
Operate moving parts—blades, bearings, switches, motors—and listen for grinding, stiffness, or electrical issues. Confirm all accessories and guards are present; missing pieces mean extra cost or unsafe operation.
Ask the seller about usage history and maintenance; that context helps you judge remaining life. Research the specific brand and model online to learn common failures and fair market prices.
If anything feels wrong or the seller won’t let you test it, walk away. When you buy used tools wisely, you save money without trading safety or performance.
Starter Kit Checklist: Tools for Your First Five Projects
After you’ve learned how to evaluate used tools, it’s time to assemble a practical starter kit that will let you complete your first five projects confidently.
You won’t need every specialty tool—choose versatile, reliable items that cover cutting, drilling, sanding, measuring, and clamping. If you later add a table saw for rip cuts, start with a circular saw to handle plywood and straight cuts now.
Pair that with a good cordless drill (18-volt recommended) for holes and screws, and a random orbital sander to finish surfaces. Get solid clamps and a steel tape measure to keep accuracy and safety.
- Circular saw
- Cordless drill (18V)
- Random orbital sander
- Set of clamps (≥4 types)
- Retractable steel tape measure
Frequently Asked Questions
What Basic Tools Do I Need to Start Woodworking?
You need a tape measure, carpenter’s square, clamps, cordless drill, and circular saw to start; they’ll let you measure, mark, hold, drill, and cut accurately so you can tackle basic projects safely and efficiently.
In What Order Should I Buy Woodworking Tools?
Start with tape measure, square, clamps, then get a cordless drill and circular saw, add an orbital sander, later jigsaw and trim router, and finally buy a table saw when you’re ready for bigger, more precise projects.
What 12 Tools Does Every Furniture Maker Need?
You need twelve essentials: tape measure, carpenter’s square, combination square, clamps, cordless drill, drill bits, chisel set, hand saw, circular saw, random orbital sander, router, and bench plane—buy in that practical priority for furniture work.
What Does Every Woodworker Need?
You need accurate measuring tools, a reliable square, clamps, a cordless drill, and a sander, plus sharp hand tools, quality blades, safety gear, and basic supplies; you’ll work safer, faster, and produce cleaner, repeatable results.
Conclusion
Start small and buy what gets you building: a good tape, square, pencil, hand saw, chisels, clamps, glue, sandpaper, finish, and basic safety gear. I once fixed a wobbly stool with just a clamp and glue—like patching a leaking roof with one good shingle—showing focus beats excess. With a $200 starter budget you’ll complete five basic projects, learn skills, and avoid wasted tools. Stick to priorities, practice, then expand.