
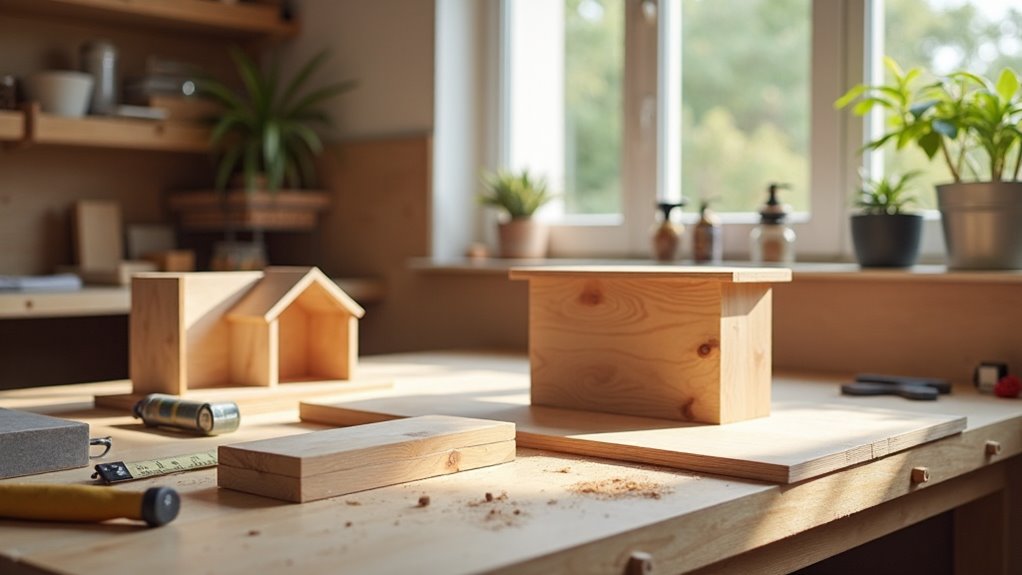
You can knock out several useful beginner projects this weekend using basic tools, modest lumber, and straightforward joinery. Pick something that fits your time and skill—an easy timber bench, modern birdhouse, tiered plant stand, or folding chair are all doable. Gather a circular saw, drill, tape, square, screws, glue, and PPE, keep cuts square, dry-fit pieces, and finish with quick sanding and sealant. Keep scope small and you’ll learn fast; more practical plans and tips follow.
Key Takeaways
- Choose short, low-complexity builds like a birdhouse, timber bench, or tiered plant stand you can finish in a few hours to a day.
- Match project choice to your available time, skill level, and budget to avoid starting something you can’t complete this weekend.
- Gather essential tools (circular saw, drill, measuring tape, square, sandpaper) and materials (lumber, screws, glue) before you start.
- Follow simple joinery, accurate measuring, and dry-fitting steps to ensure parts align and assembly goes quickly.
- Prioritize safety and fast finishing: use PPE, keep a tidy workspace, sand progressively, and apply quick-drying sealant or paint.
Weekend Projects: Quick Overview and Time Tags
If you want quick wins, pick a project you can finish in a morning or a day: the Easy Timber Bench and Stone-Top Patio Table each take just a few hours, the Modern-Style Birdhouse and Tiered Plant Stand can be done in a single morning, and the Simple Folding Chair is a one-day build—perfect for practicing core skills without tying up your weekend.
You’ll choose based on time and skill: the bench and patio table suit people comfortable with power tools and straightforward joinery. The birdhouse and plant stand teach layout, cutting, and assembly quickly. The folding chair walks you through basic hinges and fitting.
These woodworking projects are simple projects that build confidence fast and leave you with usable results.
How to Pick a Weekend Woodworking Project (Time, Budget, Skill)
Start by matching the project to the time you have—pick a Modern-Style Birdhouse or Simple Folding Chair for a weekend, or a Wood Desk Organizer if you’ve only got a few hours.
Be realistic about your skill and scope: choose beginner-friendly builds like Wooden Toy Cars or DIY Wall Hooks that use basic tools and boost confidence.
Finally, set a budget and pick materials that fit it—go for cost-effective options like Refurbished Serving Boards or Wooden Bag Charms and add a personal touch with reversible hangings or custom finishes.
Time, Skill, And Scope
Between choosing a project and finishing it, you need to match time, skill, and scope to your weekend reality—pick something that fits the hours you have, the tools and techniques you already know, and a budget you won’t regret.
Be realistic about time: a Modern‑Style Birdhouse can fill a Saturday morning; an Easy Timber Bench often needs extra stain time. Honest skill assessment prevents frustration—start with DIY Wall Hooks or Wooden Bag Charms if you’re into basic woodworking.
Scope matters: Campfire Benches and DIY Peg Rails give quick wins and confidence. Prefer projects using common woodworking tools and accessible materials so you won’t stall hunting parts.
Pick one clear goal, plan steps, and limit additions; finishability beats ambition on a weekend.
Budget And Material Choices
A few deliberate choices about budget and materials will keep your weekend project realistic and finishable. Start by setting a firm budget: decide what you’ll spend on lumber, hardware, and finish before shopping.
Pick projects whose material needs match that budget—DIY cutting boards can be low-cost and use offcuts, while a solid wood bench will need more investment. Match materials to skill and tools: plywood panels suit simple cabinets or birdhouses; solid wood makes durable furniture but requires better tools and joinery.
Favor projects with step-by-step plans so you don’t waste materials. Finally, prioritize function and appearance within your budget—choose a project that delivers practical use and visual payoff without exceeding time or cost limits.
Weekend Woodworking: Tools and Materials to Gather
Before you start your weekend build, gather a few essential tools—think table saw, drill, and a belt sander—so cuts and shaping go smoothly.
Stock basic materials like lumber, screws, wood glue, and sandpaper, and keep a tape, square, and level handy for accurate work.
Don’t forget safety gear (goggles, gloves, dust mask) and a ventilated, organized workspace to assemble projects cleanly and safely.
Essential Tools To Have
Start with five core tools you’ll use on nearly every project: a circular saw, a drill, measuring tape, square, and sandpaper — they’ll cover cutting, fastening, measuring, squaring, and finishing tasks without cluttering your bench.
Choose a good one for the circular saw; power and blade quality matter when working with wood.
Add safety gear: safety glasses, work gloves, and a dust mask — use them every session.
Keep clamps and a basic chisel set nearby for holding and detail work.
Set up a sturdy workbench and bright lighting to improve accuracy and speed.
You don’t need a huge collection to start; buy reliable, modest tools and the essentials will carry you through most beginner weekend projects.
Basic Materials Checklist
One clear checklist will keep your weekend build moving: stock plywood and 1x2s, a small box of wood screws in assorted lengths, wood glue, and sandpaper in medium and fine grits.
You’ll also want a circular saw, drill, measuring tape and level for accuracy. Buy a finish—stain or paint—to protect surfaces.
- Basic lumber and fasteners (plywood, 1x2s, assorted screws)
- Adhesives and abrasives (wood glue, sandpaper medium/fine)
- Tools for cutting and joining (circular saw, drill, tape, level)
- Finishing and extras (stain/paint, potting soil for planter builds)
Use these items to make simple projects: a wooden toy, a carved wooden keepsake, or a small plant stand.
Keep quantities modest; you’ll reduce waste and cost.
Safety Basics Every Weekend Woodworker Must Follow
Plan to protect yourself every time you step into the shop: wear safety goggles, hearing protection, and a dust mask; keep the floor and benches clear; and know your tools’ safety features and operating steps.
You’ll always use PPE and inspect it before work. Treat the miter saw and table saw as live hazards: check guards, blade condition, and fence alignment.
Clamp stock firmly; never hold cut pieces by hand. Keep hands well away from blades, and never reach over moving parts.
Maintain a tidy workspace so you won’t trip or misplace push sticks and wrenches. Read each tool’s manual and follow its startup/shutdown sequence.
If something binds or sounds wrong, stop, unplug, and correct the issue before continuing.
Easy Timber Bench : Time, Tools, Quick Build Plan
You can build the Easy Timber Bench in a single afternoon if you’ve used basic power tools before; the straightforward design and clear cuts keep the work fast and predictable.
You can assemble the Easy Timber Bench in an afternoon—simple cuts and clear steps make the build quick and reliable.
You’ll finish the frame and top in a few hours, then stain later if you want — staining takes a long time relative to the build. Use common tools and cut with a circular saw for straight, repeatable cuts.
- Materials: two 2x4s for legs, three 1x6s for top, screws, wood glue.
- Tools: circular saw, drill/driver, speed square, sander.
- Steps: measure, cut, assemble frame, attach top, sand.
- Tips: pre-drill, clamp, test fit, customize length or finish.
Modern-Style Birdhouse : Cuts, Assembly, Finish
Start by laying out and cutting all parts to exact dimensions: front, back, two sides, roof, and bottom, keeping lines straight and edges square for a clean, minimalist look.
Cut precisely, then dry-fit pieces to confirm alignment. Attach the sides to the back first, using pilot holes to prevent splitting; drive screws flush.
Add the bottom, then secure the front, making sure all edges are flush for a tight, sturdy box. Reinforce corners with small brackets if you want extra durability.
Sand all seams and exposed edges until smooth. Drill an appropriately sized entrance hole—about 1.5 inches for common species—centered and cleanly cut.
Finish with weather-resistant paint or sealant, applied evenly, and allow full cure before mounting outdoors.
Raised Planter : Simple Box Planter for Vegetables
After finishing a compact birdhouse, shift focus to a raised planter—a straightforward box that gives your vegetables better drainage, easier access, and a neater garden layout.
After the birdhouse, build a simple raised planter box for better drainage, easier access, and tidier beds.
You’ll cut simple boards, assemble a sturdy rectangle, and finish with basic sanding and a protective coat. It’s a fast, budget-friendly build that fits patios, porches, or backyards and suits beginners who want usable results.
- Choose rot-resistant wood and basic hardware.
- Cut four sides, a bottom (optional), and corner supports.
- Assemble with screws for strength; pre-drill to avoid splits.
- Line with landscape fabric, fill with quality soil, plant.
You’ll finish in a weekend, reduce bending while tending plants, and expand gardening options without complexity.
One-Day Folding Chair : Portable Seating Plan
You’ll need basic tools like a table saw and belt sander plus lumber and hardware—budget $20–$100 depending on wood.
Follow the step-by-step assembly to cut, sand, and hinge the parts so the chair folds and locks securely.
Check the built-in handle, weight, and folded dimensions to confirm it’s easy to carry and stores flat.
Tools And Materials Needed
Gather the right tools and materials before you cut: a table saw, belt sander, and drill with appropriate bits will handle the main work, while measuring tape and a square keep your cuts accurate and alignment true.
You’ll pick wood that’s strong but light—pine or poplar work well—and prepare fasteners and hardware before you start so you won’t stall.
- Table saw, belt sander, drill with bits
- Measuring tape, carpenter’s square, sandpaper
- Pine or poplar boards, wood glue, wood screws
- Hinges for folding action, optional stain/sealant
Lay out boards, check hardware fit, and verify you have enough screws and glue.
Keep finishes optional until after test-fitting; this section only covers tools and materials, not assembly.
Step-By-Step Assembly
Now that your tools, materials and hardware are staged and checked, let’s assemble the One-Day Folding Chair.
Lay out parts in build order: legs, seat slats, backrest, cross braces, hinge pins, and carrying-handle piece. Cut and sand parts to final dimensions, then dry-fit the frame to confirm alignment.
Attach front and rear legs with pivot bolts, maintain square with a simple jig, and secure cross braces with glue and screws.
Fasten seat slats to the front and rear rails, spacing them evenly.
Mount the backrest to the rear leg assembly, checking travel clearance so it folds cleanly.
Install the carrying handle in its notch.
Test movement and tighten hardware.
Finish with a light sanding and protective sealant; chair will be stable and ready in hours.
Portability And Storage
A compact folding design and the built-in carrying handle make this chair easy to move and stash between uses; you can fold it flat in seconds and slip it under a bench, into a closet, or stack several in a car trunk for outings.
You’ll finish the project in a day using basic tools like a table saw and belt sander. Materials run $20–$100 depending on wood choice, so you can tailor cost to durability and weight.
The handle and slim profile mean you’ll grab and go for picnics, extra dining seats, or camping. Consider these practical details:
- Fold-flat thickness fits under beds and benches.
- Carrying handle centers weight for balanced transport.
- Lightweight wood reduces load for long walks.
- Stackable design saves trunk and garage space.
Tiered Plant Stand : Quick Indoor/Outdoor Display
Build this tiered plant stand in a single morning using seven 8-foot 1x2s and a few basic tools; you’ll get a sturdy, multi-level display that works indoors or out.
You’ll cut the boards to length, assemble simple rectangular tiers, and connect them with vertical supports. The plan emphasizes straight cuts, square joints, and flush fasteners so the stand stays stable under multiple pots.
Its tiered layout gives each plant better light and air circulation, which supports healthier growth while maximizing display area in small spaces.
Suitable for sheltered outdoor spots and any room inside, the stand resists minor weathering if you seal it.
Beginners will appreciate the quick build time, minimal material list, and a finished piece that’s both functional and visually tidy.
Cornhole Boards : Weekend Game Set With Fold-Down Legs
If you enjoyed the quick, straightforward tiered plant stand, you’ll like how fast a cornhole set comes together using the same basic shop skills.
You’ll cut two plywood tops, build simple frames, and add fold-down legs that lock in place for play or tuck away for transport. Plans take only a few hours, and tools you already have will handle the work.
- Two standard plywood sheets for tops and backs
- Basic lumber for frames and 4 folding legs
- One router or hole saw for the target circles
- Paint, sealant, and optional graphics for customization
You’ll end up with durable, portable boards that fit tailgates and campsites, and you can personalize them quickly.
Campfire Bench : Sturdy Seating With Minimal Cuts
Two long boards, a few shorter supports, and basic hand tools are all you’ll need to make a sturdy campfire bench that takes a weekend and minimal cuts. You’ll cut two seat boards to length, rip simple legs from the shorter supports, and attach with screws or bolts for a rock-solid joint.
Keep joinery straightforward—butt joints reinforced with screws and glue work fine outdoors when you use exterior-grade fasteners and sealant. Size it to fit your space; a standard 16–18-inch seat height suits most adults. Finish with exterior stain, paint, or clear sealer to extend lifespan.
This project is family-friendly and fast: plan cuts, predrill holes to prevent splitting, and assemble on-site beside your fire pit or under trees.
Stone-Top Patio Table : Fast Polished Finish
You’ll gather affordable lumber, a few basic tools, and the tile or stone top that matches your space.
Next you’ll prepare and sand the wood to exacting dimensions so the frame fits the tile snugly and sits level.
Finally you’ll secure and seal the tile top for a fast, polished finish that holds up outdoors.
Materials And Tools
You’ll keep costs low by selecting economical plywood and surplus or clearance tiles; many builds stay under $50.
Focus on durability: waterproof sealant for wood and grout prevents weather damage. Gather these essentials so you can work efficiently and finish quickly.
- Plywood, tiles/stones, adhesive, grout
- Table saw, drill, tile cutter
- Fine-grit sandpaper, sealant
- Budget options and extras (spare tiles)
Preparing The Wood
Start by choosing clear, straight-grained wood free of knots or blemishes so your sanding and finish will look professional. Sand methodically: begin with 80 grit, move to 120, 180, then 220, removing scratches at each step so the surface is ultra-smooth. Wipe dust between grits. Apply a wood conditioner to improve stain absorption and guarantee even coloration on exposed wood edges and legs. Pick a fast-drying clear polyurethane or varnish for the top coat; follow cure times precisely for durability and sheen. Prepare surfaces for the tile top later by keeping edges clean and flat. Use outdoor-rated adhesive when you add stone. Below is a quick reference table for sanding and finishing.
| Step | Grit/Material | Purpose |
|---|---|---|
| 1 | 80 → 120 | Remove mill marks |
| 2 | 180 → 220 | Smooth finish |
| 3 | Conditioner | Even stain absorption |
| 4 | Polyurethane | Fast-dry durable coat |
Applying The Tile Top
Clean the wood base, then lay out the outdoor-rated tiles dry to confirm fit and pattern before mixing mortar.
You’ll work efficiently: pick frost-resistant tiles, clear dust, and mark edges.
Apply thin-set mortar with a notched trowel, combing evenly so each tile seats flat and level.
Press tiles firmly, tapping with a rubber mallet if needed. Let the mortar cure per manufacturer instructions before grouting.
- Choose outdoor-rated tiles for durability and appearance.
- Spread thin-set evenly with a notched trowel for a uniform bond.
- Allow full cure time to avoid grout failure.
- Grout, dry, then seal with an outdoor tile sealer to guard against moisture and stains.
Finish is fast, polished, and built to last.
Planter–Trellis Combo for Privacy and Planting
Build a planter–trellis combo to create a compact, living privacy screen that supports climbing plants while saving space. You’ll spend about $100 and use basic materials like bamboo or inexpensive lumber.
Cut a rectangular planter box, install drainage, and attach a simple trellis frame to the back with screws and exterior glue. Choose lattice spacing that fits your chosen climbers—vines or roses—and brace the trellis for wind.
Finish with exterior paint or sealer to extend life. Position the unit where plants get adequate sun and airflow; the integrated design improves exposure and reduces overcrowding.
This project’s straightforward measurements and few tools let you complete it in a weekend and add instant privacy and planting utility.
Classic Wooden Cart : Garden Utility You Can Finish Fast
A simple wooden garden cart will save you time and trips by hauling tools, pots, and soil in one go; you can cut the parts, assemble the frame, and attach wheels in a few hours with basic tools and plywood or inexpensive lumber.
You’ll follow straightforward plans, cut boards to size, fasten a simple box to a base, and add a handle and two wheels. The result is lightweight, easy to maneuver, and built for utility.
- Sturdy box frame for loads
- Low center of gravity for stability
- Smooth-rolling wheels for easy movement
- Simple handle and axle assembly
You’ll finish in a weekend, improve garden efficiency, and enjoy a practical DIY accomplishment.
Small Projects: Curtain Rods and Wall Hooks
Two quick weekend projects—wooden curtain rods and wall hooks—give you practical, customizable storage and styling without breaking the bank. You can cut and size rods to fit any window, choosing diameter and finial style to match your decor.
Mounting is straightforward: measure, drill simple brackets, and secure the rod for reliable function.
Wall hooks require only basic cuts and joinery; attach single pegs or build a multi-hook board to organize coats, bags, and hats in tight entryways.
Both projects let you personalize shape, spacing, and finish to suit the room. They’re fast to complete, use minimal tools, and maximize utility and visual impact.
Start with accurate measurements and basic hardware for clean, durable results.
Fast Finishing: Sanding, Staining, and Sealing in a Weekend
When you want professional-looking results without a week of waiting, plan your sanding, staining, and sealing so each step fits into a single weekend: You’ll sand from coarse to fine grits in a few hours to smooth and prep the surface, then apply stain to enhance grain and color—about an hour per coat—using fast-drying formulas to save time.
Plan sanding, staining, and sealing over a weekend: sand coarse-to-fine, stain quickly, then seal—fast, professional results.
After stain dries, brush on clear sealant; most dry under two hours so you can add coats the same day. Organize tools and materials beforehand to keep momentum.
- Sand: coarse → medium → fine, few hours.
- Stain: wipe/brush, ~1 hour per coat, quick-dry.
- Seal: clear coat, under 2 hours dry.
- Prep: sandpaper, brushes, sealant ready.
Frequently Asked Questions
Can I Use Reclaimed Wood for These Weekend Projects?
Yes — you can use reclaimed wood, but inspect for rot, nails, screws, and contaminants. You’ll clean, de-nail, plane or sand, and stabilize warped boards. Use proper PPE and treat or seal for safety and durability.
How Do I Transport Large Pieces Safely in My Car?
You strap big boards properly, because your car isn’t a magic van. Fold seats, pad edges, secure with ratchet straps and rope, let pieces overhang with bright flag, drive slowly, and double‑check tied knots before leaving.
What Woodworking Joints Are Best for Beginners?
Start with butt, lap, and dado joints; they’re simple, strong for beginners, and require basic tools. You’ll also use rabbet and pocket-hole joints for quick, reliable assembly while learning fit, glue, and clamping techniques.
Can I Finish Projects Outdoors in Rainy Weather?
Yes — you can’t work in pouring rain, but you can finish outdoors under cover. Use shelters, waterproof clamps, quick-drying finishes, elevated dry racks, and weatherproof glue; monitor humidity and temperature to avoid warping or poor adhesion.
Where Can I Sell or Gift Completed Pieces Locally?
Sell or gift pieces at local craft fairs, farmers’ markets, consignment shops, community bulletin boards, neighborhood Facebook/Nextdoor groups, Etsy with local pickup, church or school fundraisers, or directly to friends, family, and nearby small businesses.
Conclusion
You’re the gardener planting small seeds each weekend, not waiting for a forest to grow. Pick a plot that fits your time, tools and budget, tend it with safe, steady work, and you’ll harvest usable furniture and fixes by Sunday night. Like a craftsman stacking bricks, build one reliable piece at a time—practical, deliberate, and finished. Keep tools sharp, plans simple, and you’ll turn short hours into steady skill and satisfaction.