
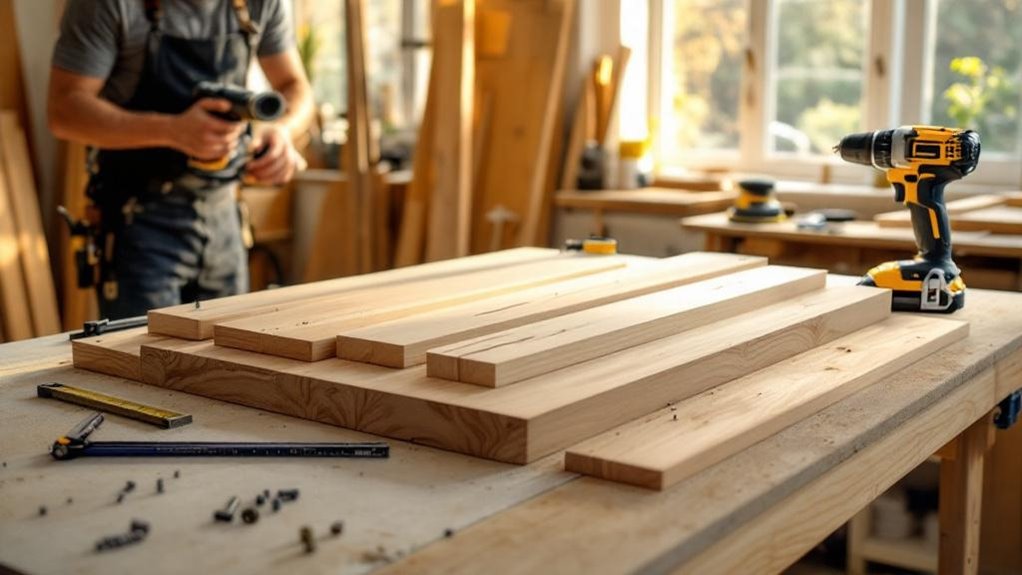
You can build a sturdy, attractive wood desk using common pine boards, plywood, glue, fasteners, a circular and miter saw, and basic safety gear. Measure your space, pick a comfortable depth, then cut top boards, apron, leg plates, stabilizers, and cross supports to a cut list. Glue and nail the desktop, attach legs with plywood cleats and screws, add braces and 22 stabilizers to prevent bowing, sand, edge‑band, stain, and top‑coat—keep going to learn step‑by‑step joinery and finishing tips.
Key Takeaways
- Measure your space and sketch a desk layout with dimensions, clearance, and storage needs before choosing materials.
- Select straight, defect-free boards (pine or hardwood) at least 1-1/4″ thick for a stable, durable desktop.
- Cut top boards, apron, leg plates, and cross supports per a detailed cut list, using a miter and circular saw.
- Assemble the desktop with glue-and-nail joinery, attach plywood cleats, then mount leg frames with glue and screws.
- Sand, apply edge-banding, condition and stain, then finish with two to three polyurethane coats, sanding between coats.
Quick Overview and Materials + Cut List
Start by gathering the materials and tools you’ll need: common pine boards (10, 8, or 12 ft lengths, at least 1-1/4″ thick), plywood for leg attachments, edge banding, wood glue, and fasteners, plus a circular saw and miter saw for precise cuts.
Follow the printable free plans to lay out a clear cut list: top boards, apron pieces, leg plates, 22 stabilizers, and cross supports.
Mark each piece and cut in sequence to minimize waste and keep grain orientation consistent.
Glue and fasten apron to the underside of the top, attach plywood leg plates, then install stabilizers and cross supports for rigidity.
Finish by sanding with 220 grit, apply conditioner, stain, and a protective top coat.
Finish with 220-grit sanding, then apply conditioner, stain, and a durable protective top coat for lasting results.
This is practical DIY Wood work.
Choose Desk Size and Layout for Your Space
Because your desk needs to fit both the room and how you work, measure the available wall and floor space first and note clearance for chairs, drawers, and traffic paths.
Decide desk top depth to suit your monitor, keyboard, and writing space; adjust depth for comfort. Check standard board lengths (8, 10, 12 ft) to minimize joins.
Plan storage space—drawers, shelving, or legs—so they don’t block movement. Use simple templates or cardboard mockups to visualize placement.
- Measure wall length, floor clearance, and sightlines
- Test chair swing and legroom with a mockup
- Choose desk top depth for your workflow
- Locate drawers to avoid traffic interference
- Align layout with existing furniture and walkways
Choose Materials: Wood Types, Thickness, and Budget
Pick a wood species based on appearance, workability, and cost—pine for budget-friendly durability, or hardwoods if you want a finer grain and longer wear.
Aim for at least 1-1/4″ thickness for stability; choose 1-1/2″–2″ if you want a heftier, high-end look.
Check board straightness in the store, factor in lengths (8–12 ft), and include stabilization and finishing costs in your budget.
Wood Species Comparison
Material choice sets the foundation for your desk, so weigh cost, durability, and appearance before buying.
For DIY Modern Wood projects you’ll balance budget and performance: pine is affordable and easy to work with using wood glue and the usual joinery, but it can bow under heavy gear.
Oak or maple cost more, resist wear, and present a refined look for long-term use.
Inspect boards for straightness at the store, especially in 8–12 ft lengths, and choose species that match your equipment weight and finish goals.
- Pine: low cost, easy to plane, watch for soft spots
- Oak: very durable, prominent grain, higher price
- Maple: dense, smooth finish, professional look
- Softwood risks: potential bowing under heavy loads
- Buy straight boards; trim warped stock before assembly
Ideal Thickness Choices
For a stable DIY desk you’ll want a desktop at least 1-1/4 inches thick, with 1-1/2 to 2 inches giving a heavier, higher-end feel and better support for multiple monitors and heavy gear.
Choose thickness based on load and depth: deeper tops may need thicker stock to avoid sag. Inspect boards at the store—pick straight, warp-free pieces so your wood desk stays flat over time.
Pine boards work well if you want a softer, familiar grain and lower cost; butcher block or solid hardwood at thicker options raises durability and visual weight.
Plan joinery and leg attachment for the chosen thickness so screws and brackets have adequate bite. Measure, test-fit, and adjust before final assembly to guarantee long-term stability.
Budget-Friendly Options
Now that you’ve settled on an appropriate thickness, think about how to keep costs down while still getting a durable, attractive top. Choose common pine boards as a budget-friendly option; they’re sturdy and cost-effective.
Aim for at least 1-1/4″ thickness, preferably 1-1/2″–2″ if you want a premium look. Use standard 8′, 10′, or 12′ boards to reduce cuts and waste.
If you’re using plywood to save money, hide raw edges with edge banding for a clean finish. Butcher block tops look great—consider them only if budget allows.
Make the build super easy by planning cuts and shopping lists before you buy.
- Pick pine boards for strength and low cost
- Use 1-1/2″ for balance
- Buy standard lengths
- Edge-band plywood
- Reserve butcher block for splurges
Tools, Safety, and Cutting Accurately for Your Desk
Before you cut a single board, put on gloves, a dust mask, and eye protection and set up a clean, well-lit workspace.
Use a miter saw or a circular saw with scrap-board guides and clamps, check each board for straightness at the store, and measure twice before every cut.
Support long pieces while cutting and take your time—loose, inaccurate cuts will compromise the desk, so prioritize steady technique and proper support.
Essential Safety Gear
Because accurate cuts and a safe workspace go hand-in-hand, you’ll want to outfit yourself with the right protective gear and keep your tools in top condition before you start cutting.
Think of free, essential safety gear as non-negotiable: they protect you so you can focus on craftsmanship. Always wear safety goggles, use ear protection with power tools, and have a dust mask or respirator ready for sanding or finishing.
Keep your work area clean and organized to prevent trips and misfeeds. Verify blades and bits are sharp and well-maintained to reduce kickback and improve cut quality.
- Safety goggles
- Ear protection (earmuffs or plugs)
- Dust mask or respirator
- Clean, organized workspace
- Sharp, maintained cutting tools
Accurate Cutting Techniques
Start by choosing the right saws and setting up for repeatable, square cuts: a miter saw for crosscuts and a circular saw with a straightedge for rip cuts will cover nearly everything in the plans.
Follow the printable plans for accurate dimensions and inspect boards at the store for straightness before buying. Clamp scrap boards as sacrificial guides when using the circular saw to keep cuts straight and protect the blade.
Wear a mask and gloves when cutting and sanding to control dust and debris. If you lack tools or want extra precision, use Home Depot’s cutting service—first five cuts are free diy, then 10¢ per cut.
Measure twice, cut once, and mark lines clearly for consistent accurate cutting techniques.
Build the Desktop: Glue, Nails, and Backing Board Method
Clamp the desktop boards to a flat backing board, apply a bead of wood glue along each joint, and drive nails through the face into the backing to lock everything solidly in place.
You’ll create a stable desktop quickly using this glue-and-nail technique; it complements pocket holes if you use them elsewhere in this DIY tutorial.
Create a sturdy desktop fast with this glue-and-nail method; it pairs nicely with pocket holes.
Add a furring strip to the front and sides for a thicker look, then fill nail holes with wood filler.
Sand the surface with 220 grit to remove glue residue and level filler, apply wood conditioner, stain, and finish coat for protection.
Work methodically: clamp, glue, nail, fill, sand, finish.
- Use even clamps to prevent gaps
- Space nails uniformly
- Test fit furring strip first
- Remove squeeze-out immediately
- Sand with steady strokes
Build Modern Desk Legs (Step-by-Step)
Cut four straight, defect-free leg pieces to the exact height you want, then lay out the leg frame assembly so each leg sits square and true beneath the tabletop.
Use plywood brackets to fasten legs to the underside with glue and screws or brad nails, and add cross supports or a central stretcher as stabilizers to prevent wobble.
Sand all leg surfaces smooth before finishing to guarantee a clean, professional result.
Leg Frame Assembly
Assemble the leg frames so they mirror the clean, sturdy profiles used in modern outdoor furniture—this gives you a stable foundation and a cohesive look.
For leg frame assembly, build each leg pair on a flat work surface, align plywood connector plates to the tabletop underside, and clamp before fastening. Use wood glue and pocket hole screws where access allows; supplement with brad nails or regular screws for extra hold.
Position legs precisely, then tighten all fasteners and recheck squareness. Don’t move the assembly until glue sets.
- Lay out parts and verify dimensions before fastening
- Clamp plywood connectors flush to the tabletop
- Drive pocket hole screws squarely for maximum grip
- Add preliminary brad nails to hold pieces while glue dries
- Inspect and tighten every joint for stability
Stabilizer And Bracing
While you’re working on the leg frames, add stabilizers and cross braces to prevent tabletop bowing and wobble under load. Anchor 22 stabilizers evenly across the frame; spacing matters to distribute weight and cut sagging risk.
Assemble the legs on a flat surface to confirm square alignment before fastening the tabletop. Attach plywood pieces to the legs as rigid blocks, glue them and secure with brad nails or screws for durable joints.
Install cross supports between legs and the underside of the tabletop, fastening into those plywood blocks to create a triangulated system that resists racking.
After initial assembly, load-test the desk with typical equipment and inspect tightness. If you notice deflection or wobble, add targeted cross supports or extra stabilizers where strain concentrates.
Attach and Align the Legs to the Top
Start by placing the tabletop upside down on a flat, level surface and positioning each leg at its corner so you can align them precisely before fastening.
You’ll attach and align the desk legs using plywood cleats as backing. Clamp a cleat to the underside, apply wood glue, then set the leg against the cleat. Fasten with brad nails or screws, checking that joints sit flush.
After fastening three legs, fit the fourth and recheck corner spacing so all legs are equally placed. Gently rock the assembly to find wobble, tweak positions, then tighten fasteners. Let glue cure before flipping.
Fit the fourth leg, recheck corner spacing, gently rock to locate any wobble, tweak and tighten.
- Assemble legs on a flat surface for even alignment
- Use plywood cleats for solid attachment
- Apply wood glue plus nails or screws
- Check and correct wobble early
- Verify equal corner placement
Stabilize the Frame: Cross Supports, Braces, and Anti‑Bowing
Because a solid underside prevents sagging and wobble, you’ll add cross supports, braces, and anti-bow members to keep the desktop level under load. Fit 22 stabilizers evenly across the underside, spacing them to distribute weight and prevent bowing. Screw cross supports front-to-back and side-to-side into the apron; they cut wobble and tie the legs into a single rigid unit. Install diagonal braces between opposite legs for lateral stiffness. Check alignment with a straightedge and adjust fasteners so the top stays flat. Use glue plus screws at high-stress joints. Inspect every attachment and tighten once the glue cures. These steps make the frame rigid and long-lasting for daily home office use.
| Location | Fastener | Purpose |
|---|---|---|
| Center | Screws + glue | Anti-bow |
| Sides | Bolts | Lateral support |
| Corners | Braces | Rigidity |
| Apron | Cross supports | Even load |
| Under top | Stabilizers | Prevent sagging |
Sanding, Edge‑Banding, Staining, and Top Coat
With the frame squared and secured, prepare the visible surfaces for finish by sanding, edge‑banding, staining, and sealing so the desk both looks professional and holds up to daily use.
Sand the entire surface with 220 grit to remove mill marks and create a uniform base.
Apply iron‑on edge banding to plywood edges, trim flush, and lightly sand the seam.
Use a wood conditioner, then apply stain with a cloth or brush for even penetration and consistent color; wipe off excess and let it dry per instructions.
Finish with two to three coats of polyurethane, sanding lightly between coats for durability.
- Sand entire surface with 220 grit
- Apply wood conditioner before staining
- Use iron‑on edge banding on plywood
- Wipe stain uniformly; follow drying times
- Top coat with polyurethane, sand between coats
Troubleshooting, Wobble Fixes, and Upgrade Options
If your desk feels wobbly after assembly, first double‑check that each leg is firmly fastened and sits at the same height—adjust uneven legs with leveling feet or by shimming—and then tighten or replace any loose fasteners.
Next, recheck all fastenings and reinforce weak joints with additional wood glue and screws.
Reinspect every fastener and shore up any weak joints with extra wood glue and screws.
Add cross supports between legs to stop lateral movement and prevent bowing under load.
Install the 22 stabilizers beneath the desktop where span and load are greatest to prevent sagging.
For persistent wobble fixes, replace any distorted leg or brace and confirm fastener torque after use.
As upgrade options, plan custom wall cabinets or shelves above the desk to increase storage and improve ergonomics without compromising stability.
Frequently Asked Questions
Can I Make the Desk Height Adjustable After Building?
Yes — you can make the desk height adjustable after building. Retrofit adjustable legs, install a crank or electric lift column, or use adjustable tabletop brackets; you’ll measure accurately, secure mounts, and reinforce structure for stability and safety.
How Do I Route Cable Management Holes or Grommets?
Drill pilot holes, then use a hole saw or spade bit to cut clean grommet openings; router with a circle-cut jig gives perfect edges. Deburr, install grommets, and seal the exposed wood to prevent splitting and wear.
Can I Install Drawers or a Keyboard Tray Later?
Yes—you can add drawers or a keyboard tray later; you’ll measure clearances, reinforce the underside with cleats or a plywood panel, use mounting rails or drawer slides, and pre-drill pilot holes for secure, square installation.
What Finish Is Best for Waterproofing Spills?
Think of polyurethane as an umbrella: you’ll use oil-based polyurethane for the toughest waterproofing, or water-based for quicker drying and less odor. Sand, apply thin coats, and let each cure fully for durable spill protection.
How Do I Refinish or Repair Deep Scratches Later?
You’ll sand the damaged area, fill deep gouges with wood filler or epoxy, sand smooth, stain to match, then apply protective finish coats. Use fine grit, tack cloth, and test color on scrap before refinishing.
Conclusion
You’ve built a solid desk you can be proud of—measure twice, cut once, and trust the process. Keep fasteners tight, braces square, and finish layers thin for durability. If it wobbles, don’t guess: check joinery, shim or add a cross brace. Treat the project like a good recipe—follow proportions and adjust for taste—and you’ll end up with a functional, lasting workspace that fits your room and work habits.