
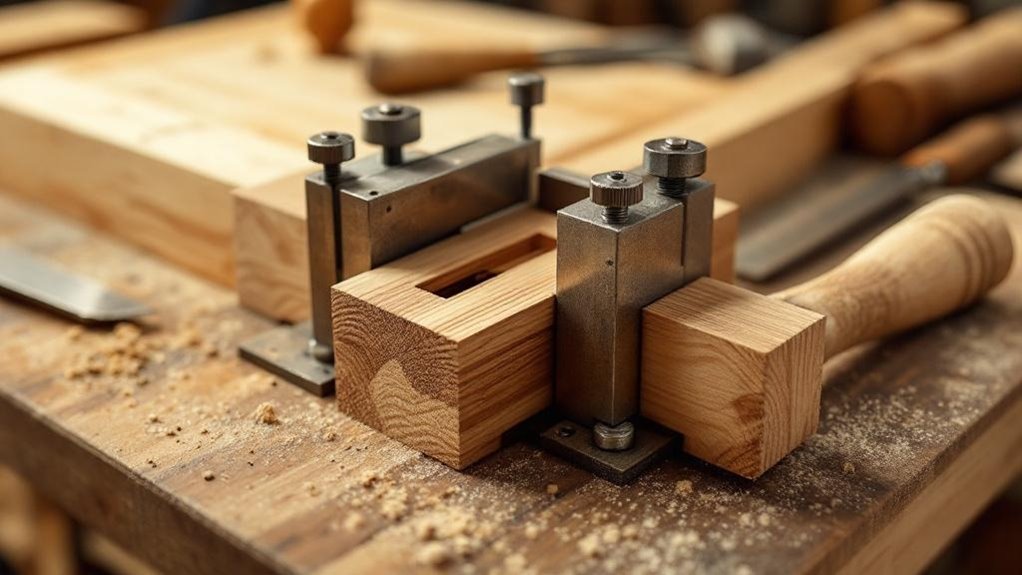
You’ll build stronger, truer furniture frames by laying out centered joints, cutting the mortise first, and fitting tenons with controlled passes and fine trimming. Plane stock to uniform thickness, mark crisp shoulder and centerlines, then choose a mortising method that suits your shop—drill press, benchtop mortiser, or mortising attachment. Cut tenons on a tablesaw, bandsaw, or with a jig, test-fit repeatedly, and finish with sanding, planing, or filler before glue-up. Keep going to learn techniques for speed and reinforcement.
Key Takeaways
- Lay out mortise location and depth precisely with a marking gauge and square before any cutting.
- Cut mortises first to establish an accurate opening, then fit tenons to that reference.
- Use a mortiser or drill press with clean-up chiseling for consistent, square mortises.
- Cut tenons on a tablesaw or bandsaw, test-fit, and fine-tune with a plane or sanding block.
- Apply a thin, even layer of glue, clamp squarely, and reinforce high-stress joints when needed.
How to Cut Strong Mortise-and-Tenon Joints : Quick Overview
Start by laying out the joint dimensions with a marking gauge and square so you cut exactly where the mortise and tenon must meet; precise, repeatable layout is the foundation of a strong fit.
You’ll transfer those lines to both members, establishing mortise depth and shoulder lines before touching tools.
For clean mortise cuts use a drill press with a brad-point, a mortising attachment, or a benchtop mortiser to remove waste accurately.
Cut the tenon on a tablesaw, with a dado set, or a bandsaw to match those lines.
Test the tenon in the mortise and adjust by sanding or planing until it will fit snugly—don’t rely on glue to hide gaps.
Repeatability and measured corrections yield lasting joints.
Why Cut the Mortise First
Because the mortise defines the joint’s exact opening, cut it first so you have a fixed reference to fit the tenon to—this lets you fine-tune the tenon for a snug, consistent fit rather than forcing the mortise to match an imperfect tenon. You’ll work from a known void, so your tenon fits become predictable and repeatable.
Cutting mortise first preserves wood integrity, lets you make necessary adjustments to shoulder and cheek, and simplifies hand-tool work when the tenon needs shaving. Aim for clean mortises so adjustments are minimal and controlled.
- Establishes a fixed reference for consistent tenon fits.
- Simplifies hand-tool tuning of the tenon.
- Reduces risk of damaging stock during corrections.
- Lets you plan necessary adjustments before final assembly.
Layout, Marking & Stock Prep for Centered Joints
Before you cut a mortise and tenon, make sure your stock is planed to uniform thickness so the joint will sit centered and true.
Establish accurate centerlines and transfer them across faces and ends with a marking gauge and a sharp knife or pencil to keep layout consistent.
Double-check gauge settings and alignments against reference edges so your mortise width and tenon shoulders match for a snug, square fit.
Stock Thickness Consistency
One key step you’ll take is planing both faces and edges to a consistent thickness so your layout lines fall true and tenons fit squarely into their mortises. You’ll set stock thickness to a known dimension before you cut the tenon so every component shares the same reference. That consistency makes it easier to gauge mortise width and keeps your mortise and tenon joint from binding or wobbling.
Use a marking gauge and sharp knife to score lines; that prevents smearing and keeps cuts clean. When parts are uniform you’ll cut repeatable tenons that fit the mortise with minimal trimming, reducing waste and strengthening the frame.
- Plane all faces and edges to uniform thickness first
- Use marking gauge and knife for crisp references
- Dimension tenons to match mortise width precisely
- Check fit on a dry assembly before final glue-up
Centerline Layout Techniques
With your stock flattened and thicknessed, set a reliable centerline on each piece to guide every cut and guarantee the mortise and tenon meet squarely.
Begin by scribing a precise centerline along face and edge; this centerline layout is your reference for every subsequent measurement. Use a marking gauge to incise firm layout lines for shoulders and mortise edges so you can saw and chisel to a crisp boundary.
Measure mortise and tenon widths from the edge so both halves sit equidistant from the centerline, ensuring uniform alignment. Verify verticals with a saddle square when marking mortise positions.
Consistent stock thickness, clear layout lines, and decisive marking gauge work are the foundation of predictable joint accuracy.
Marking Gauge Precision
Anyone serious about accurate mortise-and-tenon work relies on a sharp, well-set marking gauge to cut crisp, repeatable layout lines that define both shoulder and mortise edges.
You set the gauge to the chisel width so your incised lines match the mortises exactly, then mark from both faces to find the centered layout where lines intersect.
Plane stock to uniform thickness first; inconsistent thickness ruins centered joints.
Use a sharp marking knife with the marking gauge for even cleaner lines and better visibility. You’ll work faster and make fewer test cuts when lines are precise.
- Set gauge to chisel width for exact mortise outline
- Mark from both faces to locate true center
- Plane stock to consistent thickness before layout
- Combine knife and marking gauge for crisp tenon shoulders
Mortising Methods: Drill Press, Attachment, Benchtop Mortiser
Although a full-size mortiser gives the fastest, cleanest results, you can get excellent mortises using a drill press or a mortising attachment depending on budget and shop space.
Use a drill press with a brad-point bit, center the fence, and set the depth stop; drill overlapping holes, then pare to clean lines with a sharp chisel for true square holes.
Mortising attachments combine hollow-chisel cutting and drilling so you can produce square holes more directly; they’re handy for varied sizes but take time to install and remove.
Mortising attachments pair a hollow chisel with a drill to cut square holes quickly, though installation can be time-consuming.
A benchtop mortiser is the dedicated middle ground: quicker setup than attachments and cleaner cuts than a drill press, ideal if you make mortises often but lack room or funds for a floor machine.
Tenon-Cutting Methods for Mortise-and-Tenon Joints
When you cut tenons you’ll choose the tool that matches the stock and the repeatability you need: a tablesaw with a dado set is fast and square for routine work, a bandsaw handles oversized or irregular stock, and a shop‑made tenoning jig gives a low‑cost, reliable way to hold pieces vertical.
Set fences and stops before you make test cuts so every cheek and shoulder is predictable.
Finish with careful planing of the shoulders and cheeks for a snug fit.
Tablesaw With Dado
Cut tenons quickly and consistently on a tablesaw fitted with a quality dado set, which lets you run stable, repeatable cuts without elaborate jigs. You’ll set the miter-gauge fence square and use an auxiliary fence for support, then align the high-quality dado set and adjust the dado stack against the rip fence to guarantee accurate cuts.
With steady feeds you can cut multiple tenons and maintain consistent tenon to fit dimensions for each mortise-and-tenon joint. Check test pieces and tweak the stack thickness for a snug, predictable fit.
- Verify miter-gauge at 90° before each run.
- Use an auxiliary fence to prevent tearout and drift.
- Cut test tenons to confirm tenon to fit dimensions.
- Maintain blade alignment and stack tightness for repeatability.
Bandsaw For Large Stock
For larger stock—pieces over about 4 inches thick—a bandsaw gives you the control and power to cut clean, consistent tenons that would be awkward or unsafe on other tools.
You’ll fit a sharp, well‑tensioned blade and choose width based on the tenon profile: wide blades for straight faces, narrow for curves or shoulder relief.
Set guides and fence precisely; small adjustments change shoulder fit and influence the mating mortise.
Feed slowly, supporting the heavy workpiece and using push sticks to maintain hands clear.
The bandsaw’s versatility lets you refine cheeks and cheeks’ shoulders before final fitting.
Treat blade tension and guard setup as critical safety steps—this joinery technique rewards disciplined setup with fast, accurate results.
Shop‑Made Tenoning Jig
Build a simple tenoning jig and you’ll turn your tablesaw into a repeatable, accurate tenon station without buying an aftermarket fixture.
You’ll clamp the workpiece to the jig, register it against an auxiliary fence, and make vertical cuts that match your marking gauge lines for tenon thickness.
Fit a zero-clearance throat plate, use a combination blade, and take light passes.
After shoulders are cut, you may use a chisel to refine cheeks and guarantee a snug fit when you lay out the mortise for the partner piece.
This method speeds production of mortises and tenons while keeping the joint precise and safe.
- Secure clamping and fence registration
- Mark tenon thickness with a gauge
- Light, controlled passes
- Final trimming with a chisel
Fine-Tuning Fit: Sanding, Planing, Fillers, and Chamfers
While you test the joint, work deliberately to bring the tenon to a snug, even fit: use a sanding block with self-adhesive sandpaper to reduce high spots without losing shoulder accuracy, employ a rabbeting plane for controlled removal on larger shoulders, and add a thin oversize filler piece where a tenon is too thin before shaping it back to final dimensions.
Test the tenon repeatedly in the mortise; even small gaps compromise strength. Use light, measured sanding to pare high areas and a rabbeting plane for uniform material removal.
Test the tenon often—even tiny gaps weaken it; sand lightly and use a rabbeting plane for even removal.
Glue and trim an oversize filler when needed, then shape and square it to match the original shoulders.
Finally, add a small chamfer to the tenon’s leading edges to ease assembly and guide the joint together smoothly.
Glue, Reinforcement, and Common Fit Mistakes to Avoid
Although a tight mechanical fit is your primary goal, you’ll still need to apply glue thoughtfully—spread an even, thin coat over mating surfaces so the adhesive bonds wood, not gaps, and avoid relying on glue to make up for a poor fit.
Use clamps and squares to maintain alignment during curing; misalignment introduces stress that undermines structural integrity. Reinforce high-stress junctions with hidden brackets or glued wooden blocks where appropriate.
Inspect joints periodically—wood shifts and can reveal common fit mistakes you should correct early.
- Address oversized tenons by trimming or sanding for a precise fit.
- Repair thin tenons with glued-on oversize filler pieces, then recut.
- Use minimal, even glue to prevent squeeze-out and weak bonds.
- Clamp precisely; poor alignment equals premature failure.
Frequently Asked Questions
Can Mortise-And-Tenon Joints Be Used With Metal or Composite Materials?
Yes — you can adapt mortise-and-tenon joints for metal and composites; you’ll adjust tooling, tolerances, and adhesives or welding methods, account for different stiffness and wear, and often reinforce with bolts, inserts, or hybrid fasteners for reliability.
How Do You Hide Mortise-And-Tenon Joints for a Seamless Look?
You hide mortise-and-tenon joints by using concealed joints, through-tenons trimmed flush, plug or spline covers, tapered keys hidden inside, or by routing and veneering; you’ll plane, sand, and finish carefully so seams vanish.
What Finish Types Best Protect Exposed Joints Long-Term?
Use polyurethane or spar varnish for durable, water-resistant protection; oil finishes like tung or Danish penetrate and stabilize wood; lacquer’s thin, hard film’s quick-drying but needs maintenance; always sand and seal end grain first.
Are There Quick Joint Alternatives for DIY Beginners?
Yes — you can use pocket screws, dowels, biscuits, or corner brackets for quick, strong joints. You’ll prep surfaces, clamp accurately, and use glue where applicable; these methods speed construction while remaining reliable for beginners.
Can Mortise-And-Tenon Joints Be Disassembled and Reused?
Yes — they can be disassembled and reused when you cut clean joints and avoid glue; like a clock taken apart and reassembled, you’ll rely on precise fit, careful tapping, occasional wedges, and minor cleanup before reuse.
Conclusion
You’ve learned reliable steps to cut strong mortise-and-tenon joints; now apply them. Did you know a well-fitted mortise-and-tenon joint can retain over 1,000 psi of shear strength—far exceeding many fasteners—so precision pays off. Start by cutting the mortise first, center and square your layout, choose the mortising method that matches your tooling, fit the tenon carefully, and finish with appropriate glue and reinforcement. Small refinements prevent big failures.