
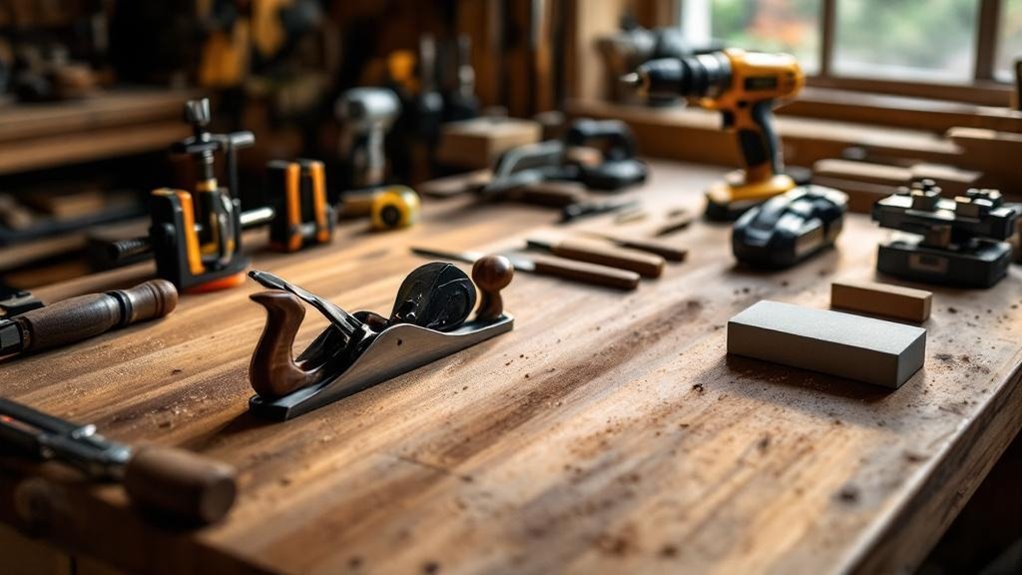
Start with a reliable tape measure, a carpenter’s square, a cordless drill, and a set of clamps. Add a 7-1/4-inch circular saw for rough cuts, plus a jigsaw or miter saw as your projects grow. Keep a marking knife or Sharpie nearby for layout, and use an impact driver for tough screws. Maintain sharp blades, clean tools, and dry storage so everything stays ready. From there, you can build a shop that works smarter.
Key Takeaways
- Start with essentials: tape measure, carpenter’s square, cordless drill, and clamps for accurate layout, drilling, and assembly.
- Add reliable cutting tools like a circular saw, miter saw, and table saw for precise rough cuts, crosscuts, and furniture work.
- Use a jigsaw for curves and detailed shapes, especially in shelves, cutouts, and irregular woodworking tasks.
- Include a router, ideally with fixed and plunge bases, for edge shaping, joinery, and cleaner finishing details.
- Keep tools maintained and stored properly, then upgrade one versatile tool at a time to improve workflow and project quality.
Start With Tape, Square, Drill, and Clamps
Start with the basics: a quality tape measure, a carpenter’s square, a cordless drill, and a good set of clamps.
You’ll use your tape measure on nearly every project, so choose a reliable steel model and follow the rule: measure twice, cut once. A carpenter’s square, whether framing or combination, helps you verify right angles and keep joints tight.
Use a reliable steel tape measure and carpenter’s square to ensure accuracy, right angles, and tight joints.
Add an 18-volt cordless drill for clean pilot holes and fast screw driving. It’ll save time and reduce fatigue.
Finally, stock several clamps, including bar and pipe styles, to hold parts steady during assembly and glue-up. Four sets give you enough reach to work alone and keep pressure even.
With these four tools, you can measure, square, drill, and assemble accurately from the start.
Choose a Tape Measure You Can Trust
A tape measure is one of the few tools you’ll grab on every project, so it pays to choose one that feels solid and reads cleanly.
Pick a tape measure with a high-impact plastic or metal case, since it’ll survive drops and shop wear. A 25- to 30-foot length gives you enough reach without feeling bulky.
- Look for imperial and metric markings for flexibility.
- Choose a locking blade that holds your number steady.
- Favor a wide blade, 1 inch or more, for better standout.
- Check that the hook moves smoothly and starts true.
- Make sure the tape measure fits your hand and retracts crisply.
With a dependable tape measure, you’ll mark stock faster and avoid second guesses.
Use a Square for Accurate Layout
Use a square to mark straight reference lines and check right angles before you cut. A framing square, combination square, and speed square each help you lay out and repeat measurements with less error.
Keep the square tight to the edge, verify corners and joints, and measure twice for cleaner, tighter work.
Square Types and Uses
Squares are some of the most useful layout tools in a home shop because each type serves a specific job. You’ll get better results when you match the square to the task.
Square types include:
- carpenter’s square for large lumber
- combination square for versatile checks
- speed square for fast roof layout
- miter square for 45-degree cuts
- bevel square for copying angles
Use the carpenter’s square on framing parts, the combination square for straight and miter cuts, the speed square for rafters and stairs, the miter square for trim, and the bevel square when you need to transfer an existing angle.
Keeping these tools close lets you work faster, measure accurately, and avoid wasted material on every project.
Marking Straight Reference Lines
When you need a straight reference line, a square is one of the most dependable layout tools in your shop. Use a carpenter’s square to lay out marking straight reference lines quickly and accurately on stock before you cut. Set the blade against your edge, then draw from the body to keep your marks consistent and easy to read.
A combination square works well when you need a ruler, a level, and a crisp line in one tool. On wider boards, a framing square helps you span the surface without wandering off your mark. When you transfer measurements from one board to another, a square keeps every line true.
That simple habit speeds your workflow, cuts errors, and helps you build cleaner joints and better-fitting parts.
Checking Corners and Angles
Once you’ve marked your straight reference lines, the same square helps you check corners and angles before you cut or fasten anything.
Use a carpenter’s square to verify 90-degree corners, then catch errors early so your parts fit cleanly.
When you need flexibility, switch to a combination square for 45-degree and 90-degree layouts. A speed square speeds up checking corners and angles on frames and rafters.
Keep your tool aligned with the stock, read the edge, and mark from the correct face.
- Confirm every corner before assembly
- Recheck your square for accuracy
- Mark right angles with the carpenter’s square
- Use a combination square for angled layout
- Reach for a speed square on quick jobs
Add a Cordless Drill and Impact Driver
You’ll use a cordless drill for clean, versatile holes and everyday screw driving without dragging a cord around your shop.
Pair it with an impact driver when you need extra torque for long screws and tough fastening jobs. Together, they’ll speed up assembly and give you better control on the bench and at the project site.
Drill for Versatile Holes
A cordless drill is one of the most useful tools in a home shop because it lets you drill holes and drive screws in wood, metal, and other materials without being tied to an outlet. For a drill for versatile holes, choose a cordless drill that feels balanced in your hand and matches your tasks. An 18-volt model gives you strong performance without extra bulk.
- Pick a 1/2-inch chuck for heavier work.
- Use a 3/8-inch chuck for standard jobs.
- Keep two batteries charged.
- Swap batteries before one dies.
- Match the drill to your material.
That setup keeps you moving, cuts downtime, and handles everyday shop work with less effort and more control.
Impact Driver for Fastening
For fastening, pair a cordless drill with an impact driver so you can drill holes with one tool and drive screws with the other.
Your cordless drill handles pilot holes, countersinks, and light screwdriving, while the impact driver delivers strong, quick bursts that drive long screws into dense stock with less strain on your wrist.
Because each tool stays set up for its job, you won’t waste time swapping bits constantly. The impact driver’s hex chuck accepts quick-change bits, so you can move fast during assembly.
Choose a quality combo with interchangeable batteries, and you’ll cut downtime, keep both tools portable, and work efficiently across the shop.
Use the drill for accuracy, then reach for the impact driver when you need torque and speed.
Pick a Circular Saw for Rough Cuts
Pick one circular saw as your go-to rough-cut tool: its round, sharp-toothed blade makes quick work of plywood and lumber, and a 7-1/4-inch model is usually the best place to start for most home shops. A 15 Amp circular saw gives you solid power without feeling overbuilt.
A 7-1/4-inch circular saw is the go-to rough-cut tool for most home shops.
Choose blades for the job, and let the circular saw do the heavy lifting.
- Use ripping blades for lengthwise cuts
- Use crosscut blades for cleaner cuts across grain
- Use combination blades for general work
- Check blade lock before changing blades
- Set depth so the blade just clears the material
Look for a laser guide and depth adjustment. Larger blades, up to 12 inches, help on thicker stock.
When to Add a Table Saw
Once your projects start calling for more precision and repeatability, it’s time to add a table saw. When you’re building furniture or cabinetry, you need a tool that delivers straight, consistent cuts without slowing you down.
A good table saw lets you rip plywood, trim hardwood, and cut dados with control and accuracy. It also helps you handle larger sheet goods and match parts to the same dimension every time. If you’ve been relying on hand or portable saws, you’ll notice the gain in speed and consistency right away.
Choose a quality table saw with a 1.75 HP to 3 HP motor, and you’ll have the power to work through softwoods and hardwoods efficiently.
Bring in a Miter Saw for Accurate Cuts
A miter saw earns its place in a home shop when you need clean crosscuts and accurate miter cuts for trim work, framing, or furniture assembly.
You’ll get fast, repeatable angle cuts that keep parts consistent and reduce setup time. Choose an 8″ to 12″ miter saw based on the stock you cut most often and the depth you need.
Laser guides and bevel adjustments can help you dial in cuts quickly and confidently.
Pairing a miter saw with a table saw gives you a strong cutting setup: one handles precise angles, the other handles rip cuts.
- Clean crosscuts
- Repeatable angles
- 8″ to 12″ blades
- Laser guides
- Bevel adjustments
Buy a Jigsaw for Curves and Cutouts
A jigsaw fills the gap when your project calls for curves, cutouts, or detailed shapes that a straight saw can’t handle. You can trace a line and follow it with control, whether you’re cutting wood, plastic, or thin metal. A good jigsaw uses a reciprocating blade, so you can move from rough shaping to tighter work with the right blade swap. Adjust the speed to match the material and help cut down tear-out.
| Task | Benefit |
|---|---|
| Curved shelf | Smooth outline |
| Sink cutout | Clean opening |
| Thin plywood | Less splintering |
| Mixed materials | Flexible use |
If you want lasting performance, look at a Bosch JS470E. A quality jigsaw earns its spot fast in a growing home shop.
Use a Router for Edges and Joinery
A router opens up a lot of possibilities for cleaner edges and stronger joinery in your home shop. Use a router to shape furniture edges, trim, and custom profiles that give projects a polished look.
With the right router bit, you can cut grooves, dados, and rabbets for tight, accurate joints.
- Pick a fixed base router for edge work.
- Use a plunge router for deeper joinery cuts.
- Clamp on a straight or edge guide for accuracy.
- Test each router bit on scrap first.
- Wear eye protection and keep the base flat.
A router rewards careful setup and steady hands. When you measure, guide, and cut with control, you get cleaner parts and stronger assemblies without extra fuss.
Keep Clamps Ready for Glue-Ups
Keep your clamps within reach and snug the joint before the glue sets, so you don’t lose alignment while you work.
Stock a mix of clamp sizes for small boxes, wide panels, and longer assemblies, so you can grab the right one fast. Quick-release clamps save time on solo glue-ups because you can adjust pressure in seconds and keep the work moving.
Clamp Before Glue Sets
When glue is ready, you need clamps within reach and on the workpiece fast, because most bonds start setting within a few minutes. You should stage every clamp before you open the bottle, so you can move from spread to squeeze without delay.
Quick-release models help when you’re working alone, and a mix of bar and pipe clamp sizes lets you handle awkward assemblies cleanly. Use quality clamp bodies and straight jaws for steady pressure and long service life.
- Lay out clamps in order.
- Match each clamp to the joint.
- Check reach before gluing.
- Apply even pressure quickly.
- Clear the bench for curing.
Keep your clamp rack organized, and you’ll waste less time between glue and cleanup.
Stock Sizes For Projects
Stocking a few clamp lengths makes glue-ups go smoother, because you won’t be hunting for the right reach mid-job. Keep 1-2′ and 3-4′ clamps on hand so you can match the project, whether you’re assembling boxes, panels, or frames.
Mix bar clamps and pipe clamps to cover different widths and materials. For solo work, quick-release clamps help you lock parts down fast and make small corrections without help.
Space clamps evenly across the joint line so pressure stays balanced and the pieces don’t shift. Buy sturdy clamps with solid bars and strong pads; they hold better and last longer.
A varied clamp rack lets you move from dry fit to glue-up with less scrambling and more control.
Quick Adjustments Save Time
Once you’ve got the right clamp lengths on the rack, the next time saver is having them ready to grab for glue-ups.
Keep quick-release clamps within arm’s reach so you can make immediate adjustments while the glue’s still workable. Stock 1-2′ and 3-4′ sizes, and you’ll cover most shop tasks without hunting for the right tool.
- Stage clamps before you spread glue
- Keep jaws clean and aligned
- Check for wear, bent bars, or sticky triggers
- Place clamps where you can reach them fast
- Use enough pressure to hold joints square
A tidy layout cuts interruptions and helps you prevent misalignment.
When every clamp works smoothly, you assemble faster, stay accurate, and waste less glue-up time.
Stock a Small Set of Good Chisels
A small, well-chosen chisel set will handle most home shop work without cluttering your bench. Start with 1/4″, 1/2″, and 1″ chisels; they’re the core woodworking hand tools you’ll reach for when paring joints, trimming edges, and cleaning corners.
A small, well-chosen chisel set handles most home shop tasks without cluttering your bench.
Add a 1-1/2″ or 2″ chisel if you often hollow mortises or clear waste fast. Buy high-carbon steel or similar quality steel so the edge lasts and the tool holds up under repeated use.
Keep them sharp; a few passes on wet/dry sandpaper restores a keen edge and cleaner cuts. Wipe them dry after use, store them safely, and keep rust off the blades.
With that routine, your chisels stay accurate, reliable, and ready for the next project, saving you time and frustration.
Make Marking Easy With a Knife and Rule
Pick a marking knife you can sharpen easily, and use it to cut crisp layout lines with a few light passes.
Use a sliding rule with a lock so you can transfer measurements fast and cut down on mistakes, especially when you keep a couple on hand for repeat work.
For cleaner scribe lines, set the knife point at your mark, slide the square against it, and use the chisel width when that gives you a better fit.
Choosing a Marking Knife
When you need crisp layout lines, a marking knife beats a pencil because it gives you a fine, accurate scribe that helps parts fit together properly. Choose a marking knife with a thin, sharp edge so you can mark joint lines, track exact fit, and reduce tear-out along the grain.
Start with a box cutter if you want a low-cost option that sharpens easily and safely, then upgrade when you’re ready. Control depth by referencing the width of a chisel, and keep your cuts consistent.
- Place the tip exactly on your mark
- Hold a square tight for straight lines
- Scribe lightly, then deepen if needed
- Use the knife for cleaner joint placement
- Keep the edge sharp for better finishes
Using a Sliding Rule
After you’ve chosen a sharp marking knife, pair it with a sliding rule to make layout faster and more accurate. You can set a dimension, lock it, and transfer that setting to parts without guessing. The sliding rule’s slide-lock keeps your measurement fixed, so you don’t lose precision between boards. Used with a marking knife, it helps you create crisp reference points for cutting and joinery.
| Benefit | Use |
|---|---|
| Repeatable setup | Copy one measurement to many parts |
| Locked measurement | Hold settings securely while moving |
| Faster workflow | Check overhangs and batch parts efficiently |
Keep more than one sliding rule in your shop. When you’re fitting cabinets or building furniture, quick access saves time and keeps your work consistent.
Scribing Accurate Layout Lines
A marking knife gives you a cleaner, more accurate layout line than a pencil because it cuts the wood fibers instead of just sitting on top of them.
Use it when you need joinery that fits tightly and cuts that land exactly where you planned.
- Set the knife tip on the mark.
- Slide your square against the edge.
- Pull the marking knife with steady pressure.
- Make a second pass to deepen the line.
- Use a chisel width for wider layouts.
A sliding rule with a slide-lock helps you transfer measurements between boards without drift.
Keep your stance firm, and let the rule guide the knife.
When you scribe accurate layout lines this way, you’ll reduce errors and give every cut a clear, reliable reference.
Add Hand Saws for Quiet, Precise Cuts
Hand saws give you quiet, precise cuts without the noise and vibration of power tools, which makes them ideal for a home shop or residential workspace.
Keep a crosscut saw for slicing across the grain and a rip saw for cutting with it, so you can handle more joinery and sizing tasks with one hand saw kit.
Because these saws are portable, you can work in tight corners, on installed parts, or anywhere an extension cord won’t reach.
They’re also affordable and simple to own, with no electricity needed and very little maintenance.
As you use them, you’ll build hand-eye coordination, learn to control your cut, and develop cleaner woodworking habits.
Start with a sharp, comfortable saw that fits your grip and cut line.
Use Wet/Dry Sandpaper to Keep Tools Sharp
Wet/dry sandpaper is a cheap, effective way to keep your knives and other woodworking tools sharp. You can use it for quick touch-ups, fine edge work, and detail sanding blocks. It’s a smart choice when you want sharp tools without buying a full sharpening setup.
Wet/dry sandpaper offers a cheap, effective way to keep knives and woodworking tools sharp.
- Buy cutoffs from auto mechanic shops or Amazon.
- Cut strips for spoon-knife sharpening kits.
- Mount paper on a flat block for control.
- Add water to slow wear and improve finish.
- Re-sharpen often to keep cuts clean.
When you keep wet/dry sandpaper in your shop, you’ll extend tool life and work faster. It also helps you maintain precise edges, so your projects fit better and look cleaner.
Keep Sharpie Markers and Layout Tools Nearby
Keep Sharpie markers, a tape measure, and a combination square close to your bench so you can mark, check, and adjust without losing momentum. With your layout tools within reach, you’ll spot errors early and keep cuts and joints accurate.
| Tool | Use |
|---|---|
| Sharpie | Quick notes and temporary marks |
| Tape measure | Fast, exact lengths |
| Combination square | Check angles and draw lines |
A Sharpie gives you clear marks on wood, plywood, and rough stock, and you can wipe temporary lines away when layouts change. The combination square helps you verify square edges and transfer measurements cleanly. Keep these layout tools in a dedicated spot, and you won’t waste time hunting for them mid-project. You’ll work faster, stay accurate, and keep your workflow tight.
Build a Simple Tool Maintenance Routine
A simple tool maintenance routine keeps your shop tools ready and extends their life. After each project, wipe off sawdust, dirt, and moisture so grime doesn’t build up.
Keep tool maintenance simple: sharpen blades and bits before they feel dull, since dull edges waste effort and can be unsafe.
- Lubricate moving parts with a light oil.
- Check cords, handles, and fasteners for wear.
- Inspect blades, bits, and cutters for damage.
- Clean vises, fences, and slides regularly.
- Replace worn parts before they fail.
Use a quick checklist and do these steps every time you finish a task. You’ll work faster, cut cleaner, and catch problems early.
Store Tools to Prevent Rust and Damage
Once you’ve cleaned and checked your tools, store them where moisture and damage won’t shorten their life. Keep your shop dry and temperature-controlled, and don’t leave metal tools in damp corners or on concrete.
Wipe each tool with a microfiber cloth after use to remove grit and moisture. For keeping tools protected, add a thin coat of wax or oil to exposed metal surfaces.
Use pegboards, racks, or labeled toolboxes so tools stay organized, off the floor, and easy to grab without knocking together. In humid seasons, place desiccant packets in drawers or run a dehumidifier in the storage area.
Use pegboards, racks, or labeled toolboxes to keep tools organized, protected, and easy to reach.
These habits cut rust, prevent corrosion, and reduce accidental dings, so your tools stay ready for the next job.
Pick Your Next Tool Upgrade
Start with the tool you’ll use most on real jobs, then upgrade for the tasks that slow you down every week.
If you need one tool that handles many jobs, choose a router, cordless drill and impact driver combo, or a random orbital sander for broad utility.
If your work calls for cleaner joinery or repeatable cuts, move up to a miter saw or band saw for better precision.
Prioritize Daily Tasks
If you want to choose your next tool upgrade wisely, focus on the tasks you do every day and buy the tool that speeds them up the most. In a growing shop, the must-have woodworking tools are the ones that cut setup time, improve accuracy, and keep projects moving.
Prioritize the work you repeat most, then upgrade there first.
- A miter saw helps you nail precise angle cuts fast.
- A table saw gives you quick ripping and crosscutting power.
- A cordless drill and impact driver combo speeds assembly.
- A random orbital sander finishes surfaces faster with fewer swirl marks.
- Clamps and a pocket hole jig make assembly steadier, stronger, and easier.
Choose the tool that removes the biggest bottleneck from your daily workflow, and you’ll feel the gain on every project.
Buy for Versatility
When you’re picking your next shop upgrade, go for the tool that can do the widest range of jobs well, not just one task fast.
In a growing shop, that means buying must-have power tools that earn their space. A miter saw handles clean angle cuts for trim and furniture parts. A router gives you edge shaping, grooves, and decorative profiles with the right bit. A random orbital sander speeds finishing and helps you avoid swirl marks.
Pair a cordless drill with an impact driver so you can drill and drive without slowing down. If you’re ready for a bigger step, a table saw brings rip cuts and, with jigs, even more options.
Choose tools that solve multiple problems and keep your workflow moving.
Upgrade for Precision
For your next upgrade, choose the tool that tightens your tolerances and makes repeatable work easier. Start with a table saw if you need cleaner, straighter cuts on parts you’ll join again and again. A better miter saw helps you crosscut stock fast and square.
- Pick a high-quality router for edge profiles and joinery.
- Add a solid random orbital sander to cut swirl marks.
- Buy a jointer to flatten one face before milling.
- Use a planer to bring boards to exact thickness.
- Try a pocket hole jig when you want strong, hidden-fastener joints.
Upgrade one tool at a time, and you’ll feel each improvement in fit, finish, and speed.
Frequently Asked Questions
Which Woodworking Tool Should I Buy First for Limited Space?
Buy a cordless drill/driver first. You’ll use it for drilling, driving screws, and most quick fixes, and it stores easily. Add a quality tape measure and clamps next; they cover most small-shop tasks.
How Do I Choose Between Corded and Cordless Power Tools?
Choose corded tools when you need nonstop power and lighter weight; choose cordless when you value mobility and quick setups. You’ll buy batteries and chargers, so compare runtime, torque, and your shop’s outlet access.
What Safety Gear Is Essential for a Beginner Woodworker?
You need safety glasses, hearing protection, a dust mask or respirator, and snug clothing. Wear closed-toe shoes, tie back hair, and keep a first-aid kit nearby. Gloves help only when handling rough lumber, not spinning blades.
How Many Clamps Are Enough for Small Home Shop Projects?
For small projects, you’ll want at least 6 to 10 clamps; 8 lets you glue panels like a ruler-straight board. You’ll quickly use them all, so buy extras as your projects grow.
Which Wood Species Are Easiest for Beginners to Work With?
You’ll find pine, poplar, and soft maple easiest to work with. They cut cleanly, sand fast, and don’t fight you much. Start with straight, knot-free boards, and you’ll make fewer mistakes.
Conclusion
As you grow your home shop, keep the basics close and ready. A reliable tape, square, drill, clamps, and circular saw will handle most jobs and help you work cleanly and safely. Keep your tools sharp, dry, and organized, and they’ll serve you longer. Treat your setup like a foundation, not a finish line—strong like concrete, it supports every upgrade you add next. Choose your next tool based on the projects you actually do.