
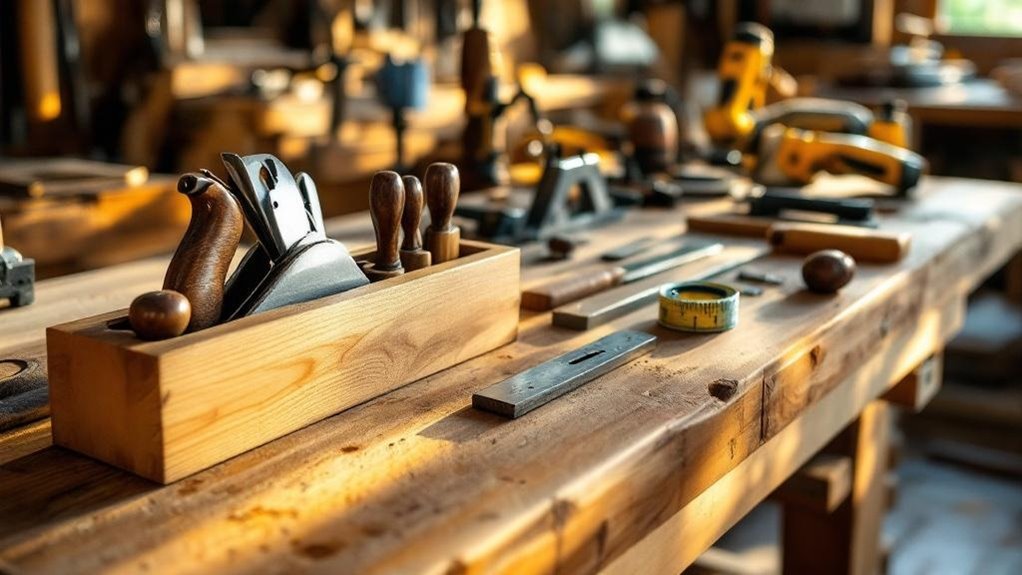
Start with a few reliable hand tools: a dovetail saw, 1/4″ to 1″ chisels, a marking gauge, a combination square, a No. 4 smoothing plane, and a low-angle block plane. These cover layout, joinery, flattening, and cleanup with accuracy and control. Store tools dry and sharpen them often. Add power tools only when real projects demand speed, like repeated cuts or sanding, and build your collection around what you actually use most.
Key Takeaways
- Start with essential hand tools: saw, chisels, marking gauge, square, hammer, tape, and low-angle block plane for most beginner tasks.
- Add smoothing and joinery planes like a No. 4, shoulder plane, and jointer plane to flatten surfaces and refine precise joints.
- Keep tools sharp and properly tuned, since maintenance improves cut quality, reduces tear-out, and extends tool life.
- Build a sturdy, flat workbench with vises and dog holes to improve accuracy, comfort, and workholding control.
- Expand into power tools only as projects demand, choosing versatile tools that solve actual bottlenecks and reduce clutter.
Start With Essential Hand Tools
Start with a small, reliable set of hand tools that lets you cut, measure, shape, and assemble accurately. You don’t need a crowded bench; you need the right basics.
Start with reliable basics, not a crowded bench; the right hand tools make accurate work possible.
Keep a dovetail saw, a marking gauge, and chisels from 1/4 inch to 1 inch for layout, shaping, and joint cleanup. Add a No. 4 smoothing plane to flatten boards and leave a cleaner surface than sanding, plus a low-angle block plane for fine cuts and chamfers.
Use a claw hammer, measuring tape, and square to keep parts straight and aligned. A wooden or rubber mallet drives chisels safely and helps you make crisp cuts.
As your skills grow, you can add specialized hand tools, but these core tools cover most beginner work.
Choose a Dovetail Saw for Fine Cuts
A dovetail saw is one of the most important saws you’ll own for fine joinery, because it lets you make precise, clean cuts for dovetail joints with minimal tearout.
You’ll notice the fine-toothed blade leaves smooth edges, which matters when you want tight-fitting joints in fine woodworking. Choose between a Western backsaw and a Japanese pullsaw (dozuki).
A Japanese dovetail saw cuts aggressively and arrives very sharp, while a Western backsaw often feels better in your hand and helps you keep the blade aligned for straighter cuts.
If you’re new to joinery, this saw can sharpen your accuracy and boost your confidence quickly. Pick one that fits your grip, then practice controlled strokes until you can follow your layout lines cleanly every time.
Add Chisels for Joinery Cleanup
Four chisels—1/4 in., 3/8 in., 1/2 in., and 3/4 in.—cover most joinery cleanup tasks, from squaring mortises to fine-tuning a joint’s fit.
You’ll use chisels to pare end grain, shave high spots, and refine shoulders without forcing the fit. Keep them sharp; a keen edge cuts cleaner, gives you better control, and reduces tearout.
- Start with a versatile set.
- Match the blade width to the cut.
- Hone before every session.
- Work with marking gauges and coping saws.
A quality set, like Irwin Blue Chip, gives you solid value and useful variety.
With the right chisels, you can clean joinery quickly, accurately, and confidently.
Buy a Combination Square for Accurate Layout
A 12-inch combination square works best on wide boards, while a 6-inch model fits tight spots and smaller projects. Its adjustable head lets you transfer angles quickly and set tools, including tablesaw blade angles, with confidence.
A 12-inch combination square suits wide boards, while a 6-inch model handles tight spots with ease.
Choose a high-quality model, such as a Starrett, if you want lasting accuracy and less drift over time.
When you reach for the combination square often, you build disciplined measuring habits that support clean layout and professional results. It’s one of the first precision tools you should own.
Use a Marking Gauge and Knife for Precise Lines
Once you’ve checked your layout with a combination square, use a marking gauge and knife to lock in the lines you’ll actually cut. A marking gauge keeps your scribe line parallel and consistent, which is essential for mortises, tenons, and other joinery.
The Veritas standard wheel marking gauge cuts cleanly and helps you stay accurate. Use a sharp, double-bevel marking knife when you need a crisp, visible line that guides the saw or chisel.
- Set the marking gauge to your exact dimension.
- Pull it firmly with the grain.
- Knife the baseline for clarity.
- Recheck with your combination square before cutting.
Practice these steps often, and your layout will become faster, cleaner, and more precise over time.
Add a Bevel Gauge for Angle Transfer
A bevel gauge lets you transfer an angle from a drawing, template, or existing part directly to your workpiece so your cuts and joints match exactly.
Add a bevel gauge early in your kit, and choose a standard model with a strong, durable arm for reliable handling. You’ll use it to capture angles for layouts, set tablesaw blade tilt, and build complex joinery without guesswork.
Make sure the locking mechanism clamps tightly; if it slips, you’ll cut the wrong angle. Before each project, check the bevel gauge against a known reference and adjust it if needed.
Keep the blade and pivot clean so the tool stays accurate. With careful use and maintenance, your bevel gauge will help you repeat precise angles consistently over time.
Pick a Coping Saw for Fast Waste Removal
Pick a coping saw when you need to remove waste fast between dovetail pins and tails. Its thin, fine-toothed blade lets you cut quickly while still maneuvering cleanly in tight spaces.
Choose a model with a comfortable grip and solid blade tension so you can work accurately with less fatigue.
Fast Waste Removal
For fast waste removal in woodworking, a coping saw gives you quick control in tight areas where larger saws can’t maneuver. You can use a coping saw to clear waste around dovetails, curves, and other intricate cuts with little setup.
Its thin blade and light frame help you work efficiently, and you can swap blades fast to match different stock.
- Cut sharp turns cleanly.
- Remove waste from joints quickly.
- Reduce sanding time afterward.
- Handle varied materials affordably.
Because the coping saw tracks tight patterns well, you spend less time correcting mistakes and more time refining the fit.
It’s a practical, low-cost tool that boosts speed without sacrificing accuracy, whether you’re just starting out or adding a dependable hand tool to your kit.
Tight-Space Maneuvering
When you need to work in tight spaces, a coping saw is one of the best tools for removing waste wood between pins and tails in dovetail joints.
Its thin blade and light frame let you steer around curves, corners, and narrow gaps without forcing the cut. You can follow layout lines accurately, and the saw clears waste quickly, leaving crisp edges that need little sanding.
Choose a coping saw blade with the tooth pattern that matches the job: finer teeth for cleaner cuts, coarser teeth for faster removal.
Keep the blade properly tensioned so it tracks straight and cuts efficiently. If you maintain it well, your coping saw will stay reliable for detailed joinery and other precise woodworking tasks for years.
Get a Smoothing Plane for Clean Surfaces
A smoothing plane is one of the most valuable tools you can add to your shop because it levels surfaces, removes machine marks, and leaves a finish that sandpaper can’t truly match. When you want clean surfaces, a smoothing plane gives you faster, finer results and a more controlled workflow.
Start with a No. 4 smoothing plane; it’s a smart choice for beginners because it flattens and refines wood efficiently.
- Pick a well-made model.
- Keep the blade sharp.
- Make light, consistent passes.
- Invest in trusted brands like Lie-Nielsen or Veritas.
With regular tuning and use, your smoothing plane can produce a glass-smooth surface and save you time on every project.
Add a Block Plane for Edges and Chamfers
Add a block plane next if you want quick control over edges, chamfers, and small cleanup work after your smoothing plane. This compact block plane, usually 6 to 7 inches long, fits easily in your hand and moves well in tight spots.
You can use it one-handed, which gives you precise control on small or delicate parts. Choose a low-angle model when you need fine cuts on cross-grain areas, because it helps reduce tearout and leaves cleaner surfaces.
Use it to break sharp edges, shape chamfers, and refine details before finishing. Keep the blade sharp and tune the plane often; maintenance matters if you want consistent results and a clean, professional look on every project.
Keep a Shoulder Plane for Tight-Fit Joinery
Keep a shoulder plane in your kit when you need tight-fit joinery with clean, accurate results. It’s one of the tools you need for trimming tenon shoulders and dialing in a precise fit. Its flat bottom rides smoothly along edges, and the fully adjustable blade lets you make fine corrections without guesswork.
A 1-inch shoulder plane gives you enough control for most projects while staying easy to handle.
- Trim tenon shoulders accurately
- Work into corners and hidden surfaces
- Adjust blade depth for exact fits
- Improve joint strength and appearance
When you use it well, you’ll tighten joints, reduce gaps, and improve the sturdiness and look of finely crafted furniture.
Use a Card Scraper on Difficult Grain
Reach for a card scraper when difficult grain starts to tear out and spoil your surface. You’ll get clean control on woods like tiger maple because the card scraper shaves thin layers instead of ripping fibers.
Keep the edge sharp and burnished so it cuts with a fine, consistent bite. Hold the tool slightly bowed, set your hands firmly, and let the edge work across the grain in controlled passes. You can remove machining marks, level small defects, and bring the surface close to finish quality without fighting the wood.
Unlike sandpaper, a card scraper can leave a glass-smooth result and cut down on sanding time. Add it to your finishing sequence whenever grain direction turns unpredictable and precision matters most.
Build a Bench Plane Set Around a No. 4
If a card scraper has helped you tame difficult grain, the next upgrade is a bench plane set built around a No. 4 smoothing plane.
You’ll use it to flatten boards and erase machine marks fast, which makes it ideal for your first serious hand-tool setup.
You’ll use it to flatten boards and erase machine marks fast, making it ideal for your first serious hand-tool setup.
Build out the rest of your bench plane set like this:
- No. 4: primary smoother and surface flattener
- Low-angle block plane: clean chamfers and end grain
- No. 7 jointer plane: true long edges for glue-up
- Sharpening kit: keep every blade keen and adjusted
With these three planes, you can handle rough prep, edge work, and final finishing without overbuying.
Regular honing and blade adjustment keep the set cutting predictably and cleanly.
Choose Quality Planes From Trusted Brands
You should start with trusted plane makers like Lie-Nielsen and Veritas, because their planes hold flat, adjust predictably, and stay reliable for years.
When you compare new and vintage planes, look for sound castings, clean soles, and mechanisms you can tune easily, then choose the one that gives you the best value and consistency.
No matter which you buy, keep the iron razor-sharp and set the plane carefully, since setup quality has a bigger effect on cut quality than the badge on the body.
Trusted Plane Makers
When you choose a plane from a trusted maker like Lie-Nielsen or Veritas, you’re usually paying for more than a brand name—you’re getting consistent machining, durable materials, and a tool that’s far more likely to perform well right out of the box.
With trusted plane makers, you can expect:
- Pre-tuned soles and irons that save setup time.
- High-carbon steel blades that stay sharp longer.
- Solid construction that resists wear in daily use.
- Better long-term value for your toolkit.
That matters because you’ll spend more time flattening boards and less time correcting tool flaws.
If you’re building your kit step by step, start with brands known for accuracy and reliability.
You’ll work faster, learn cleaner technique, and add a plane that keeps delivering value.
New Vs Vintage
New planes and vintage planes can both earn a place in your shop, but quality should drive the choice, not age alone. If you want dependable results, look first at trusted brands like Lie-Nielsen and Veritas. Their new planes arrive ready for work and suit beginners who want predictable, precise cuts. Vintage planes, especially Stanley Bailey models, can save money and add character, but you’ll often spend time restoring them before they perform well.
| Option | Best For |
|---|---|
| new planes | Convenience and consistency |
| Vintage planes | Budget and restoration interest |
| Either from trusted brands | Long-term skill growth |
Choose a solid tool, and you’ll get better results, easier learning, and a more enjoyable woodworking experience over time.
Sharpness And Setup
- Hone the blade often; sharpness prevents tear-out and uneven surfaces.
- Check setup before each session; the iron depth and lateral alignment must be precise.
- Tune the sole, mouth, and chipbreaker so the plane tracks smoothly.
- Maintain and store the tool carefully to preserve performance and extend its lifespan.
When you combine reliable hardware with disciplined sharpening and setup, you get cleaner joinery, smoother finishes, and a plane you’ll trust on every project.
Decide Between New and Vintage Planes
Choosing between new and vintage planes depends on how much time you want to spend on setup, how much you want to spend overall, and whether you value convenience or character. If you want immediate results, new planes from Lie-Nielsen or Veritas arrive pre-sharpened and consistent. If you enjoy restoration, vintage planes can save money and deliver excellent performance.
| Option | Best For | Tradeoff |
|---|---|---|
| New | Fast work | Higher cost |
| Vintage | Lower budget | More tuning |
| New | Precision | Less history |
| Vintage | Character | More maintenance |
| Both | Versatility | Different needs |
Well-kept vintage planes, especially Stanley Bailey models, can rival new ones once you restore them. You’ll also gain the hobby of collecting tools with history and craftsmanship.
Sharpen Tools Before Buying More
Before you buy another plane, chisel, or saw, make sure the tools you already own are sharp, because a keen edge improves cutting performance, extends tool life, and makes woodworking safer and easier.
Start with your planes and chisels, then set up a sharpening system that you’ll use regularly.
- Inspect edges for dull spots.
- Hone with quality stones.
- Test cuts on scrap.
- Sharpen before every major project.
A dull blade forces you to push harder, which reduces control and increases risk. Sharp tools cut cleaner, need less effort, and deliver better accuracy.
You don’t need a big investment to revive them; consistent sharpening often improves results more than buying new gear. Mastering this habit builds confidence and makes every project more satisfying.
Build a Bench for Hand Tool Work
For hand tool work, you need a bench that stays rock solid, with a thick top and a height that fits your posture and tasks.
You’ll get better control if you add a front vise, a tail vise, and dog holes so you can lock stock down for cutting, planing, and jointing.
Build it from durable hardwood like maple or beech, and you’ll end up with a stable, long-lasting surface that supports precise work.
Bench Stability Needs
A stable bench is the foundation of effective hand tool work, and its height should let you work comfortably at about waist level so you can maintain good posture and reduce fatigue.
When you build a sturdy workbench, focus on these essentials:
- Use a solid top, ideally beech or maple, to cut flex and vibration.
- Keep the surface flat and level so parts don’t rock during joinery or assembly.
- Add a vise or clamping system so you can hold stock securely while you cut or shape it.
- Include a lower shelf and a smooth, sanded top to store tools neatly and speed setup.
With these choices, your bench stays rigid, accurate, and ready for demanding hand tool tasks.
Workholding And Layout
Once your bench is stable and set at a comfortable height, focus on workholding and layout so hand tool tasks stay accurate and controlled. Choose a simple bench with a flat, level top and a rigid hardwood frame and surface. Set the height near your elbow so you can plane, saw, and chisel without hunching.
Add dog holes and a vise to improve workholding; they’ll let you clamp boards fast, reposition stock, and keep parts from shifting. Lay out the top so frequently used clamps, squares, and marking tools stay within reach.
A well-planned bench gives you control, reduces fatigue, and makes accurate joinery easier. Build it strong, keep it uncluttered, and let the bench support every cut, layout line, and assembly step.
Protect Yourself With Workshop PPE
Protecting yourself in the workshop starts with the right PPE: wear safety glasses or goggles to shield your eyes from flying debris and dust, use earplugs or earmuffs when power tools get loud, and put on a dust mask or respirator to limit inhaling harmful particles.
Choose gloves that fit snugly so you can grip stock safely without sacrificing control. Keep your area clean and well lit to spot hazards fast.
- Safety glasses
- Hearing protection
- Dust mask or respirator
- Protective gloves
You’ll work more confidently when each layer of protection matches the task. Check your PPE before you begin, and replace worn gear right away.
Small habits like these help you avoid cuts, noise damage, and respiratory irritation every time you use woodworking tools.
Maintain Tools After Every Use
After each project, clean your tools right away by wiping off sawdust and moisture so rust doesn’t have a chance to start.
To maintain tools after every use, you should clean tools thoroughly, then check edges, moving parts, and fasteners. Sharpen blades and bits as soon as they feel dull; sharp cutters work cleaner, cut safer, and reduce strain on motors and wrists.
Add a light lubricant to hinges, threads, and slides when needed so parts move smoothly. You should also inspect tools for cracks, loosened handles, frayed cords, or misalignment before you put them away.
When you store tools, use cases or pegboards that keep them dry and protected. This routine helps every tool last longer and perform better.
Store Tools to Prevent Rust and Damage
Before you store any tool, dry it completely so trapped moisture can’t start rust or corrosion.
Keep hand tools in a toolbox, on a pegboard, or on a shelf, and place power tools in cases or cabinets with silica gel or desiccants nearby.
Check metal surfaces regularly for early rust, and wipe on a light coat of oil whenever needed to protect them.
Dry Before Storage
A dry tool is a longer-lasting tool, so make sure every metal surface is completely dry before you put it away. Even when tools are still warm from use, wipe them with a clean cloth to remove moisture, dust, and sap.
- Dry blades, chisels, and planes immediately.
- Check joints, screws, and handles for hidden dampness.
- Apply a thin coat of protective oil or rust inhibitor to exposed metal.
- Keep storage areas low-humidity, and use desiccants in containers if dampness is a problem.
This routine helps prevent rust and corrosion, which can shorten tool life and reduce accuracy.
If you work in a humid shop, inspect tools before every storage cycle and rewipe any condensation.
Dry storage isn’t optional; it’s part of basic tool care.
Use Protective Storage
Once your tools are dry, store them in a clean, dry, well-ventilated space so moisture doesn’t have a chance to settle in and start rusting metal.
Use protective storage to keep each tool organized and separated, whether you choose a toolbox, pegboard, or cabinet. When tools can’t knock together, you reduce wear, edge damage, and finish scuffs.
Cover or sheath blades and other cutting edges every time you put them away so they stay safe from nicks and moisture. Add silica gel packets or another desiccant inside storage containers to pull excess humidity from the air.
Make a habit of checking stored tools during use intervals so you can catch wear early and keep your collection ready for the next job.
Check For Rust
Inspect your tools regularly for any sign of rust or corrosion so you can catch problems early before they spread. When you check for rust, run your hand over metal edges, joints, and fasteners to feel for rough spots.
Then protect each tool with these steps:
- Wipe tools clean after every use to remove moisture, dirt, and oils.
- Store them in a dry space with low humidity.
- Apply wax or light oil to exposed metal surfaces.
- Place silica gel packets in storage boxes to absorb excess moisture.
Keep inspecting your tools on a set schedule, especially after humid days. Early care prevents pitting, keeps tools working smoothly, and extends their life.
Know When It’s Time for Power Tools
When do power tools start pulling their weight in your shop? You’ll notice the shift when your projects grow beyond simple repairs and into furniture making, large cabinetry, or other advanced builds.
At that point, power tools help you cut, shape, and repeat operations faster and with better consistency than hand tools alone. A table saw or router can justify its cost when you face repetitive cuts, tight tolerances, or intricate profiles that eat up time by hand.
You’ll also gain confidence as regular use sharpens your ability to tackle more ambitious designs. Keep hand tools in your workflow for control and craftsmanship, but use power tools where speed and precision matter most. That balance gives you efficiency without losing skill.
Add Power Tools That Save Time
Add cordless drill drivers, fast cutting saws, and efficient sanding tools to speed up your workflow and cut down on repetitive hand labor.
You’ll drill holes, drive screws, and make clean cuts much faster with less strain and better consistency.
Choose tools that match your most common tasks, and you’ll finish projects with more accuracy in less time.
Cordless Drill Drivers
Choose a model with a strong battery, variable speed, and torque control for clean results in wood, metal, or drywall.
- Run longer between charges.
- Adjust speed for accuracy.
- Reduce hand fatigue with a lightweight grip.
- Swap batteries across matching tools.
This flexibility helps you stay productive on assembly, repairs, and installation jobs. Over time, a reliable cordless drill driver becomes one of the most useful power tools in your shop.
Fast Cutting Saws
You’ll get the biggest time savings from a circular saw when you need straight cuts in plywood or framing lumber, and a miter saw when you’re trimming boards to exact angles. A jigsaw helps you follow curves and cutouts without slowing down the job, while a reciprocating saw handles demolition and rough cutting with speed.
A table saw gives you repeatable ripping and cross-cutting accuracy, so it’s worth adding when you’re ready for larger projects.
Choose fast cutting saws that match your common tasks, and you’ll spend less time measuring, repositioning, and forcing cuts, which keeps your build moving efficiently.
Efficient Sanding Tools
A few well-chosen power sanders can cut your sanding time dramatically while giving you smoother, more consistent results.
With efficient sanding tools, you can match the tool to each task and avoid overworking the wood.
- Use an orbital sander for most surfaces; it removes marks fast and helps you reach smooth finishes.
- Add a belt sander when you need to level rough lumber or shape large, flat panels quickly.
- Keep a detail sander ready for corners, trim, and tight spots where precision matters.
- Pair your power sanders with dust collection to reduce cleanup and improve tool performance.
Build Your Woodworking Tool Collection Around Real Projects
Start by matching your tool purchases to the projects you actually want to build, whether that means furniture, cabinetry, or smaller shop fixtures.
Let your first woodworking tools support those jobs, not every possible task. Buy a versatile tool set in stages: a dovetail saw, chisels, and a marking gauge for joinery, then a circular saw and drill/driver for fast layout, cuts, and assembly.
Start with a few versatile tools that match your projects, then add more only as real needs appear.
As tools come in, choose ones that suit the hardwoods or softwoods you’ll actually use. Don’t chase duplicates; buy only when a project exposes a real gap.
When a build finishes, review what slowed you down and what tools can make the next job cleaner or faster. That keeps your collection focused, efficient, and tied to real results.
Frequently Asked Questions
What Tools Help Start Woodworking on a Tight Budget?
You’ll start cheaply with a tape measure, pencil, try square, hand saw, block plane, chisel set, hammer, clamps, and a drill. Buy used tools first, then add quality blades and sharpening gear.
How Do I Choose Tools for My First Furniture Project?
Choose tools that match your project’s joinery and stock: a tape measure, square, saw, drill/driver, clamps, and sanding gear. You’ll build accurately, save money, and avoid buying specialty tools before you need them.
Which Measuring Tools Are Best for Beginner Woodworkers?
A 1/64-inch error can ruin joinery. You’ll want a 6-inch steel rule, combination square, tape measure, and marking gauge. They’re accurate, durable, and let you measure, mark, and check angles confidently.
How Should I Prioritize Tools for Small Workshop Spaces?
Prioritize compact, multiuse tools first: a workbench, hand saw, drill, clamps, square, and measuring tools. You’ll save space by choosing foldable or wall-mounted storage, then add larger machines only when projects demand them.
What Woodworking Tools Offer the Most Long-Term Value?
You’ll get the most long-term value from a solid table saw, cordless drill, hand plane, chisels, marking tools, and clamps; they’re versatile, durable, and support nearly every project while reducing future replacement costs.
Conclusion
As you build your tool collection, keep it lean, sharp, and ready. Picture a clean bench, a dovetail saw resting beside chisels, a square aligned with crisp pencil marks, and tools stored dry, safe from rust. Start with the hand tools you’ll use every project, then add power tools when they truly save time. Let each new tool earn its place, and your shop will grow into a dependable, well-tuned workspace.