
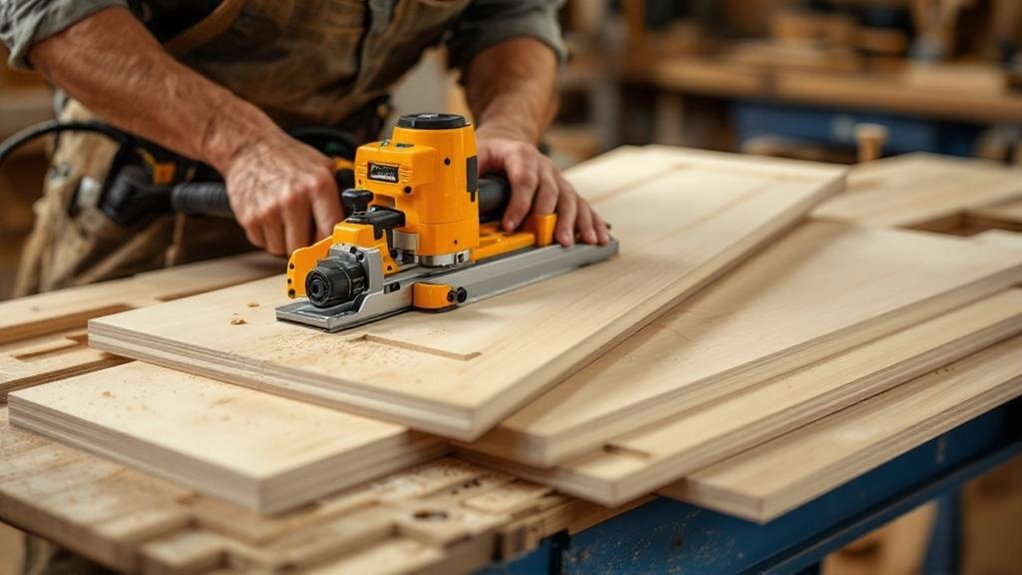
Use a biscuit joiner to keep panel edges flush and speed up glue-up on cabinets, tabletops, and frames. Pick the biggest biscuit that fits the stock, mark centerlines on both panels, and test slot depth on scrap before cutting. Store biscuits dry so they don’t swell early, and clamp the panels flat from both sides during assembly. A simple gauge or story stick helps you lay out slots faster, and there’s more to tighten up the process.
Key Takeaways
- Use a biscuit joiner to quickly align panel edges for flush, repeatable joints without complex jigs.
- Mark matching centerlines first so slot locations transfer accurately between boards before cutting.
- Choose the largest biscuit that fits, and cut slots slightly deeper than half the biscuit for solid engagement.
- Keep panels clamped flat during dry-fit and glue-up to prevent bowing and maintain alignment.
- Let biscuits swell from glue, then trim and sand any proud edges after the joint cures.
What Is a Biscuit Joint?
As the biscuit swells, it helps lock the joint and keep the pieces aligned. You’ll often use biscuit joints when you need a faster, simpler option than mortise-and-tenon joinery. The oversized slots give you a little wiggle room, so you can fine-tune alignment during assembly.
That makes them useful for cabinet assembly, picture frames, and edge banding. Biscuit joints work best in low-stress applications, so you shouldn’t rely on them alone for heavy structural loads.
Why Use a Biscuit Joiner for Panels?
You can use a biscuit joiner to keep panel edges aligned because its crescent-shaped slots give you just enough play to fine-tune the fit.
It also lets you join boards edge-to-edge quickly, so you can assemble panels fast and keep the surfaces flush.
For larger projects, that repeatable precision helps you make consistent joints with less hassle.
Panel Alignment Benefits
When you’re joining panels, a biscuit joiner helps keep edges aligned by cutting matching crescent-shaped slots that guide the pieces into place during glue-up. In biscuit joinery, you drop in a biscuit, spread glue, and let the joint self-register.
The oversized slots give you a little wiggle room, so you can nudge uneven boards flush before the glue sets. Once the biscuit swells, it locks the edges together and adds a mechanical bond that helps hold alignment under stress.
Use it on cabinet sides, tabletops, and other wide panels where straight seams matter. You don’t need complex jigs or fixtures; you just mark, cut, fit, and clamp.
That makes your setup simpler and your panel edges more accurate.
Fast Edge-to-Edge Assembly
Biscuit joiners make edge-to-edge panel assembly fast and straightforward. You cut matching slots in each panel, drop in biscuits, and clamp the boards without a complicated setup.
The adjustable fence helps you keep every slot aligned, so your edges stay flush across the full panel. Use them when you need speed and consistency.
- Mark your panel edges.
- Set the fence and cut slots.
- Insert biscuits and spread glue.
- Clamp, check, and let it cure.
The oval biscuits give you a little wiggle room during glue-up, which helps correct tiny shifts before the clamps bite.
That speed makes biscuit joiners ideal for tabletops, shelving, and cabinet panels, where you want fewer fasteners showing and a cleaner finish.
Choose the Right Biscuit Size
Match the biscuit size to your stock so the joint aligns cleanly and fits the workpiece thickness.
When you can, choose the largest biscuit that fits because it’ll give you more glue surface and a stronger joint.
For small projects, use a smaller size or FF biscuits if standard biscuits are too big.
Match Biscuit Size to Stock
Choosing the right biscuit size starts with the stock you’re joining, since bigger biscuits give you more glue surface and a stronger joint. Use biscuit sizes that match the board thickness and width so you don’t weaken the edge.
- Pick #0 biscuits for small projects, like picture frames.
- Keep stock at least 2-1/8″ wide when you use #0 biscuits.
- Choose #10 for general assembly and #20 for larger panels or heavier joints.
- Check biscuit thickness before cutting; humidity can swell them, so store them sealed and use a Biscuit Press for consistent fit.
When the biscuit fits the stock cleanly, you’ll get better alignment and a joint that stays solid during assembly.
Favor the Largest Biscuit
When the joint allows it, go with the largest biscuit that fits the stock, usually a #20, because it gives you more glue surface and a stronger, more stable bond.
Use the largest biscuit possible for heavy panels and furniture joints, where strength and alignment matter most. If the stock is too narrow, step down to a #10 or #0, but keep the biscuit size matched to the job, not just the parts.
Check that the board width meets the minimum requirement before you cut slots. Bigger biscuits also help absorb small humidity-driven movement, so the joint stays solid over time.
Choose the biggest suitable size, keep your cuts centered, and you’ll get better glue coverage and a tougher assembly with less fuss.
Mark Panel Centerlines First
Start by marking the centerlines on both panels before you cut any biscuit slots. Clear marking keeps your joints aligned and helps you place each slot consistently across matching pieces.
Use a T-square or straight edge to draw centerlines on both faces, then check the material thickness so your lines reflect the biscuit’s real position.
For wider panels, a self-squaring story stick lets you repeat measurements without drifting. Mark both edges when you can; that extra reference helps you verify alignment before assembly and catch fit issues early.
- Lay out centerlines first.
- Transfer them with a T-square.
- Account for panel thickness.
- Double-check both edges.
Make a Quick Biscuit Gauge
Mill a quick biscuit gauge with slots for #0, #10, and #20 biscuits, then attach the pieces so you can identify the size at a glance. Keep the biscuit gauge on your bench and use it before you cut or sort parts.
Push each biscuit halfway into the gauge and mark a centerline across it; that line gives you a fast reference when you transfer layout marks to the workpieces. Match that centerline with your panel layout lines so you place biscuits accurately and assemble parts faster.
This simple biscuit gauge also helps you pick the largest biscuit size that fits your material, so you can stay consistent from one project to the next without stopping to measure each time.
Set Slot Depth for Stronger Joints
Test the slot depth on scrap wood first so you can confirm the fit before you cut your real parts.
Set the joiner a little deeper than half the biscuit’s width, about 1/32″, so the glued biscuit can swell and lock the joint tight.
Match the depth to the biscuit size—#0, #10, or #20—so you get full engagement without weakening the wood.
Test Depth On Scrap
Before you cut into your workpieces, set the biscuit joiner depth on a scrap board and aim for a slot that’s about 1/32″ deeper than half the biscuit’s width.
Use a caliper or ruler to check the biscuit, then match the setting before you make a real cut. When you test depth on scrap, you’ll spot errors early and keep joints tight and aligned.
- Cut a practice slot in scrap wood.
- Insert a biscuit and feel for a snug fit.
- Adjust the biscuit joiner if it binds or rattles.
- Recheck the setting often so wear doesn’t throw off your cuts.
This quick check helps you avoid loose joints, preserve edge alignment, and assemble faster with less cleanup and fewer surprises.
Cut Slightly Deeper
Set your biscuit joiner about 1/32″ deeper than half the biscuit’s thickness so the slot gives the biscuit room to swell with glue and lock the joint more securely. This slight extra depth helps the biscuit expand, boosts holding power, and lowers the chance of joint failure during assembly.
Keep your biscuit slots consistent from piece to piece so every joint fits and lines up the same. If you’re working in dense or damp stock, that small adjustment can offset changes in swelling.
Before you cut your actual parts, check the setting on a scrap piece and confirm the fit. Once you dial it in, repeat that depth for all matching cuts.
Consistent slot depth gives you stronger, cleaner, more reliable assemblies.
Match Biscuit To Slot
Now match the biscuit to the slot depth so the joint pulls tight without stressing the wood. Set your biscuit joiner so each slot is about 1/32″ deeper than half the biscuit’s thickness. That slight extra room lets the biscuit slide in, soak up glue, and expand for a stronger bond.
Use the largest biscuit that fits, like a #20 on bigger panels, to increase glue area. Keep the fence aligned with your marks so every slot stays consistent across parts.
Don’t cut slots deeper than 2/3 of the material thickness.
- Measure the biscuit before you cut.
- Mark both faces clearly.
- Test-fit the biscuit in the slots.
- Glue generously and assemble quickly.
Cut Cleaner Slots With a Better Blade
Swap in a higher-quality blade if you want cleaner biscuit slots with less tear-out and fewer hanging strands. A blade made for biscuit joiners, like Freud’s six-tooth option, cuts more consistently than a generic blade.
Set your cutting depth carefully so the biscuit fits without forcing the slot. Check the blade often for dull edges, chips, or wobble, because wear quickly shows up as ragged cuts and weaker joints. Clean off resin buildup regularly; even a good blade can leave uneven slots when pitch coats the teeth.
Keep the joiner aligned and firmly mounted while you work, so the blade tracks true through the cut. When you pair a sharp, clean blade with correct setup, you’ll get smoother slots and better joint quality.
Use the Biscuit Joiner to Align Wide Panels
Start by marking precise centerlines on both wide panels with a T-square so your biscuit slots line up.
Then cut matching slots and use the biscuits to help you register the panels accurately before glue-up.
Clamp the panels flat and tight while you cut and dry-fit them so you can catch any misalignment early.
Mark Centerlines First
Lay out the centerlines on both workpieces before you cut, and use those marks to line up the biscuit joiner for wide panels.
Start with marking biscuit centerlines on each edge, then check them with a T-square so every panel matches.
Set the joiner’s fence to the marks, and keep the base centered as you cut the slots. For repeat work, make a story stick and transfer the same locations fast.
- Mark both panels clearly.
- Verify with a T-square.
- Adjust the fence to the line.
- Cut with the base on center.
These steps help you place each slot where it belongs, stay consistent across large panels, and avoid wandering cuts.
Use Biscuits For Alignment
Use biscuits to help align wide panels by cutting matching slots in each piece, then slipping in the biscuits during glue-up. The biscuit joiner gives you slight side-to-side play, so you can fine-tune fit across multiple sections before the glue sets.
Keep your centerlines accurate with a T-square or straightedge, and place each slot consistently from edge to edge. That way, your biscuit joints pull the panels into the same plane and cut down on gaps.
Use enough glue to wet the slots and biscuit, then assemble quickly so the alignment advantage stays intact. With careful layout and fast assembly, you’ll get a flush, seamless panel without fighting each board into position.
Clamp Panels Flat Together
Once you’ve aligned the panels with biscuits, clamp them flat together while the glue is still workable. You want even pressure across the whole glue-up so the panels don’t creep or bow.
Set clamps above and below the joint, then tighten gradually while checking for flush edges. Keep the biscuit slots near the ends and midpoint to spread stress and hold the assembly straight.
If the panel is wide, add a temporary support or a few dowels to resist sagging. Recheck alignment as you tighten, and make small adjustments before the glue grabs.
- Clamp from both sides.
- Watch the face for gaps.
- Support wide spans.
- Confirm the joint stays level.
Keep Edge Joints Flush During Glue-Up
To keep edge joints flush during glue-up, cut precise biscuit slots in both adjoining panels so the biscuits can lock the pieces into alignment.
Use biscuit joints to hold the faces even while you work. Brush glue into each slot and onto each biscuit, then insert them quickly so they swell and grab. Bring the panels together with parallel clamps and tighten them firmly to stop any creeping or twist.
Check the seam with a straight edge or leveling jig before the glue starts to set. If you see a slight step, make a small clamp adjustment right away.
Once the glue cures, sand the edge lightly. That final pass removes tiny differences and leaves you with a clean, seamless panel surface that looks professionally assembled.
Fix Misaligned Slots Before Assembly
Clamp both workpieces securely before you cut so they can’t shift, and check the biscuit joiner’s fence against the marked reference lines to keep the slots where you want them. You’ll spot misaligned slots faster when you compare each cut to your layout before assembly. If a slot lands off, correct it now instead of forcing the joint later.
- Mark centerlines on both faces.
- Test the fence position on scrap.
- Chisel or rout a slight correction.
- Dry-fit biscuits and adjust for a snug match.
If the slots are already cut, add a little thicker glue film or filler only when needed to help the pieces seat cleanly.
Keep your cuts accurate, and you’ll save time, reduce gaps, and get tighter biscuit joints every time.
Reinforce Narrow Joints With Backside Biscuits
You can strengthen narrow joints by adding full-size biscuits on the backside for extra support and stability.
If you’re using #0 biscuits, keep the stock at least 2 1/8 inches wide so the joint stays strong.
Glue and clamp the boards first, then cut the slots so everything stays aligned and bonds cleanly.
Minimum Stock Width
For narrow joints, use #0 biscuits only in stock that’s at least 2 1/8 inches wide so the joint keeps its strength. This minimum stock width keeps the joint from splitting or loosening, and it gives you room for accurate slot placement.
Before you cut, glue and clamp the mating boards so they stay aligned.
- Measure the board width first.
- Mark the biscuit centerline clearly.
- Cut slots no deeper than two-thirds the thickness.
- Check that the fit stays tight before assembly.
If you’re working on face frames, choose the stock carefully and keep the slots centered.
After the glue dries, trim and sand the biscuit flush for a clean finish.
Backside Biscuit Reinforcement
When a narrow joint needs extra strength, add full-size biscuits on the backside to boost support and keep the pieces aligned, especially in face frames and similar work.
For biscuit joints, use #0 biscuits and make sure your stock is at least 2-1/8 inches wide so you don’t weaken the part.
Clamp and glue the mating boards first, then cut matching slots while keeping each slot no deeper than two-thirds of the board thickness. That helps you reinforce the joint without losing strength.
After the glue cures, trim any biscuit edges flush and sand the surface smooth. This backside reinforcement adds stability, improves alignment, and gives you a cleaner, stronger joint on narrow assemblies.
Handle Mitered Panels With Back-To-Back Clamping
Clamp mitered panels back-to-back before cutting your biscuit slots to keep the pieces from tipping or shifting. This setup locks both parts in place, so you can cut with better control and keep the miter faces aligned.
It also helps you hold a consistent 90° relationship between the cuts, which makes the fit cleaner when you assemble the biscuit joints.
- Position both mitered panels together.
- Check that the bevel edges line up.
- Secure them with a clamp or fixture.
- Cut your slots without letting the pieces move.
With the panels held tight, you reduce misalignment and get a more reliable fit. This simple method saves time and supports stronger, cleaner assembly.
Cut Biscuit Slots on Beveled Edges
If your fence only locks at 90°, clamp the mitered pieces back-to-back to steady them while you cut both sides. This keeps your biscuit joints aligned and repeatable.
After assembly, sand any exposed biscuit material flush with the surface, and you’ll get a clean, seamless finish on the beveled edges.
Prevent Tipping on Thin Stock
Thin stock can tip the joiner, so add a flat plywood base extension to give the tool a wider, steadier reference surface. Secure the wood, then make sure the joiner’s fence sits flat before you plunge the blade and mill a slot.
- Clamp both pieces of wood to the base so the face stays aligned.
- Insert biscuits based on the biscuit layout, using matching slots for perfect alignment.
- Apply glue, then glue and clamp the mating pieces until glue dries.
- Check that the base rests on both workpieces; this helps face frames, picture frames, and miter joints stay strong for many applications.
Use the largest biscuit the joint allows, and an Offset Biscuit only when needed. This simple setup can greatly improve Joint Strength without visible gaps.
Stabilize Edge Cuts With a Base Extension
To stabilize edge cuts, add a flat base extension made from plywood or scrap wood to your biscuit joiner so you’ve got a wider, steadier reference surface. Attach it securely so it stays aligned while you work.
The extra support keeps the tool from tipping as you cut biscuits in narrow or irregular boards, and that means fewer wobbles and cleaner slots. With more surface contacting the workpiece, you can guide the joiner more confidently and keep each cut consistent.
That consistency pays off when you assemble panels or frame parts, because the biscuits seat better and the joints fit tighter. Use a flat extension that matches your joiner’s base, check the fit before cutting, and keep pressure even through every pass.
Build a Self-Squaring Biscuit Story Stick
- Cut the stick from durable wood.
- Glue and screw the joint square.
- Mark centerlines on the arm.
- Transfer the marks to each panel.
With one reliable reference, you’ll align slots the same way every time and cut with less guesswork.
One reliable reference keeps every slot aligned, reducing guesswork and making joinery fit cleanly.
That consistency speeds assembly and helps your joinery fit cleanly without extra correction.
Use a Clamp for Bowed Boards
When a board is bowed, clamp it to the machine’s base before you cut so it can’t tip or shift. Use Kreg’s Bench Klamp System or any solid hold-down to keep the stock flat and steady. If you can, rout a shallow recess so the clamp sits flush and supports clean slot cutting. Keep pressure even across the board so both pieces register well and your biscuits align. After cutting, release the clamp quickly with the keyhole slot to speed assembly.
| Step | Action |
|---|---|
| 1 | Position bowed stock against the base |
| 2 | Clamp with even pressure |
| 3 | Cut slots with no movement |
| 4 | Remove the clamp and assemble |
Try a Biscuit Jig for Tricky Angles
A biscuit jig takes the guesswork out of tricky angles by holding the joiner steady and guiding each cut with integrated fences and guides.
You mount your biscuit joiner in the jig, set the angle, and cut with confidence. That stable setup keeps your slots consistent and helps you avoid wandering cuts on complex assemblies.
Mount your biscuit joiner in the jig, set the angle, and cut with confidence.
It also speeds setup, so you can move from one workpiece to the next without repeated measuring.
- Position the jig against your angled edge.
- Lock the joiner in place.
- Cut the slot cleanly and repeat.
- Use the same setup for matching parts.
If you want a versatile build, check woodworking plans in magazine issue 161 or on dedicated woodworking websites.
Use Slots for Tabletop Fasteners
For tabletop fasteners, cut No. 10 depth slots to locate Z-clips securely without weakening the top with full-length kerfs.
Set your biscuit joiner fence so each slot lands the same distance from the edge, and check that spacing stays even from end to end.
You can cut the slots before assembly or after the top comes together, depending on what gives you cleaner access and better control.
Use the biscuit joiner to make short, accurate pockets that hold the clips firmly, yet still let the top move naturally.
Keep the layout consistent across all fastener points so the tabletop stays flat and stable.
This approach gives you a strong attachment, preserves the wood’s strength, and makes installation faster than routing long kerfs for every clip.
Prevent Biscuit Swell Before Glue-Up
Once you’ve cut clean slots for your clips or biscuits, keep the biscuits dry until glue-up so they don’t swell and fight the fit. Store them in sealed containers, away from humid air, so they stay true in thickness.
If you want extra control, run them through a Biscuit Press before assembly to compress minor variation. Choose the biscuit size that matches your joint; larger biscuits give you stronger panels, but #0 still needs at least 2 1/8” stock width.
- Brush dust from each slot.
- Check that every biscuit slides freely.
- Apply glue evenly, then seat the parts.
- Let the joint set fully before handling.
Speed up Assembly With Better Layout
Speed up your assembly by doing the layout work up front: mark every biscuit slot location on the workpieces before you cut, then use a self-squaring story stick with a T-square to transfer matching centerlines across multiple panels.
That way, you’ll keep spacing consistent and avoid stop-and-start adjustments. Pick the right biscuit quickly with a biscuit gauge, then strike the layout line and centerline so the joiner lands exactly where you need it.
If you’re cutting mitered parts on a fence that only tilts to 90°, clamp the pieces back-to-back to hold them steady. When you want faster setup at different angles, reach for an all-purpose biscuit jig.
Good layout cuts confusion, saves time, and makes assembly go together cleanly.
Frequently Asked Questions
What Are the Weaknesses of a Biscuit Joint?
You’ll find biscuit joints mainly align parts, not add much strength. They can swell, shrink, or loosen with moisture and poor glue, and mismatched slots or biscuits can cause weak, misaligned joints.
How Deep Should the Biscuit Slot Be?
You should cut the slot about 1/32″ deeper than half the biscuit’s thickness. For #10 biscuits, that’s about 15/16″; for #20, up to 1-1/8″. Test on scrap first.
What’s Better Than a Biscuit Joiner?
Domino joiners are often better because you’ll get stronger, more precise floating-tenon joints. For heavy work, choose dowels or mortise-and-tenon. If you want speed, pocket holes work fast; for panels, use tongue-and-groove.
How Far Apart Should Biscuit Joints Be Placed?
Like fence posts, you should place biscuit joints 8 to 12 inches apart. For wider panels, narrow them to about 6 inches, and use double biscuits less than 6 inches apart when you need extra strength.
Conclusion
You can use biscuits to make panel work both simple and precise. They don’t replace good layout, but they do speed alignment and help parts meet cleanly. If you size the biscuit right, mark centerlines carefully, and dry-fit before glue, you’ll work faster without losing control. Small details—like a quick gauge or jig—save time; careful prep saves the joint. In woodworking, speed and accuracy don’t fight each other.