
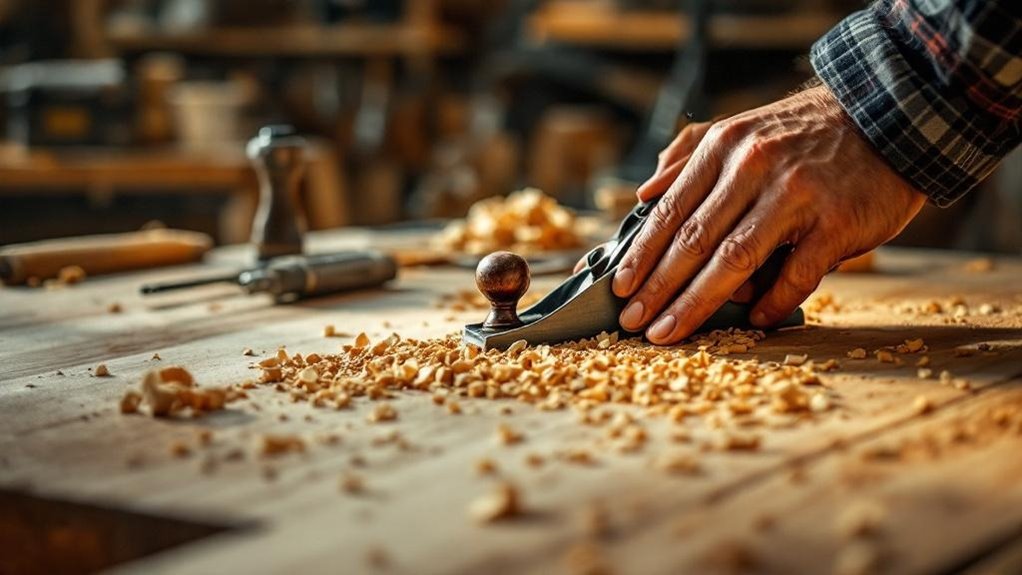
Use a sharp, well-tuned hand plane to remove crushed fibers cleanly and leave crisp edges, fine sheen, and less tear-out than sanding. Hone the iron on a diamond stone or #80 paper, set the frog and mouth tight for control, and keep the sole flat enough to work smoothly. Read the grain, take light shavings, and skew only when it helps. Stop when the surface looks uniform, then learn the setup details that make it repeatable.
Key Takeaways
- Keep the plane razor sharp and take light, grain-following passes to leave a cleaner surface with less sanding.
- Set the frog close to a narrow mouth to improve chip support and reduce tear-out on difficult grain.
- Use a cap iron, slight skew, and a cambered blade to control fibers and plane resistant areas more smoothly.
- Inspect grain direction end to end and stop planing when the surface shows a uniform sheen without ridges.
- Maintain the plane regularly, checking sole flatness, alignment, and lubrication for consistent, chatter-free cuts.
Why Hand Planing Beats Over-Sanding
When you choose a hand plane over over-sanding, you remove compressed fibers and surface defects more cleanly, especially on tricky grain where sandpaper can still leave tear-out behind.
With well-set hand planes, you can follow the grain, control depth, and reduce tear-out without bruising the surface. Sanding tends to round edges and blur crisp details, but a plane leaves sharp arrises and deeper grain definition intact.
You also avoid swirl marks and the dull, overworked look that abrasive action can create. Because you’re shaving fibers rather than grinding them, the wood often shows a subtle sheen instead of a flat haze.
That cleaner cut preserves the board’s structure and gives you a more tactile, organic finish that feels finished, not over-refined.
Sharpen Your Hand Plane for Clean Cuts
A sharp hand plane is what keeps your cuts clean and your surface free of tear-out, so you should hone the blade regularly just as you’d maintain any tool that needs reliable performance. To sharpen well, use a diamond stone or #80 paper on a flat surface and keep the cutting edge keen. Aim for a fine angle of attack near 62° so you can take lighter cuts and spare the fibers. Check the blade’s lateral position, too, because even pressure across the plane’s mouth helps you leave a smoother finish.
| Tool | Use | Result |
|---|---|---|
| Diamond stone | Sharpen quickly | Fresh edge |
| #80 paper | Flat backing | Precise honing |
| Lateral check | Align blade | Even cut |
| Light pass | Reduce force | Less tear-out |
Set the Frog and Mouth for Better Control
Set the frog flat, or just slightly concave, so it beds solidly and resists chatter as you plane. A stable frog’s bedding surface lets you keep control, and it helps the iron track cleanly through the cut.
Position the frog close to the back of the mouth opening, not too far back, so the blade stays supported and the mouth stays open enough for clear chip flow.
- Start with 1/16 inch for general work.
- Tighten to 1/32 inch for figured wood.
- Confirm sharpening before you chase a tighter mouth.
- Recheck alignment often to protect the planed surface.
That setup won’t fix poor technique, but it does reduce tear-out and gives you more predictable results on difficult grain.
Flatten the Sole Without Chasing Perfection
Even though your plane doesn’t need to be NASA-flat, a flatter sole does improve cut quality and finish. Check the plane sole with a metal straightedge and feeler gauges, then decide where you need correction.
If the sole rocks or shows high spots, start a simple flattening process: stick sandpaper to a flat granite tile or similar reference surface, then rub the sole in circular and linear strokes.
Stop often, clean the surface, and inspect progress. You don’t need to remove every trace of wear; focus on the areas that actually contact the wood. A smooth, shiny sole matters more than perfection.
When the plane is properly set, these small adjustments help it glide consistently and leave cleaner shavings without wasting time on unnecessary metal removal.
Read the Grain Before You Start Planing
Before you take the first shaving, read the grain and decide which way the fibers want to be cut. You’ll avoid tear-out when you plane with, not against, the grain direction.
Watch the surface closely: long, straight fibers act differently from reversing or interlocked grain. Open-pored woods can misbehave sooner than fine-grained stock, so adjust your approach before you commit. If the cut starts to lift fibers, try skewing the plane to change how the iron meets the wood.
- Inspect the board end to end.
- Mark any reversals or wild patches.
- Choose sound stock with consistent grain.
- Adapt each stroke to the wood’s response.
When you read the board well, you reduce damage and leave a cleaner surface with fewer corrective passes.
Pick the Right Angle to Reduce Tear-Out
Once you’ve read the grain, set the plane’s cutting angle to suit it, because the right attack angle can make the difference between a clean shaving and torn fibers.
Aim for an angle of attack around 62° when you need broad protection against tear-out; it often cuts cleanly across mixed grain. If the stock still misbehaves, skew the plane slightly to change the effective angle and ease the cut.
A bevel-up plane helps here, since you can quickly raise the cutting angle to 60° or more. Keep the blade razor sharp, because dull iron invites damage.
Tighten the plane’s mouth only after you’ve tried these adjustments, since a narrow opening can help but shouldn’t be your first fix.
Use a Cap Iron to Stop Fiber Lift
A cap iron, or chipbreaker, can stop fiber lift by pressing the wood fibers down just ahead of the cutting edge, which helps prevent tear-out and leaves a smoother surface.
You’ll get better control when you set the cap iron about 3/32 inch from the plane iron’s edge. That gap lets the chipbreaker support the cutting action without clogging the mouth.
- Hone the plane iron first so the edge cuts cleanly.
- Set the cap iron close enough to press fibers, not bind shavings.
- Check the setting on figured or grainy boards.
- Fine-tune the gap for your plane and wood.
When you adjust it well, you reduce lift and improve surface quality.
Skew the Plane Only When It Helps
You can skew the plane to gain control and ease the cut, especially when tricky grain raises the risk of tear-out.
Don’t overdo it, though, because excessive skew can make surface quality worse in some woods. Match the skew to the grain you see, and keep the plane square when that gives you a cleaner cut.
Skew Only For Control
Skew the plane only when it improves control, because a modest angle—around 30 degrees—can change how the blade meets the grain and help prevent tear-out. When you use skewing the plane on a smoothing plane, you lower the cutting aggressiveness and let the edge slice cleaner through tricky fibers.
That matters most on figured stock or end grain, where a steadier cut gives you better results with less sanding.
- Use skewing to guide the cut, not to force it.
- Watch the grain and let the angle reduce tear-out.
- Keep the stroke controlled for a cleaner surface finish.
- Apply it where the wood demands precision, then return to square cutting.
Beware Excessive Skew
Too much skew can backfire, especially in wood with shifting grain, because it can increase tear-out instead of reducing it. You should use skewing sparingly, not as a default habit.
A modest angle, around 30°, often improves the cut by lowering the effective cutting angle to about 40.9°, but pushing further can lift fibers and roughen the surface. Keep skewing for localized trouble spots where the plane needs extra control.
On straight grain, stay square so you preserve clean cuts. Watch the shavings and the surface closely; if tear-out appears, reduce the skew or return to a direct pass.
Test the degree of skew on your stock, and let the wood tell you what works best.
Match Skew To Grain
Grain direction should drive how much you skew the plane, because the right angle can make the cut cleaner and reduce tear-out by roughly 30% on difficult stock.
When you read the board correctly, you can choose skewing the plane only when it helps.
- If the grain fights you, add skew to slice fibers more cleanly.
- On softwoods or irregular grain, a modest skew often cuts tear-out fast.
- If grain direction stays consistent, keep the plane square for tighter control.
- Test small changes in skew angle until the surface improves without chatter.
Watch the surface, not the habit. A little skew can rescue rough stock, but too much can distort control.
Match your pass to the grain direction, and you’ll leave a smoother finish with less sanding.
Fix Ridges With Lighter Shavings
When ridges show up, switch to lighter shavings by setting the plane for a very thin cut; this gives you better control, reduces the chance of tear-out, and lets you level imperfections gradually without taking off more material than necessary.
In hand planing, lighter shavings help you erase minor highs while preserving the surface around them. Keep the blade sharp, because a dull edge won’t slice cleanly and can leave more ridges behind. A cambered blade can also help you take narrow, effective shavings without flattening the whole profile.
If the grain resists, skew the plane slightly to improve the cut. Work methodically, checking the surface after each pass. You’ll smooth the board efficiently and keep the final contour true, especially on fine cabinetry work.
Know When to Stop Planing and Sand
Judgment matters just as much as technique: stop planing once the surface shows a uniform sheen and the plane leaves no visible tear-out or track marks.
Watch the shavings closely; when they shift from full ribbons to fine dust, you’re nearing the point where the surface is smooth enough.
Watch the shavings closely; when they shift from ribbons to dust, the surface is nearly smooth enough.
Keep following the grain so you don’t lift fibers or chase defects you’ve already removed. Then decide how much sanding you actually need.
- Check the board under raking light.
- Stop when shavings stay small and consistent.
- Sand only with finer grits, often to 220 on open-pored woods.
- Skip sanding on closed-grain woods if the hand-planed finish already looks clean.
Keep Your Jack Plane Running Smoothly
Keep your jack plane cutting cleanly by regularly disassembling it, brushing debris and rust from the sole and hardware, and adding a light coat of machine oil to the threads.
Check the sole with a straightedge and feeler gauges, then tune the frog so it beds flat or slightly concave to prevent chatter.
Set the mouth to about 1/16 inch for general work, or tighter for finer cuts, so the iron can slice smoothly with less tear-out.
Clean Sole and Hardware
A clean sole and sound hardware are what keep your jack plane tracking smoothly across stock. For hand tools, planes require routine care, and your clean sole should stay free of grit and pitch.
Brush it with a toothbrush, then a brass-bristle brush to lift stray chips before they scratch a board. Disassemble removable parts, including the frog, knob, and blade-adjustment nut, so you can wipe every surface.
- Clean the sole often.
- Oil screws lightly after cleaning.
- Keep the sole shiny and flat.
- Check flatness with a straightedge and feeler gauges.
If the sole drifts out of flat, flatten it on sandpaper fixed to a flat surface. A smooth, rust-free jack plane works easier and leaves cleaner surfaces.
Tune Frog and Iron
Once your plane is clean, set your sights on the frog and iron, since their setup decides how smoothly your jack plane cuts. Remove the frog and scrub away packed dust, then check its bedding surface. You want it flat or slightly concave, never twisted, so the iron stays supported and chatter drops.
Lap the frog on a granite surface with #80 sandpaper or a diamond stone until contact looks even. Refit it carefully, align the frog with the mouth, and tighten the screws firmly so nothing shifts under load.
Reinstall the iron, confirm it sits flat, and verify the edge clears the mouth cleanly. When you keep the frog stable and the iron true, your jack plane tracks better, cuts cleaner, and needs less sanding afterward.
Frequently Asked Questions
How to Smooth a Surface Without Sandpaper?
You can smooth it with a sharp hand plane, set fine, and take light passes, then finish with a card scraper. Skew the plane slightly, keep the mouth tight, and watch for thin, even shavings.
Is Hand Planing Better Than Sanding?
Yes, hand planing’s often better when you want crisper edges, richer grain, and fewer swirl marks. You’ll get a cleaner, more natural surface, though sanding still helps with final touch-ups on tricky grain.
What Is the Best Finish for Hand Planed Wood?
About 80% of hand planed projects look best with oil or a wiping varnish; you’ll highlight grain, keep crisp edges, and avoid a plasticky sheen. If you want more build, shellac or polyurethane can work too.
How to Prevent Tearout When Planing?
You prevent tearout by sharpening your blade, planing with the grain, setting the chipbreaker close, tightening the mouth, and skewing the plane when needed. You’ll cut cleaner fibers and avoid lifting, ragged wood.
Conclusion
If you master hand planing, you’ll stop treating sandpaper like a rescue mission and start making surfaces so clean they look almost suspiciously perfect. Keep your iron sharp, your mouth tight, and your shavings light, and you’ll cut the wood instead of grinding it into submission. Don’t chase flawless machinery—just chase better habits. When you know when to stop, you’ll finish faster, flatter, and with results that practically beg to be admired.