
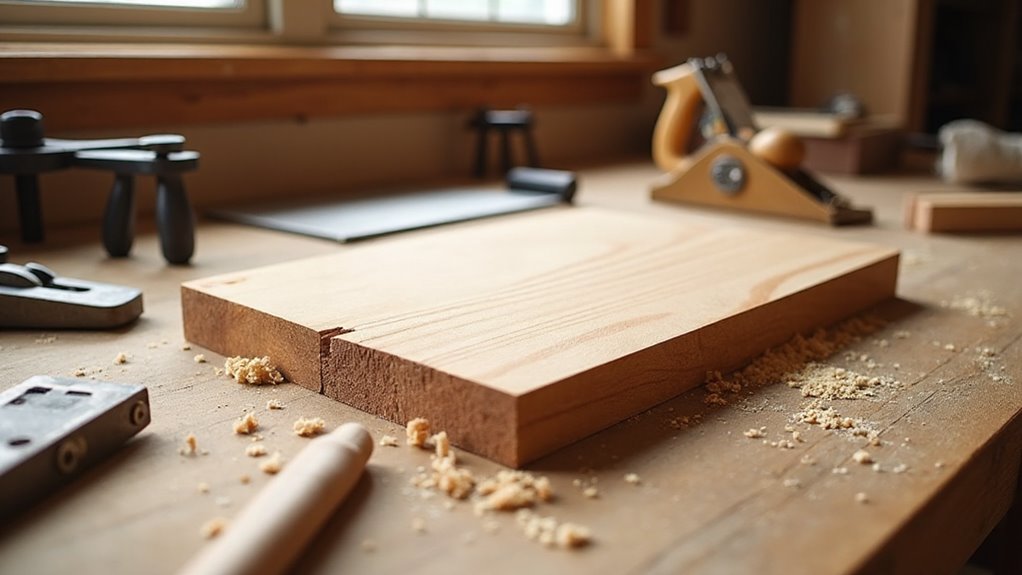
Start with small, focused hand-tool projects that teach measuring, cutting, joinery, and finishing. Try a cutting board to practice planing and squaring, a simple box to learn accurate marking and dovetails or finger joints, and a picture frame to master miters. Make utensils or small shelves for shaping and sanding skills. These projects use a minimal kit—saw, chisels, clamps, square—and build confidence quickly; continue and you’ll reveal more advanced joinery and larger builds.
Key Takeaways
- Start with simple, short projects like a cutting board or picture frame to learn measuring, sawing, and planing without complex joinery.
- Build small boxes or chests to practice accurate marking, dovetail or finger joints, and square assembly in a low-cost format.
- Make a wall shelf or cubby using butt joints, dados, and rabbets to develop layout, squaring, and repeatable cuts.
- Craft hand-tool-friendly jigs (backsaw guide, marking gauge stop) to improve consistency and speed across multiple projects.
- Choose projects that match your toolset and time, emphasizing skill growth, simplicity, and tangible, useful results.
Why Start With Hand‑Tool Woodworking
Start with hand tools because they force you to learn wood’s feel and behavior, sharpening your eye and touch while you cut, plane, and fit.
You’ll build foundational skills faster when you limit gear and focus on technique: marking, sawing, planing, and fitting joints teach material judgment that power tools mask.
Limit your tools, hone technique—marking, sawing, planing, and fitting joints teach material judgment power tools hide.
Hand tools lower cost and simplify choices, so you concentrate on joinery like mortise-and-tenon, which trains layout, measurement, and patience.
Working this way also models sustainable practice—you use fewer consumables and make deliberate decisions.
Early projects with hand tools accelerate practical learning, giving you repeatable feedback and confidence.
Adopt this approach and you’ll enter more complex work with refined touch, clearer decisions, and a durable skill set.
Minimal Hand‑Tool Kit for Beginners
Start with a compact set of essential hand tools—a handsaw, a set of chisels, a hammer, and clamps—that will handle most beginner projects.
Pair those with accurate measuring and marking tools like a tape measure, square, and pencil to guarantee clean joints and consistent results.
Keep tools organized and well‑maintained so you work safely and get the most from each piece.
Essential Hand Tools
A compact set of hand tools will let you tackle most beginner projects without drowning in gear: a handsaw, a basic chisel set, a good hammer, a couple of clamps, and a tape measure cover the essentials.
You’ll work more intentionally with these essential tools, feeling the wood respond as you cut, pare, and assemble. That tactile engagement accelerates skill development—joinery, edge work, and the habits that prevent mistakes—without relying on power.
Choose quality over quantity: a well-made handsaw and sharp chisels save time, money, and frustration.
Keep the kit small so you focus on technique, not tool accumulation. For beginner projects, this minimal toolkit gives you versatility, portability, and a solid foundation for more advanced tools later.
Measuring And Marking
Three basic measuring tools—the tape measure, a reliable square, and a marking gauge—will let you lay out accurate cuts and joinery without cluttering your bench.
You’ll use a 25-foot tape measure for overall dimensions and rough placement, then verify critical lines with a combination square to confirm exact angles and straight edges.
Set the marking gauge to the material thickness to scribe consistent, parallel lines for grooves and tenons. Use a sharp pencil or knife for crisp marking; fine lines are easier to follow and reduce cutting error.
Habitually double-check measurements before you cut—measure twice, cut once remains the best safeguard.
Consistent measuring and marking build precision and confidence in every beginner project.
Storage And Maintenance
Once you’ve got reliable measuring and marking habits, look after the tools that make them possible. You’ll keep a minimal kit—saw, chisels, hammer, tape, square, clamps—ready by pairing smart storage with routine maintenance. Use wall racks or drawers for protection and quick access. Sharpen blades, inspect handles and edges, and replace worn parts regularly. Favor a few quality tools, especially a versatile chisel set, to accelerate skill growth.
| Storage tips | Maintenance tasks |
|---|---|
| Wall-mounted racks for saws | Hone and sharpen blades |
| Drawer trays for chisels | Check handles and ferrules |
| Clamp hooks | Lubricate moving parts |
| Labelled spots for measuring tools | Remove rust; recondition edges |
Treat storage and maintenance as habits: they preserve function, improve safety, and extend tool life.
How to Choose Your First Projects: Skills, Time, Tools
Start by matching projects to the core skills you want to practice—measuring, cutting, and basic joinery—so pick beginner-friendly builds like cutting boards or picture frames.
Be realistic about time: simple boxes can take a few hours, while bookshelves may stretch over days.
Confirm the required tools fit your current kit—saws, chisels, clamps—and choose projects that keep you motivated as you build confidence.
Match Projects To Skills
Choosing your first woodworking projects sets the pace for your learning, so pick builds that match your current skills, available time, and tools. Start with simple projects—cutting boards or picture frames—to practice measuring, cutting, and basic joinery while delivering a finished piece.
Match project complexity to your skills: choose beginner-friendly tasks to reduce frustration and build confidence before advancing. Consider the time you can realistically commit and pick projects you can finish within that window to maintain momentum.
Use projects that work with the hand tools you already own so you can hone technique rather than accumulate gear.
Finally, favor projects that interest you or meet a practical need; motivation accelerates learning and turns repetitions into meaningful skill growth.
Estimate Time And Tools
Now that you’ve matched projects to your skills and interests, plan around two practical constraints: time and tools.
Start with simple pieces—cutting boards, picture frames, a small shelf—that reinforce basic techniques like gluing and sanding. Before you begin, estimate time: pick projects that finish within a few hours or at most a couple of days so you keep momentum and see measurable progress.
Inventory your tools and choose projects that use what you already own; a miter saw and chisels cover many joinery tasks and let you build confidence with essential kit.
Mix slightly harder projects like a small box to gradually expand skills without overwhelming yourself.
This approach balances practice, achievable goals, and steady skill growth.
Safety for Hand‑Tool Woodworking
When you work with hand tools, keep your bench tidy and use the right tool for each task to reduce slips and mistakes; wear goggles and gloves, inspect tools regularly for damage, and store them properly so they’re safe and easy to grab when you need them.
You need to know that wearing safety goggles is nonnegotiable—eye protection prevents debris injuries. Choose gloves that balance protection and dexterity; avoid bulky gloves when using delicate chisels. Match each task to the correct tool to reduce forceful slips.
Inspect handles, edges, and cutting surfaces before use; replace or repair any damaged tools. Organize storage so tools are accessible and secured. Maintain lighting and clear floors; tidy workspaces reduce accidents and speed workflow.
Cutting Boards : What You’ll Learn and a Simple Plan
Tackle a cutting board to learn core woodworking skills—milling, gluing, and flattening—while working with hardwoods like maple or walnut that give durability and a clean finish.
You’ll learn the basics of material selection, dimensioning, and surface preparation using simple hand tools: saw, chisel, planer, and sandpaper. Measure and calibrate carefully to achieve flat, even surfaces; mistakes teach calibration and patience.
A basic plan keeps the project manageable and rewarding.
- Select hardwood strips (maple, walnut) for strength and appearance
- Mill boards to uniform thickness with a plane or careful handwork
- Glue strips with clamps, checking for alignment and square
- Flatten both faces and square edges; sand progressively finer
- Embrace errors as lessons for future projects
Cutting boards build foundational skills for more complex work.
Simple Boxes and Keepsake Chests to Practice Joinery
Having learned milling, gluing, and flattening with a cutting board, you can apply those same measurement and surface-prep skills to simple boxes and keepsake chests to practice joinery.
Start with a small box to focus on cutting accuracy and square assemblies; you’ll learn dovetails or finger joints without complex curves or hardware. Use minimal materials and basic hand tools to keep costs low and technique visible.
Begin with a small box to hone cutting accuracy, square assemblies, and simple dovetail or finger-joint skills.
Cut precise joints, dry-fit parts, then glue and clamp, watching for aligned faces and tight seams. Customize chest size or lid details to explore layout and planing strategies.
Finishing is simple: light sanding and oil or wax. Completing these projects builds confidence and gives transferable experience for more advanced woodworking.
Picture Frames : Measuring, Mitering, and Finishing Tips
Start by measuring your artwork precisely, allowing a 1/4-inch overlap so the piece seats securely.
Cut crisp 45° miters with a miter saw or careful hand saw work, then glue and reinforce the joints with brads or nails for long-term stability.
Sand smoothly, check the assembled frame is square by measuring diagonals, and finish with stain or varnish to seal and enhance the grain.
Accurate Measuring Techniques
A reliable tape measure and a sharp pencil will save you time and frustration when building a picture frame: measure twice, mark clearly, and cut once so each rail matches the exact finished dimensions. You’ll rely on accurate measuring techniques and basic tools like hand saws to produce clean, consistent pieces.
Verify angles and grain alignment before cutting, and plan sanding/finish steps to preserve dimensions.
- Set tools to 45° for miter cuts and confirm with a square.
- Use stops or marks for repeatable rail lengths.
- Align grain direction to improve visual flow.
- Check each cut against a dry-assembled frame before gluing.
- Sand progressively with finer grits for smooth finish readiness.
Precision here prevents gaps and rework.
Clean Miter Jointing
Once your measurements and miters are verified, focus on making clean miter joints by cutting each corner at a true 45° and fitting the pieces dry before any glue touches them.
Use a miter box to guide your handsaw for uniform angles; confirm each cut against the opposite piece to catch small errors. Lightly sand mitered edges to remove high spots so joints seat without gaps.
Apply glue sparingly and evenly—excess squeezes out and can interfere with a tight seam. Bring the corners together and use clamps to hold pressure squarely at the joint while the adhesive cures.
Check alignment during clamping, wipe squeeze-out promptly, and recheck squareness once clamps are removed for a precise, durable frame.
Finishing And Sealing
Before you apply any finish, make sure the frame is clean, fully sanded through progressively finer grits, and free of dust so the sealer adheres evenly.
You’ve measured and mitered accurately; now focus on finishing and sealing to protect the joints and highlight grain. Wipe the frame, inspect mitered corners for gaps, and touch any voids with wood glue and a tiny shim before final sanding.
Use thin, even coats of sealer or stain, sanding lightly between coats for a flawless surface. Clamp pressure should’ve been consistent during drying to prevent gaps.
- Sand progressively: 120 → 220 grit for smoothness
- Fill gaps with wood glue and sawdust mix if needed
- Apply sealer thinly, wipe excess
- Sand between coats with fine grit
- Cure fully before handling
Small Shelves and Wall Cubbies: Moving to Vertical Builds
Moving into vertical builds, small shelves and wall cubbies give you efficient, low-cost projects that teach precise measuring, cutting, and joinery.
You’ll learn straightforward joinery—butt joints, dados, simple rabbets—that reinforce measurement habits and layout discipline. Vertical pieces maximize small-room storage and let you practice consistent spacing and squaring under real mounting conditions.
You’ll practice straightforward joinery—butt joints, dados, rabbets—building measurement habits and squaring for true, mountable vertical pieces
Design variations let you explore styles and proportions while shaping and assembling parts, keeping material needs minimal and costs low. Focus on accuracy: consistent thickness, true edges, and tight joints matter more here than decorative detail.
These projects scale as your confidence grows, preparing you for larger assemblies. Treat each small shelves woodworking project as a skill-building exercise in accuracy, alignment, and durable fastening.
Wooden Utensils and Small Household Items for Finishing Practice
Wooden utensils and small household items give you focused, low-risk projects to hone shaping, sanding, and finishing techniques. You’ll use basic carving and hand-tool control to make spoons, spatulas, coasters, and trays that teach grain reading and muscle memory.
Small pieces let you complete work quickly and iterate finishes without large material loss.
- Carve spoons and spatulas to learn shaping and edge work.
- Make coasters and trivets to practice flatness and simple joinery.
- Turn salad bowls or shallow trays for curved-surface sanding.
- Test oil, wax, and food-safe finishes on scraps and samples.
- Build confidence by finishing functional pieces you’ll use daily.
These wooden utensils projects accelerate finishing practice and reinforce fundamental skills for future builds.
Hand‑Tool Progression: When to Tackle Bookshelves and Cabinets
Once you’ve mastered cutting boards, picture frames, and a few utensil projects, you’re ready to step up to bookshelves and cabinets—projects that demand precise milling, accurate joinery like dados and rabbets, and careful planning for assembly and finishing. You’ll apply your woodworking experience to layout, jig use, and controlled glue-ups. Assess wood selection, workspace, and tools before starting. Begin with a simple shelf or small cabinet to practice dado spacing, rabbets, and face-frame fitting. Expect problem-solving opportunities that strengthen craftsmanship and judgment.
| Stage | Skill Focus | Outcome |
|---|---|---|
| 1 | Milling accuracy | Stable panels |
| 2 | Dado/rabbet joinery | Strong joints |
| 3 | Assembly planning | Smooth workflow |
| 4 | Finishing prep | Clean surfaces |
Common Beginner Mistakes : And How to Fix Them
Many beginners make a handful of recurring mistakes that are easy to fix once you know what to watch for. You’ll avoid frustration by treating accuracy, wood behavior, finishing, and maintenance as core habits.
Key fixes:
- Take precise measurements: use a reliable tape measure, mark clearly, and verify cuts with squaring techniques.
- Align joints: practice butt joints and dry‑fit assemblies to guarantee everything sits square before glue.
- Account for wood movement: acclimate lumber, leave expansion gaps, and avoid rigid fastenings that restrict seasonal movement.
- Improve finishing: test finishes on scrap, sand between thin coats, and build smooth layers instead of one heavy coat.
- Maintain tools: keep blades and edges sharp, check settings regularly, and replace worn parts to boost performance and safety.
Where to Find Plans, Tutorials, and Local Help for Hand‑Tool Beginners
Fixing those common mistakes gets you ready to learn from others, and the good news is there are plenty of reliable resources for hand‑tool beginners. You’ll find free plans and tutorials on sites like Instructables and Fine Woodworking, step‑by‑step videos on YouTube, and library books that act as a thorough guide to techniques. Join local woodworking clubs or community college woodworking classes for hands‑on instruction, and use online forums and social media groups to get quick troubleshooting and feedback.
| Resource Type | Where to Look | What You’ll Get |
|---|---|---|
| Plans/Tutorials | Instructables, Fine Woodworking | Free beginner plans |
| Video | YouTube channels | Visual step‑by‑step |
| Local Help | Clubs, community colleges | Workshops, woodworking classes |
| Reference | Libraries, forums | Techniques, peer advice |
Frequently Asked Questions
How Do I Pick Wood Species for My First Projects?
Pick common, stable woods like pine, poplar, or maple for ease, availability, and forgiving grain. Match hardness to project, check moisture content, avoid warping, and prioritize straight boards so your tools perform predictably.
What Finishing Products Are Food-Safe for Cutting Boards?
Use food-safe finishes like mineral oil, fractionated coconut oil, walnut oil (for non-allergic users), and USDA-approved food-grade butcher block oil or waxes (beeswax blends). Apply, cure, and reapply regularly to maintain protection.
How Long Does Sharpening Hand Tools Typically Take to Learn?
You’ll usually get competent at basic sharpening in a few hours to a couple days of practice; becoming consistently proficient takes weeks, and true mastery requires months to years of deliberate practice and varied tool sharpening experience.
Where Should I Store Hand Tools to Prevent Rust?
Store your hand tools in a dry, well-ventilated place: a toolbox or cabinet with desiccant packs, rust-inhibitor paper, and oil-coated cloths. Wipe tools after use, apply light oil, and avoid damp basements or direct sunlight.
Can I Sell Small Hand-Tool Projects I Make at Home?
Yes — you can sell small hand-tool projects you make at home, like a craftsman selling wares at market. Check local regulations, price materials and labor, photograph well, list online, and guarantee safety and quality consistently.
Conclusion
You’ve laid the first planks of a craft that’ll teach patience, precision, and pride. Start small, hone basic cuts and joinery, then let each successful cut be a rung on your skill ladder. With a lean tool kit and clear plans, mistakes become lessons, not disasters. Keep safety front and center, practice deliberately, and let simple projects — a cutting board, spoon, shelf — be the scaffolding for confident, hand‑tool mastery.