
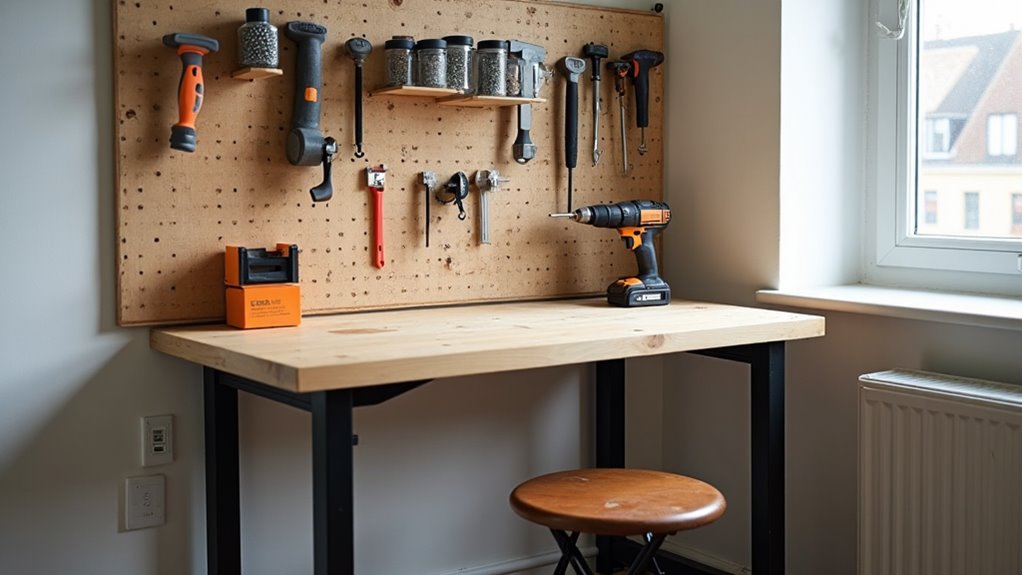
You can build a sturdy, space-saving workbench on a tight budget using a sheet of plywood or MDF and a few 2x4s, basic tools, and simple joinery. Choose a fold-up, flip-top, knock-apart, or mobile one-sheet design for tiny workshops. Add shallow drawers, clamp strips, or pegboard on the sides for neat storage, and fit double-locking casters for mobility. It’s fast, cheap, and customizable—keep going to see step-by-step options and cost-saving tips.
Key Takeaways
- Choose compact designs like fold-up, flip-top, or knock-apart benches to save floor space and store against walls.
- Use inexpensive materials: kiln-dried 2x4s for the frame and a single MDF or plywood panel for the top.
- Build light-duty benches from hollow-core doors or PVC and plywood for reliable work surfaces under $50.
- Add vertical storage—pegboards, shelves, clamp strips, or shallow drawers—to keep tools organized without extra footprint.
- Add mobility with double-locking casters and simple features (drop-leaf, flip-top) for flexible, space-saving use.
Quick Picks: 5 Workbenches You Can Build in an Hour
You don’t need a full weekend or a garage full of tools to get a solid workspace—these five one-hour workbench designs give you practical, compact options you can build fast with common materials and basic skills.
You’ll pick a layout that’s quick to build and fits tight spaces: a Light‑Duty Table made from a hollow‑core door over PVC for a portable, lightweight surface; a Fold‑Up that tucks flat against a wall and expands when you need more real estate; a Cheap bench using 15 pieces of 2×4 and one plywood sheet for under $50; the 1‑Hour Workbench built from five 2x4s and MDF panels for immediate use; and a Super Simple variant that prioritizes minimal parts and easy assembly.
Each option’s visual simplicity helps you choose fast.
Quick Build: One‑Sheet Plywood Mobile Workbench (Step‑By‑Step)
If you liked the quick one‑hour builds, this one‑sheet plywood mobile workbench gives you a bit more heft and mobility without adding complexity.
You’ll rip one project panel of MDF and five 2x4s into parts, glue and laminate plywood for a stout base, then stack three 1″ MDF layers for a dead-flat top. Fast cuts, simple butt joints and glue or screws keep assembly under an hour.
Mount casters with double-locking wheels so you can roll it around tight rooms and lock it solid for heavy work.
The bench measures about 25″ deep, 36″ tall and 48″ wide; swap caster sizes to tweak height. Total materials run roughly $135, undercutting comparable store models and delivering a practical mobile workbench.
Other Fast Plans: Fold‑Up, Flip‑Top, and Knock‑Apart Benches
For tight shops you’ll appreciate fold-up benches that tuck flat against a wall, freeing floor space in seconds.
Flip-top models give you a rotating work surface for tools and parts, while knock-apart benches break down into lightweight pieces that you can carry to a jobsite.
All three use simple, cheap materials and straightforward joinery so you can build a space-saving or portable bench without much fuss.
Space-Saving Fold‑Up Designs
When floor space is tight, fold-up, flip-top, and knock-apart benches give you big workspace without the clutter: you get space-saving solutions that tuck away when not in use.
A basic fold-up bench mounts to a wall or hinges from a leg brace so the top drops down quickly; when stowed it’s nearly invisible, freeing floor area. The flip-top model adds a revolving center so you can double your platform for staging or cutting while still fitting into a corner.
Knock-apart styles use interlocking joints so you can disassemble components for compact storage. All three favor simple builds—2x4s, plywood, basic hardware—and fast plans keep costs low and construction beginner-friendly, letting you gain functionality without a big outlay.
Portable Knock‑Apart Options
After stowing a flip-top or fold-up bench, you’ll still want workshop options that travel and pack flat—portable knock-apart benches answer that need.
You’ll use full sheets of plywood and pine to build a sturdy top and interlocking base that slides together without screws, so assembly and breakdown are quick. Fast plans focus on straight cuts and repeatable joinery, letting you put a bench together with minimal tools and a helper.
When you disassemble, pieces stack flat for closet or vehicle transport, freeing floor space in a tiny shop. The knock-apart approach adapts: swap tops, add vises, or reconfigure leg spacing for different projects.
For tight budgets and tight rooms, these portable, knock-apart benches give reliable, flexible workspace.
Sturdy 2×4 Compact Workbench for Heavy Use
You can build a compact, heavy-duty bench from just five 2x4s and an MDF top that fits tight corners without sacrificing strength.
Use sturdy joinery—through-bolts, glue, and blocking—to handle heavy clamping and pounding.
Add locking casters or adjustable feet so you can move it or level it for different tasks.
Built From 2x4s
Five straight KD pine 2x4s, a couple of MDF panels, and an hour are all you need to put together a compact, heavy-duty workbench that stands up to regular use.
You can build a no-fuss bench that fits a corner, resists pounding, and stays stable for repairs and projects. Use simple butt joints, screws, and glue; clamp, square, and screw from below for a clean top.
Consider these quick choices to customize it:
- Top: 3/4″ MDF glued to 2×4 frame for a flat work surface
- Frame: KD pine 2x4s for straight, stable legs and rails
- Fasteners: exterior screws and wood glue for strength
- Add-ons: casters or adjustable feet for mobility
- Budget: under $100 using basic materials and tools
Heavy-Duty Joinery
When you need a compact bench that can take a pounding, build the frame entirely from 2×4s and use robust joinery so the legs and rails act as one solid unit.
You’ll cut straight, square joints—lap joints, pocket screws, or through-bolts—to lock members together so the bench resists racking and stays true under load.
Keep the footprint small but stack bracing: a full lower stretcher and diagonal blocks at the corners make it unshakable. Use a thick top or sacrificial board you can replace.
Plan adjustable leg heights for leveling on uneven floors and add under-shelf storage for clamps and fasteners.
Materials cost runs about $135, so you get a heavy-duty, beginner-friendly workbench that’s fast to assemble and built to last.
Mobile With Casters
Add heavy-duty casters to a compact 2×4 bench and you’ll get a tough, mobile workhorse that fits tight shops.
You’ll build a sturdy 2×4 compact workbench that handles heavy use, with plywood top for a flat, customizable surface and an optional overhang for clamps.
Dimensions around 25″ deep, 36″ tall, 48″ wide keep it practical in small spaces. It’s mobile with casters, so you can rearrange quickly, and the project is super easy for beginners—few tools, a few hours.
- Built from inexpensive 2x4s for strength
- Plywood top gives a stable work surface
- Heavy-duty casters for smooth movement
- Compact footprint fits tight shops
- Quick, beginner-friendly build
Locking casters make it secure when you’re working.
Light‑Duty Workbenches and Kid‑Size Tables
A compact workbench lets you tackle sewing, school projects, or crafts without taking over the room: built from a hollow‑core door and PVC pipe, these light‑duty tables go together fast, cost under $50, and pack away or move easily to wherever you need them.
You’ll appreciate how light-duty workbenches give a stable surface without heavy materials—screw in PVC legs, drop the door top, and you’re ready. For kids, scale the height and add rounded edges so their workspace’s comfortable and safe.
Light, sturdy workbenches snap together quickly—swap heights and round the edges for a kid-friendly, safe workspace.
Add a clamp, a small pegboard, or removable bins for supplies; they snap on and off for different tasks. When you’re done, lean the top against a wall or slide it under a couch.
They’re affordable, portable, and customizable.
Choose the Right Compact Workbench (Size, Height, Use)
If you liked the lightweight, stowable table from the last section, pick a compact workbench that matches the tasks you’ll actually do: aim for roughly 25″ deep by 48″ wide and about 36″ tall for general use, with simpler tops for light projects and a sturdier 2×4 frame for heavier work.
Choose height based on tasks—about 33″ without casters, 36″ with wheels for mobility. Focus on stability, clearance, and reachable storage.
- Prioritize a solid footprint that resists wobble.
- Add casters to shift from stationary to mobile.
- Pick a simple top for sanding and small assembly.
- Use a stronger frame when you’ll clamp or hammer.
- Include shelves, cubbies, or tool holders for vertical storage.
A compact workbench should fit your workflow, not the other way around.
Budget Materials That’ll Actually Last: 2×4, MDF, Plywood
You can build a surprisingly tough compact bench with simple 2×4 framing—use kiln-dried pine for straight, stable members that resist warping.
Top it with a flat MDF sheet for a smooth working surface and back the structure with plywood for strength and weight where you need rigidity.
Skip pressure-treated boards indoors and focus on these budget-friendly materials to get long-lasting performance without extra cost.
Durable 2×4 Framing
- Use KD pine 2x4s for straight, stable legs and aprons.
- Sandwich 2×4 joists at 16″ or 12″ centers for predictable stiffness.
- Top with a 2×4-backed MDF or plywood surface for flatness.
- Skip pressure-treated lumber indoors to avoid warping and off-gassing.
- Bolt legs to aprons with carriage bolts for easy disassembly.
This approach keeps materials cheap, assembly quick, and the bench reliably rigid for years.
Stable MDF And Plywood
Having built a rigid 2×4 frame, pick a top that stays flat and resists wear: MDF gives you a smooth, dead-flat surface for layout and finishing, while a plyboard top adds strength without excess weight. You’ll find 2×4 framing plus MDF or plyboard is super simple, affordable, and fast to assemble. MDF works great for routing, painting, and glued joints; plyboard handles clamps and tool impact better. Combine a thin MDF top over plywood for a flat, stiff sandwich that keeps weight down and cuts material waste. Both materials are sold in standard sheets at local centers, so you can tailor sizes to tight spaces.
| Material | Strength | Best use |
|---|---|---|
| MDF | Flatness | Layout/finish |
| Plyboard | Lightweight strength | Tools/clamps |
| Combo | Stiffness | All-purpose |
Essential Tools for Small‑Shop Builds
One compact kit of tools will let you tackle most small‑shop builds: a battery‑powered circular saw for clean, fast cuts and a cordless impact driver for quick assembly, with corded alternatives scouted at garage sales to save money.
For essential tools, focus on accuracy, durability, and thrift — KD Pine 2x4s and MDF panels pair well with simple tools.
Prioritize accuracy, durability, and thrift—KD pine 2x4s and MDF panels work perfectly with simple, reliable tools.
- Battery circular saw (or corded find) for ripping and crosscuts
- Cordless impact driver (or basic drill) for fast fastening
- Husky 6-inch extendable square for precise layout and a straight edge
- Tape measure and pencil for quick marking and repeatability
- Basic clamps (bar or pipe) to hold parts during glue and screw work
You’ll assemble sturdy benches with minimal gear, keeping costs low and workflow efficient.
Add Storage: Side Cubbies, Drawers, and Clamp Strips
You’ve got the basics to cut and assemble, so now make the bench work for you by adding smart storage. Add side cubbies for screws, sandpaper, and frequently used hand tools—open access keeps clutter off the top. Fit shallow drawers under the surface to hold bits, blades, and measuring tools without sacrificing legroom. Run clamp strips between the legs so clamps hang ready and out of the way.
| Feature | Material | Benefit |
|---|---|---|
| Side cubbies | Plywood | Quick access, tidy tops |
| Drawers | 2x4s + plywood | Compact, hidden storage |
| Clamp strips | 1×4 or plywood | Keeps clamps handy |
Cut plywood slots for drill/driver holders to save bench space. These low-cost additions use common lumber and boost function.
Mobility & Stability: Picking Casters and Double Locks
If your shop layout changes or space is tight, mount double-locking casters so the bench rolls when you need it and stays rock-steady when you don’t.
You’ll get mobility without sacrificing stability by choosing casters that lock both rolling and pivoting. Match caster weight ratings to exceed your bench’s total load, and favor larger wheels to cross imperfect floors.
Install at least three casters—one per corner plus a third for balance—so the bench moves smoothly and sits solid when locked.
- Choose double-locking casters that prevent rolling and swivel
- Pick capacity > total bench load for safety
- Use larger wheels for uneven surfaces
- Mount a minimum of three casters for balance
- Lock both wheel and swivel for true stability
These choices keep your small-space bench both portable and secure.
Quick Customizations: Drop‑Leaf, Flip‑Tops, and Modular Tops
When space is tight, smart top options—drop‑leaf panels, flip‑tops, and modular sections—let you expand work area only when you need it and tuck it away the rest of the time.
You can fit a drop-leaf wing that folds down against the wall or bench leg; when raised it gives you a full staging area for cutting or assembly. A flip-top with a revolving center supports two tools back-to-back, and you’ll appreciate integrated drawers for small bits.
Fit a drop‑leaf wing for extra staging, or a flip‑top with revolving center and drawers for compact, versatile workspace
Modular tops use removable sections or dog holes so you swap jigs and vises fast. Build any of these from 2x4s and plywood to keep costs low.
They’re visual, flexible solutions that adapt to projects without stealing permanent floor space.
Cost Comparison: Build vs. Buy and Where to Save
Those quick customization tricks are great, but cost matters just as much in a small-space setup.
Do a clear cost comparison: building a bench runs about $135 in materials versus $200+ for basic store models. You get customization, stronger materials, and mobility options that shop benches often skip.
- DIY: ~$135 materials, tailor size, add casters, use sturdier lumber
- Shop-bought: $200+, limited sizes, fewer features
- Save by sourcing reclaimed lumber or buying offcuts
- Prioritize a solid top and strong legs; skimp on fancy finishes
- Watch lumber prices; buy when sales hit or split projects with friends
You’ll likely spend less and end up with a durable, space‑fitting workbench that suits your exact needs.
Quick Troubleshooting & Common Build Mistakes
Because small errors compound fast in tight builds, you’ll want to catch alignment and cutting mistakes early: use setup blocks for repeatable layouts, run final cuts on a table saw using your optimized cut list, and mark staple or screw paths before fastening to avoid drilling into hidden parts.
For quick troubleshooting, stop and re-measure rather than forcing parts to fit—misaligned frames usually trace to one shortcut or swapped part.
If casters change workbench height, mock them up and adjust leg lengths or wheels before final assembly.
Reinforce critical joints with dowels or bolts where frames must bear heavy loads.
Visually inspect staple lines and pivot points, and loosen fasteners to realign before committing. Small fixes now save time and keep a compact bench functional.
Frequently Asked Questions
How Do I Childproof a Workbench in a Shared Household?
Lock tools in clear, labeled bins or cabinets, bolt heavy equipment down, cover sharp edges with guards, use childproof latches and outlet covers, keep small parts high, and establish strict access rules so kids can’t wander into danger.
Can I Integrate a Bench Vise Without Reinforcing the Top?
Yes — but it’s risky: a vise without reinforced top is like a tree with shallow roots, wobbling and damaging the surface. You’ll want a clamped mounting plate, oversized base, or underside braces to spread loads safely.
What Finishes Are Best for Food-Contact Projects on Plywood?
Food-safe finishes like food-grade mineral oil, walnut oil (avoid if allergy risk), or certified food-safe polyurethane and shellac work best on plywood; you’ll seal edges, apply multiple coats, sand between, and cure fully before food contact.
How Do I Soundproof a Workbench for Noisy Tools?
You reduce noise by isolating and damping: mount tools on rubber pads, use a dense top (ply or MDF) with sorbothane or mass-loaded vinyl layer, add foam or acoustic panels around the bench, and use vibration-isolating feet or casters.
Can I Incorporate Electrical Outlets Safely Into the Bench?
Yes — you can; about 30% of DIY benches use integrated outlets for convenience. Mount GFCI-protected, recessed boxes, keep cords tidy, separate tool circuits, use strain reliefs, and follow local code or hire a licensed electrician.
Conclusion
You’ve got plenty of practical picks to produce a perfect workbench for small spaces and small budgets. Start simple, stack savings, and scale smart: fold up, flip over, or bolt together a bench that’s built to be mobile, manageable, and mighty. Pick sturdy casters, pick plywood sheets, pick a plan you’ll prefer to use. With careful cuts, clever customizations, and common-sense care, you’ll craft a compact, cost-conscious corner that’s ready for real work.