
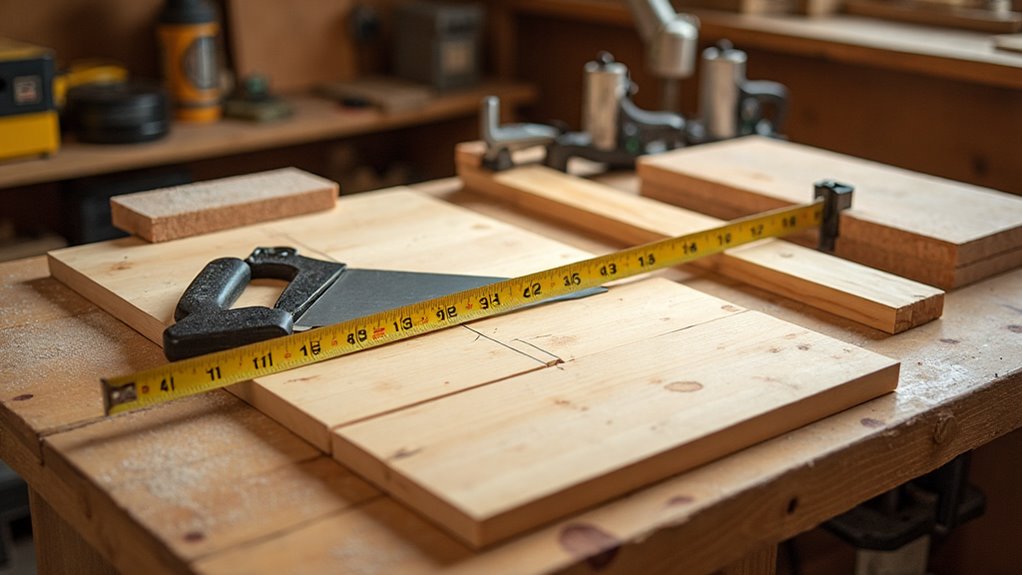
You’ll save time and material by measuring twice and marking with a sharp knife, using a reliable tape and square for transfers. Pick straight, kiln-dried boards and check the grade and moisture. Set a stable bench with good light and handy tool storage. Choose the right blade or saw for grain direction, clamp work securely, drill proper pilot holes, and follow grit progression when sanding. Keep finishes thin and ventilated, and continue to learn more practical tips.
Key Takeaways
- Measure twice, mark once using a reliable tape, combination square, and sharp marking knife for precise layout and fewer mistakes.
- Choose the right blade or saw type—rip for grain, crosscut for across grain—and use guides or fences for straight cuts.
- Secure workpieces, maintain sharp blades, and feed steadily to avoid tear-out and ensure clean, square edges.
- Sand progressively (80→120→180+ grit), always with the grain, and sand between finish coats for adhesion and smoothness.
- Drill proper pilot holes (70–80% screw diameter), use appropriate glue/fasteners, and clamp for tight, durable joints.
Woodworking Basics: Quick Start Checklist
Start by checking that your measuring tools—tape measure, combination square, and marking knife—are calibrated and within reach, since accurate layout prevents costly mistakes later.
You’ll gather essential cutting gear next: a circular saw for straight rip and crosscuts and a jigsaw for curves.
Arrange clamps—bar clamps and quick-grip—nearby so you can secure joints immediately during glue-ups.
Set out a progression of sandpaper grits, from coarse to fine, for efficient sanding before finish.
Organize your workspace with good lighting, a sturdy workbench, and pegboards for tool storage to keep parts and fasteners accessible.
Finally, stage parts for assembly in logical order so you can work cleanly and maintain alignment throughout.
Measure Twice: Essential Measuring and Marking Tools
One clear rule will save you time and material: measure twice, cut once—so keep a reliable tape measure (25 ft or more), a combination square, and a sharp marking knife or carpenter’s pencil within reach.
You’ll rely on these marking tools for precise layout; a sharp pencil or knife gives a clean line that guides saw blades and routers. Use the tape measure for overall lengths and the combination square to establish true 90-degree lines and consistent edges.
Rely on sharp marking tools: a clean pencil or knife, tape measure for lengths, and a combination square for true 90s.
Check critical dimensions twice and transfer measurements directly to the workpiece instead of estimating. Accurate measuring prevents gaps, misaligned joints, and wasted boards, so build the habit of verifying each mark before cutting.
Consistent, sharp marking tools improve cut accuracy and final fit.
Pick the Right Boards: How to Read Lumber
After you’ve marked and measured carefully, the next step is choosing lumber that won’t fight your layout. When you pick the right boards, check the grade stamp to assess quality and strength—higher grades suit furniture and visible surfaces.
Select straight boards with minimal warping, bowing, or twisting to keep cuts accurate and assembly easy. Verify moisture content: kiln-dried lumber at 6%–8% is best for indoor work to reduce future movement.
Inspect surfaces for knots and defects; fewer imperfections mean better structural integrity and appearance. Learn the types of wood: softwoods like pine are affordable and easy to work, while hardwoods like oak offer durability for high-quality pieces.
Choose boards that match your project’s demands.
Set Up Your Workbench and Workspace
Set your workbench at a comfortable height and position it on a stable, level surface so your projects sit flat and you can work without strain.
Choose a sturdy bench or sawhorses that support the full length of your stock. Place the bench where lighting is strong and shadows are minimized so measurements and markings stay clear.
Arrange your workspace with enough room to move materials and avoid awkward reaches. Keep tools organized within arm’s reach: mount frequently used items on a pegboard, store others in drawers, and label spaces for quick return.
Sweep sawdust and clear debris after each session to reduce slip hazards and guarantee accurate assembly. Regular maintenance of the bench and organization saves time and prevents mistakes.
Cutting Basics: Hand Saws vs. Power Saws
You’ll start by learning common hand saw types like rip and crosscut saws and when their control and cleaner cuts matter.
Then compare power saw advantages — speed, precision, and fit for large or curved cuts — and note maintenance and safety needs.
Finally, pick the right blade or blade type for the cut and material to get accurate, splinter-free results.
Hand Saw Types
When deciding between hand saws and power saws, know that hand saws give you finer control and cleaner results on small, detailed cuts. Rip saws slice along the grain, crosscut saws cut across it, coping saws handle intricate curves, and Japanese pull saws deliver thin, precise cuts with less effort.
You’ll rely on hand saws when precision matters: they’re the core types of saws for benchwork, joinery, and trim.
- Rip saw — best for straight cuts along the grain; fast stock removal.
- Crosscut saw — designed for straight cuts across the grain; clean end grain.
- Coping saw — excels at curved cuts and tight internal shapes.
- Japanese pull saw — thin blade for precise, low-effort cuts.
Use steady angle and consistent pace for accurate results.
Power Saw Advantages
Although they do demand respect and proper setup, power saws let you cut much faster and with less physical strain than hand saws. You’ll get greater speed on large or repetitive cuts, and you won’t tire the way you do with manual sawing. Built-in fences and laser guides deliver precision, improving repeatability and fit. Modern models reduce injury risk: blade guards, electric brakes, and better control protect you during use. Use power saws when accuracy, efficiency, and reduced exertion matter most, but always follow safety protocols.
| Emotion | Reality | Action |
|---|---|---|
| Confidence | Greater speed | Use proper setup |
| Relief | Less strain | Wear PPE |
| Assurance | Safety features | Maintain saws |
Choosing The Right Blade
Power saws give you speed and consistency, but picking the right blade determines how cleanly and safely a cut comes out. You’ll balance hand and power saws choices: hand saws give control for detailed rip or crosscuts, while power saws speed through straight cuts and large panels.
For choosing the right blade, consider material, tooth count, and sharpness to maximize cutting efficiency and accuracy.
- Match tooth type: fine teeth for hardwoods, coarse for softwoods.
- Pick blade form: circular for straight cuts, jigsaw blades for curves.
- Maintain blades: clean and sharpen both hand and power saws regularly.
- Use the right tool: choose hand saws for precision work, power saws for volume.
Stay practical—blade choice defines results.
Make Straight Cuts: Rip and Crosscut Techniques
You’ll start by choosing the right blade and tool for the job: rip blades for cuts along the grain and crosscut blades for cuts across it.
Use a straightedge or guide and measure twice with a combination square to keep rip cuts true, and set your miter saw and clamp the workpiece for accurate crosscuts.
Always keep a firm grip and a sharp blade to reduce splintering and improve safety.
Rip Cut Basics
A sharp table saw blade and a straightedge will make rip cuts cleaner and faster, so set your fence or guide carefully and feed the board steadily along the grain.
You’ll use rip cuts for long, smooth edges; a table saw or circular saw is typical, while a miter saw is better for crosscuts.
Always measure twice, mark clearly, and clamp the workpiece. Wear safety glasses and hearing protection.
- Choose a blade rated for ripping and confirm fence alignment.
- Use a straightedge or rip fence to prevent drift and splintering.
- Feed the board steadily, keeping hands clear and using push sticks.
- Check cut width after the pass; adjust and re-cut only if needed.
Crosscut Techniques
Start by lining up your cut carefully: crosscuts slice across the grain, so set a miter gauge or guide to hold the work square and align the blade with your marked line before you cut.
Use a crosscut saw or miter saw and confirm the workpiece is securely clamped to prevent movement or kickback. Measure and mark precisely, then recheck your layout against the guide so the blade tracks the line for straight cuts.
Set blade height to remove only the required material to avoid tear-out. Feed the stock steadily—don’t force the cut—and keep hands clear of the blade path.
After the cut, inspect the edge for squareness and smoothness and sand minimal imperfections before assembly.
Blade Selection Tips
Having the right blade makes straight cuts far easier and cleaner, so after setting up your fence or miter gauge you should pick a blade matched to the cut type: use a rip blade (fewer, larger teeth) for cuts along the grain and a fine-tooth crosscut blade for cutting across the grain to reduce tear-out.
Pick blades by task and keep them sharp.
- Choose rip blades for fast material removal when cutting with the grain.
- Use fine-tooth crosscutting blades for clean edges across the grain.
- Secure work and use a straightedge or fence to prevent binding and wandering.
- Inspect alignment and replace or sharpen dull blades to avoid tear-out and extra sanding.
Follow these blade selection tips to get accurate straight cuts and reduce finishing work.
Cut Curves and Details: Jigsaws and Coping Saws
Though curves and fine details can intimidate beginners, you’ll find that a jigsaw and a coping saw together give you the control and flexibility to tackle most shapes.
Use a jigsaw for larger sweeping curves and complex outlines—its versatility makes it ideal for intricate cuts in custom furniture and decorative edges. Clamp the workpiece, choose the correct blade, and run a straightedge for clean, accurate results.
Reach into tight corners and cut fine internal shapes with a coping saw; its thin, flexible blade navigates tight turns that power tools can’t. Select fine-toothed blades for smooth finishes or thicker blades for faster, rougher removal.
Practice blade changes and cutting technique so you can reliably produce the detailed features your woodworking projects demand.
Shape and Smooth: Planes, Rasps, and Files
Start with the right hand plane to flatten and refine surfaces—use a full-size plane for stock removal and a block plane for trims and end grain.
Use rasps to quickly shape curves and remove bulk, working freehand and checking fit often.
Finish with files of matching profiles and textures to smooth rasp marks and dial in precise contours.
Hand Planes Essentials
Hand tools like planes, rasps, and files are the foundation for shaping and smoothing wood, and knowing when to use each will speed your work and improve your results.
You’ll rely on hand planes for flattening and smoothing wood: smoothing planes for final surfaces, block planes for edge trimming. A wooden hand plane with adjustable blade controls cut depth so you get consistent thickness and a clean finish. Work with the grain, keep blades sharp, and adjust incrementally to avoid tear-out.
- Choose the plane type for the task.
- Set blade depth for fine shavings.
- Use rasps to quickly removes material when shaping curves.
- Follow with files to refine and prepare for sanding.
These tools are essential woodworking basics.
Using Rasps Effectively
Rasps are your go-to tool when you need to remove wood quickly or shape complex curves. You’ll use rasps to aggressively remove material where a plane can’t reach, especially on curved or irregular surfaces.
Choose coarse rasps for heavy stock removal and finer rasps as you approach the desired contour. Hold the rasp with a firm grip and work with controlled push-and-pull strokes along the grain to avoid tear-out.
Keep the rasp moving; short, choppy strokes gouge. Check your progress frequently and switch to a finer cutting tool for refinement—prepare the surface for final smoothing steps without overworking the wood.
Proper rasp selection and technique let you shape accurately and save time in later finishing.
Finishing With Files
Reach for a file when you need to refine shapes and smooth surfaces after using planes or rasps. Files let you take control of final contours and surface quality with precision. You’ll choose flat, round, or half-round files to match flat and curved areas, using coarser grades for removal and finer grades for smoothing and finishing.
Always file with the grain, maintain a steady angle, and apply consistent pressure for even results. Files are key to achieving precise finishes that sanders can’t reach.
- Select file shape to match the contour.
- Start with coarse, move to fine for smoothing.
- File with the grain; avoid cross-grain scratches.
- Keep angle and pressure consistent for precise finishes.
Drill Right: Drilling, Countersinking, and Pilot Holes
Start with the right hole: drill pilot holes sized about 70–80% of your screw diameter to prevent splitting, then use a countersink bit so screw heads sit flush or below the surface.
When drilling, match bit size to screw or dowel and the wood species; hardwoods need more care. Mark and clamp work, drill perpendicular, and back the bit out occasionally to clear chips.
Use a cordless drill for both drilling and driving to speed workflow, but practice on scrap wood to dial in speed and pressure. Adjust RPM and feed pressure for bit type and material to preserve bit life and accuracy.
Finish with a countersink pass only after confirming hole depth and alignment.
Strong Joints: Glue, Screws, Nails, and Dowels
A strong joint comes down to choosing the right combination of glue and fasteners for the load and finish you want: glue gives a permanent bond, screws add mechanical strength and serviceability, nails speed assembly, and dowels provide precise, concealed alignment.
- Use glue (yellow/white for interior, exterior-specific for outdoors) for permanent bonds; align carefully because it’s hard to undo.
- Drive screws with pilot holes to prevent splitting; choose head type for driving efficiency and use screws when disassembly or heavy shear strength is needed.
- Nail when speed matters; expect lower long-term strength and add support for heavy loads.
- Dowel for concealed, accurate joins—drill precisely for tight fit.
Combine glue with screws or dowels to make strong joints that last.
Clamp for Accuracy: Strategies for Square Assemblies
Once your glue and fasteners are in place, clamps hold everything square while the bond sets; you’ll get accurate joints only if pieces stay put.
Use clamps to hold workpieces firmly so joints are tight and alignment is maintained. Check squareness with a combination square at each corner before tightening.
For large panels, employ bar or pipe clamps to apply even pressure across the assembly and prevent warping; space them evenly for a flush fit.
For quick adjustments or smaller parts, quick-grip clamps speed the process and adapt to varying thicknesses. Apply pressure gradually and avoid distorting the wood—use pads or cauls when needed.
Re-check alignment multiple times while the glue cures to confirm accuracy and final fit.
Sanding for Finish: Grit Progression and Method Choice
Sanding prepares the surface for a flawless finish, and you’ll get the best results by following a grit progression and choosing the right method for the job. Start coarse to remove defects, then refine: 80–120 for initial work, 180–220+ for final passes. Always sand with the grain to avoid visible scratches.
- Use an orbital sander on flat panels for speed and consistent sanding.
- Hand-sand curved or detailed areas with a block or folded paper for control.
- Change abrasive when it loads or dulls to prevent heat buildup and uneven cuts.
- Tackle edges and corners with a block or specific attachments; don’t rely on the orbital alone.
This approach delivers a smooth finish, minimizes rework, and preserves wood integrity.
Finish Choices and Troubleshooting Common Beginner Mistakes
With your surface properly smoothed, pick a finish that matches the look and level of protection you want: oils keep wood looking natural, varnishes form a hard protective film, and wax gives a soft sheen suitable for low-wear pieces. Work in ventilation, use clean lint-free cloths or brushes, and test on scrap wood. Troubleshooting starts with sanding between coats and noting humidity effects. Avoid runs by applying multiple thin coats and allowing full drying.
| Finish | Best use |
|---|---|
| Oil | Natural grain, easy upkeep |
| Varnish | High-wear surfaces, durable seal |
| Wax | Decorative, low-traffic items |
If you see streaks or uneven color, sand lightly, wipe dust, retest, then recoat.
Frequently Asked Questions
How Do Wood Types Affect Tool Choice and Blade Wear?
Hardwoods wear blades faster and need tougher, higher-speed tools; softwoods cut easier but gum up blades. You’ll choose carbide or diamond teeth for dense woods, finer tooth counts for clean cuts, and slower feeds for resins.
Can Woodworking Be Done Safely in Small Apartments?
Yes — you can safely do woodworking in a small apartment if you plan carefully, limit dust and noise, use compact tools, secure proper ventilation, contain debris, use PPE, and respect building rules and neighbors.
What Are Eco-Friendly Wood Finishes and Where to Buy Them?
Think of linseed oil as a patient gardener, shellac as a quick-drying bird — you’ll find eco-friendly finishes like tung, flaxseed, milk paint, and water-based poly at local hardware stores, specialty eco shops, or online retailers such as Etsy.
How Do Humidity and Seasonal Changes Affect Wood Joints Over Time?
Humidity and seasonal changes make wood expand and contract, stressing joints and causing gaps, warping, or loosening. You should allow movement with proper joinery, gaps, and finishes, and control indoor humidity to minimize problems.
What Basic Hand-Tool Maintenance Extends Tool Lifespan?
Like a well-oiled clock, you’ll clean, sharpen, rust-proof, and adjust your tools regularly. You’ll store them dry, clamp blades safely, replace worn handles, and lubricate moving parts to keep peak performance and extend lifespan.
Conclusion
You’ve got the essentials—measure carefully, choose good boards, set up a tidy bench, cut with the right saw, join snugly, clamp square, sand through grits, and pick a finish. Stick to the checklist and you’ll avoid most beginner mistakes. Fun fact: hobbyist woodworking grew about 22% during the past five years, so you’re joining a big, helpful community. Keep practicing; accuracy and patience beat speed every time.