
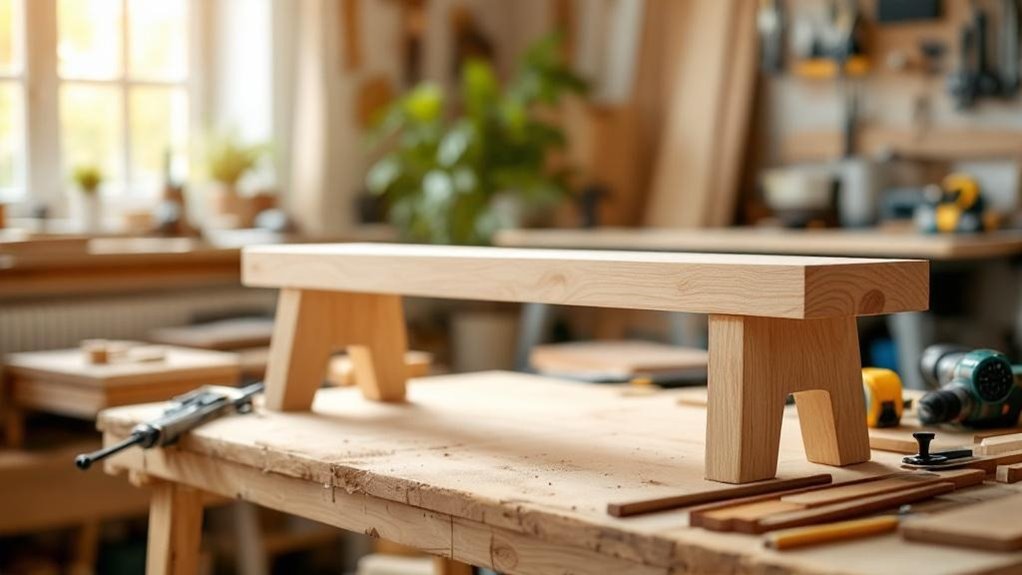
You can build a sturdy, stylish bench in a weekend using basic tools, affordable lumber, or upcycled furniture parts. Pick a size and style that fits your entryway, porch, or mudroom, and match the plan to your skill level. Prep tools, cut lists, and fasteners before you start to save time. Simple designs include storage benches, outdoor models, and conversions from dressers. Keep measurements tight and blades sharp, and if you want, you’ll find step-by-step plans and weatherproofing tips ahead.
Key Takeaways
- Choose a simple design (storage, entryway, or outdoor) sized to your space and skill level to ensure weekend completion.
- Use basic tools (drill, saw, measuring tape, level) and common lumber (2×4/2×6) to keep costs and complexity low.
- Pick plans with clear cut lists, diagrams, and estimated times to minimize surprises and wasted materials.
- Upcycle salvaged furniture or pallet wood for unique benches and significant budget savings.
- Prep parts, sharpen blades, and organize fasteners before starting to speed assembly and avoid common pitfalls.
Who This Roundup Is For : What You Can Build in a Weekend
If you’ve got a weekend and a few basic tools, this roundup is for you: whether you’re fixing up an entryway, outfitting a mudroom, adding outdoor seating, or giving old furniture new life, these projects are designed to be doable, budget-friendly, and satisfying.
You’ll tackle clear, short jobs: split an old dresser into two stylish DIY Bench seats for an entryway, repurpose a dresser top into a mudroom storage bench with cubbies for shoes and bags, or build a simple outdoor bench from basic lumber that stays sturdy through seasons.
You can also convert a headboard into a king-size bench or craft an upholstered DIY Bench using pallet wood and a crib mattress. Each plan lists tools, materials, and time estimates so you’ll finish confident.
Choose the Right Bench for Your Space & Skill
When you’re picking a bench, match its size and style to the room and your skill level so the finished piece looks intentional and feels sturdy—think a compact 48-inch Aldo Leopold model for narrow entryways, a roomy 79-inch patio bench for outdoor entertaining, or a simple 50×20-inch outdoor bench if you’re just starting out. Consider purpose (storage, seating), available materials (repurpose a dresser), and tutorials that fit your comfort level. Review bench plans for step-by-step clarity. Start simple if you’re new; choose pieces with straightforward joinery and common materials.
| Space | Skill | Result |
|---|---|---|
| Entryway | Beginner | Dresser makeover |
| Patio | Intermediate | 79-inch bench |
| Mudroom | All levels | Storage bench |
Tools and Budget Materials for a Weekend Build
Although you can tackle a bench in a single weekend, you’ll want a handful of reliable tools and a simple materials list to keep costs down and the build smooth. Gather a drill, a miter or circular saw, screwdriver, measuring tape, and a level—those let you cut, drill, and assemble accurately without fuss.
For budget-friendly materials, buy 2×4 or 2×6 lumber (about $3–$5 per board) and a box of 2.5″ deck screws (~$5). Add wood sealant or paint ($10–$20) for durability.
To shrink costs and add character, scout repurposed dresser parts or pallet wood. Lay out cuts and fasteners before starting so you won’t waste material or time.
5 Bench Designs You Can Finish in a Day
You’ll start with a quick materials checklist so you don’t run back to the shop halfway through—think measured lumber, fasteners, basic hardware, and any cushions or finish.
I’ll walk you through simple step-by-step plans for each one-day design so you can follow targeted cuts, assembly order, and safe fastening methods.
Finally, you’ll get fast finishing tips—sanding sequence, quick-dry stains or paints, and simple sealants—to have a usable bench by evening.
Quick Materials Checklist
A few basic materials will get you from idea to finished bench in a day: stock up on 2x4s (or reclaimed boards), deck screws, and 4×4 posts for sturdy legs, plus wood glue and sandpaper for a clean finish.
For your quick materials checklist, add basic fasteners (brads or exterior screws if outdoors), wood filler, and a weatherproof sealer or paint.
Keep tool essentials minimal: drill with bits, circular saw or handsaw, tape measure, square, and a hammer.
If you’re upcycling, include clamps and finishing hardware salvaged from the piece.
Downloadable plans often list exact quantities, so measure twice and buy a little extra for mistakes.
With this kit, most benches take only a few hours to assemble.
Simple Step-by-Step Plans
Pick a plan that matches your time, tools, and space—these step-by-step bench designs are made so you can finish in a day.
Choose a simple bench plan like the 50″ x 20″ outdoor model built from 2x6s; the measurements and cut list keep decisions minimal. If you want indoor pieces, follow the modern bench tutorial for a clean, easy build or convert a dresser into two benches for quick charm and sustainability.
For kids, use the children’s bench plan with storage, repurposed materials, and clear assembly steps. To add comfort, try the upholstered bench using pallet wood and an old crib mattress with straightforward instructions.
Each plan lists materials, cut lists, and assembly order so you stay on schedule.
Fast Finishing Tips
Finished benches are the payoff for a day’s work, so plan your final steps before you cut the first board. When you build a bench using simple designs like the Easy DIY Bench or Simple Outdoor Bench, think finish first: pick quick-dry paints or water-resistant sealants, and choose pre-cut or reclaimed lumber to shave prep time.
Keep tools organized, use straight cuts and simple joins, and schedule drying breaks into your build so the bench is usable by evening.
- stacked boards on sawhorses ready for sanding
- a brush stroking thin, even sealant layers
- clamps holding simple butt joints tight
- paint cans labeled “fast-dry” lined up
- folded tarp protecting a finished seat
Work efficiently and plan each step.
Build the 7′ Outdoor Bench in a Weekend (Step-by-Step)
Ready to build this 7′ outdoor bench? You’ll cut, assemble, and set posts in a weekend using six 2x8x8 boards, eight 2x4x8 studs, and six 4x4x8 Douglas fir posts. The base is 7′ long by 13″ wide with stud markings every 16″. Legs are 3′ sections of 4×4 set in 12″ holes filled with dry quick cement for lasting stability. Follow step-by-step instructions to build, secure, and finish the bench for durable, attractive seating.
| Step | Material | Dimension |
|---|---|---|
| Base | 2×8 boards x6 | 7′ × 13″ |
| Studs | 2×4 studs x8 | spaced 16″ |
| Legs | 4×4 posts x6 | cut to 3′ |
Upcycle Benches: Headboards, Dressers, Crib Mattresses
After you’ve tackled a solid outdoor bench, you can pivot to indoor projects that make old furniture useful again—starting with upcycled benches that look custom-built.
You’ll love how simple swaps turn scraps into seating: refinish a headboard into a dramatic back, split a dresser into two benches, or upholster a pallet frame with a crib mattress for cushy comfort.
Think small, practical steps: strip, sand, reinforce, and finish.
- A tall headboard as a farmhouse backrest with tapered legs
- Two short benches from one dresser carcass, taped and re-purposed
- Pallet base topped with a crib mattress and new fabric
- Kids’ bench with cubby storage made from repurposed panels
- Curtain-covered cushion for a soft, coordinated seat
These upcycle benches save money and add personality.
Storage Benches: Mudroom Cubbies and Shoe Storage
You’ll appreciate how built-in cubbies and shoe-specific compartments keep a mudroom orderly and make grab-and-go routines smoother.
Consider a bench with hidden compartments for seasonal gear and a top repurposed from an old dresser to add character without wasting space.
For kids, smaller cubbies and low hooks turn shoe storage into a tidy, kid-friendly system that’s simple to customize to your entryway.
Built-In Cubbie Designs
When you build a bench with built-in cubbies, you’re creating a tidy, multi-functional entry solution that keeps shoes, bags, and daily gear in their place while giving everyone a spot to sit and change footwear.
A bench project like this solves clutter and adds practical seating; you can size cubbies to your family’s needs, reuse an old dresser top for character, and follow step-by-step tutorials if you’re new to woodworking.
Plan for cubby dimensions, ventilation for shoes, and a sturdy seat hinge if you want hidden storage beneath.
- weathered dresser top as a warm, reclaimed seat
- three deep cubbies for boots and backpacks
- labeled compartments for each family member
- ventilated bottoms to reduce odor
- painted trim to match your entryway
Shoe Storage Solutions
A sturdy storage bench can transform a chaotic entry into an organized, comfortable hub for your family’s shoes and daily gear; you’ll get seating, hidden storage, and easy access all in one compact piece.
In DIY Bench Projects You Can Build in a Weekend, focus on practical shoe storage solutions that fit your routine. Convert an old dresser top into one bench with cubbies beneath for boots and sneakers, or build a kids’ bench from repurposed materials so children have a dedicated spot to sit and stash their shoes.
Follow a clear, beginner-friendly tutorial: measure shoe sizes, space cubbies accordingly, add a cushioned seat, and finish with durable paint. These choices maximize space, style, and everyday efficiency at your mudroom entry.
Bench With Hidden Compartments
If you liked the shoe cubbies idea, consider upgrading to a storage bench with hidden compartments to keep things even tidier and out of sight.
You’ll gain a seating spot that conceals shoes, bags, and outdoor gear while giving each family member a designated cubby. Repurpose an old dresser or headboard to save materials and add character, following a step-by-step DIY tutorial to cut, hinge, and finish the lids.
Top it with a cushion or simple upholstery for comfort and style. Picture the result:
- a long bench with lift-up tops revealing deep shoe bins
- divided cubbies labeled for each person
- reclaimed wood with weathered paint
- soft upholstered seat matching your entryway palette
- hidden latch mechanisms for clean lines
This bench with hidden compartments keeps your mudroom streamlined and functional.
Upholstered & Kid-Friendly Benches: Quick Padding Tricks
Because you want seating that’s comfy, safe, and easy to clean, quick padding tricks make upholstered and kid-friendly benches both practical and stylish. You can turn pallet wood and a crib mattress into one piece that adds charm—this weekend project gives a durable, low-cost piece of furniture perfect for adding extra seating.
Build a Children’s Bench with storage under the cushion so toys and shoes tuck away on one side. Use wipeable, tough fabric and closed-cell foam for spills and rough play.
Follow clear instructions and step-by-step instructions: cut, staple, trim, and secure the cushion to the frame. With straightforward materials and affiliate links for specialty fasteners, you’ll craft a statement piece with kid-safe comfort in a great weekend.
Style Your DIY Bench: Paint, Distress, French Finishes
Now that your kid-friendly bench has a comfy, wipeable cushion and hidden storage, you can focus on making the frame look as good as it feels.
Use chalk paint for a matte base that sands beautifully for distressing, then layer a lighter top coat to add depth. Pick a palette that complements your room so the bench reads as intentional, not afterthought.
Try French finishes like gilding or wax to lift key details and protect high-touch areas. Distress selectively with sandpaper, a rasp, or dark wax to mimic vintage wear without overdoing it.
- matte chalk paint base
- sanded edges and corners
- lighter top coat highlights
- dark-wax shadowing in creases
- gilded trim or waxed accents
Outdoor-Ready Benches: Materials and Weatherproofing
When you build a bench for the yard, choose materials and fasteners that actually stand up to sun, rain, and seasonal swings—cedar or pressure-treated lumber gives you rot resistance from the start, while stainless or galvanized screws keep joints from rusting out. You’ll seal or paint with an exterior-grade finish, then add a top coat of UV-blocking varnish to preserve color. Design slats or gaps for drainage so water won’t pool and cause warping or mold. Fasten carefully and pre-drill to avoid splits. Reapply sealant every couple years, inspect screws for corrosion, and touch up exposed end grain. The result is a stable, low-maintenance bench that lasts through seasons.
| Material | Finish | Notes |
|---|---|---|
| Cedar | Oil-based sealant + varnish | Natural rot resistance |
| Pressure-treated | Exterior paint + varnish | Budget-friendly |
| Fasteners | Stainless/galvanized | Prevent rust |
Common Pitfalls and Quick Fixes to Keep on Schedule
Watch for tools that slow progress—dull blades, wrong screwdriver bits, or an unreliable drill can turn a quick cut into a time sink.
Measure twice and cut once to avoid wasted material and the extra trips to the store that derail your timeline.
Keep spare blades, the correct bits, and a clear measuring routine so small mistakes don’t balloon into major delays.
Tools That Slow Progress
If you want to keep your bench project on schedule, start by fixing the tool and workflow issues that quietly eat your time: dull blades and worn drill bits, a messy workspace, unclear plans, and missing tools are the usual culprits.
You’ll save hours by maintaining cutting edges, arranging a clear layout, and simplifying steps into a checklist. Prep tools and parts before you cut or assemble.
- a saw struggling through plywood with a fuzzy edge
- a drill bit that walks and tears holes
- clamps buried under scraps when you need them
- a convoluted plan spread across scraps of paper
- running back to the store for a specialty blade
Tune tools, organize storage, and keep a basic power-tool set handy.
Material Measurement Mistakes
Measure twice, cut once isn’t just a proverb—it’s your next time-saver. You often miscalculate lumber lengths and end up short; double-check totals and add a small waste allowance before buying. Remember kerf: the blade removes material, so measure after each cut to keep final dimensions true.
Stick to one measurement system—mixing metric and imperial invites errors. Don’t trust faint marks; use a sharp pencil and a straightedge so cuts land where you expect. And never assume pre-cut pieces match; measure every board since manufacturing varies.
Quick fixes: recount and remeasure before cutting, label pieces as you go, and keep a scrap pile for test fits. These small habits keep you on schedule and reduce costly rework.
Adapt Bench Plans : Change Size or Materials Easily
While staying close to a plan’s original proportions will keep the bench sturdy, you can quickly tailor most DIY bench plans—like those on Etsy or the Simple Outdoor Bench—by changing board lengths in the cut list and swapping woods or recycled materials to suit your space and style.
You’ll use standard dimensions as a baseline, scale up or down, and keep joinery proportions so strength isn’t compromised. Extend parts to add storage or a planter, updating assembly steps.
Use standard dimensions as your baseline, scale proportionally, and preserve joinery—then extend pieces for storage or a planter.
Cut accurately with a miter saw, and drill clean pilot holes for different material densities.
Picture the finished piece:
- A narrow entry bench from shortened boards and cedar planks
- A wider dining bench using oak for heavier loads
- A painted recycled pallet seat
- A bench with under-seat storage box
- A planter-integrated end section
Where to Find Reliable Free and Paid Bench Plans
After you’ve adjusted a plan to fit your space or swapped materials, the next step is finding a reliable set of instructions to follow.
Look for free bench plans on reputable DIY websites and blogs that include step-by-step directions, materials lists, and downloadable PDFs with cut lists.
If you want more detail, browse paid plans on platforms like Etsy—prices commonly run $2.09 to $15.48—and choose listings that offer detailed diagrams and extended build notes.
Seek plans labeled by skill level so you can match complexity to your experience.
Check for community feedback or comment sections where builders share modifications, pitfalls, and photos; that real-world input helps you judge clarity and fit.
Download PDFs and read them fully before buying or building.
Frequently Asked Questions
Can I Build a Bench With Only Basic Hand Tools and No Power Tools?
Yes — you can build a sturdy bench with basic hand tools. You’ll plan simple joinery, cut and dress lumber with a handsaw and plane, drill with a brace, chisel tight joints, and sand and finish by hand.
How Do I Transport a Finished Bench in a Small Car?
You can fold seats or dismantle legs, pad the bench with blankets, and secure it with straps or bungee cords; angle it to fit, protect surfaces with cardboard, and slide carefully to avoid scratching or shifting during transit.
What Fasteners Are Best for Coastal Salt-Air Environments?
Use stainless steel (316) or silicon bronze fasteners — they’ll laugh at salt spray while holding firm. You’ll want marine-grade screws, bolts, and washers, plus thickened sealant and periodic rinsing to keep everything rust-free.
Can I Legally Sell Benches Made From Reclaimed Materials?
Yes—you can usually sell benches made from reclaimed materials, but you’ll need to verify property rights, avoid trademarked/controlled wood, comply with local regulations (business licenses, labeling, safety), and document provenance to reassure buyers and regulators.
How Do I Childproof a Bench With Moving Lids or Storage Compartments?
Better safe than sorry: you’ll install soft-close hinges, magnetic or keyed child locks, and safety lid supports or gas struts; round edges, secure heavy lids with straps, and test repeatedly so kids can’t trap fingers or open compartments.
Conclusion
You’ve got everything to tackle a weekend bench—choose the right plan, prep tools and materials, and pace yourself. Remember, measure twice, cut once: little prep saves big headaches. Start with a simple design, use weatherproof materials if it’s outside, and adapt dimensions to fit your space. If you hit a snag, pause, reassess, and make a quick fix. Build confidently; you’ll finish with a useful piece and a skill boost.