
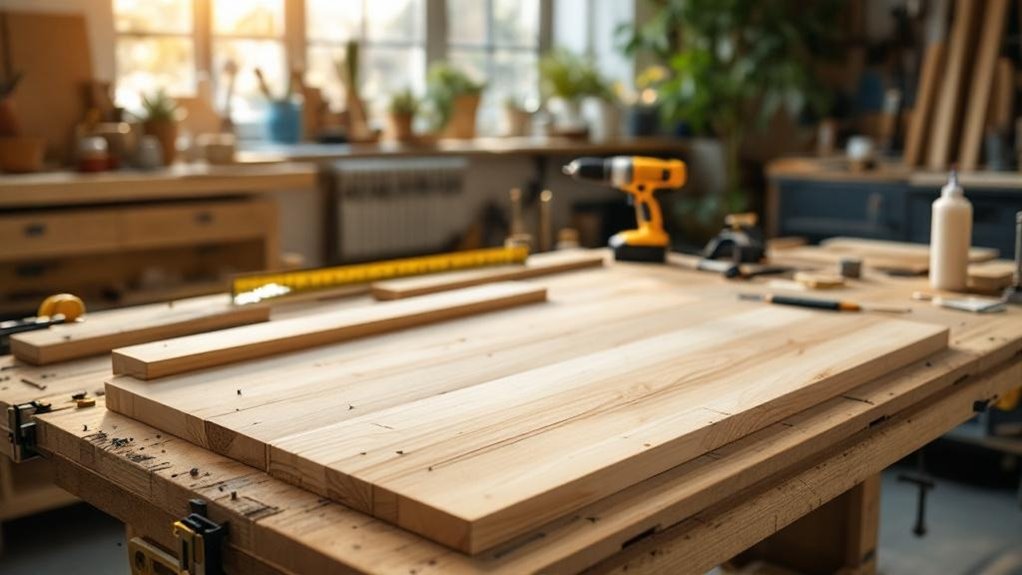
You can build a sturdy, stylish coffee table in a weekend using basic tools and common pine boards. Measure your space, pick a simple rectangular design about 16–18″ high, then cut two 4′ tabletop boards and four identical 16″ leg boards. Remove rounded edges, sand 80–120–220 grit, and assemble with glue, clamps and Kreg pocket screws. Distress, stain, fill pocket holes, and apply polyurethane for protection. Follow the full plan and you’ll get step‑by‑step guidance to finish it right.
Key Takeaways
- Measure your seating area and choose a simple rectangular or square design about 16–18 inches high for beginner-friendly proportions.
- Gather essential tools: miter saw, drill, Kreg Jig, clamps, sander, and basic sandpaper grits (80, 120, 220).
- Use five 2×6 boards for a stable tabletop and 2x4s for the frame; create a precise cut list before cutting.
- Glue and clamp leg assemblies (three boards per leg), dry-fit components, then fasten with pocket-hole screws and wood glue.
- Sand, fill holes or defects, apply stain or whitewash, and finish with polyurethane for durable, low-maintenance protection.
Pick the Right Coffee Table Design for Your Space & Skill Level
Start by measuring your room and sketching the layout so you can pick a table that fits the space and leaves clear pathways; a coffee table should sit comfortably between seating and generally be 16–18 inches high to line up with couches and chairs.
You’ll choose a design that matches both your room’s dimensions and your skill level. If you’re new to woodworking, favor simple rectangular or square plans from DIY coffee table ideas—fewer cuts and straightforward joinery reduce mistakes.
Be honest about your abilities: beginner-friendly options use pocket holes and basic joints.
Match materials and finishes to existing decor—a rustic stain for warmth or a sleek finish for modern rooms—so the final piece integrates without overwhelming the layout.
Tools & Materials for Your DIY Coffee Table
Now that you’ve picked a design that fits your space and skill level, gather the tools and materials you’ll need to build it.
For tools & materials for your DIY coffee table, you’ll need a miter saw, drill, and a Kreg Jig for pocket holes; consider a table saw if you want cleaner rip cuts.
Grab an electric sander and sandpaper in various grits to finish smooth surfaces.
Materials: five 2x6x8 pine boards (non-pressure-treated), 2.5-inch Kreg screws, and wood glue.
Optional supplies include Minwax stain or paint and brushes.
Account for total lumber cost—roughly $30—so you can budget for extras like finish or hardware.
Organize everything before you start to streamline the build.
Choose Lumber: 2×6 Vs 2×4 and How to Prep Boards
Decide whether you want a heavy, stable top (use 2×6) or a lighter, easier-to-handle frame (use 2×4).
Trim the rounded edges, cut all boards to consistent length and width, then square the faces so joints sit flush.
Finish prep with sanding and any distressing before assembly to guarantee a clean, professional look.
2×6 Vs 2×4
When choosing between 2×6 and 2×4 lumber for your coffee table, think about thickness, appearance, and how much prep each board will need: You’ll choose 2×6 for a thicker, sturdier top and a substantial look; pick 2×4 if you want lighter boards that are easier to handle and cut. Width (3.5″ vs 5.5″) changes layout and support. 2x6s often need more edge trimming to square them; 2x4s may need less. Both come in similar lengths, so decide by design, weight capacity, and finished dimensions.
| Feature | Impact |
|---|---|
| Thickness (2×6 vs 2×4) | Appearance and load capacity |
| Prep needed | 2×6 = more trimming |
Board Prep Steps
Although your choice of 2×6 or 2×4 will determine the table’s look and support, prepping the boards the same way gets you straight, smooth panels ready for assembly. For board prep steps, first select 2×6 if you want a wider tabletop surface and extra sturdiness; pick 2×4 for a narrower, lighter look.
Cut each board to length with a miter saw for clean, precise ends. Square the edges so boards sit flush—this prevents gaps and yields a professional fit.
Dry-fit pieces, then apply glue and clamp tightly to align and bond while drying. Finally, sand progressively from 60-grit through 220-grit to a uniform smoothness ready for stain or paint. Follow these steps methodically.
Cut List: 4′ X 20 DIY Coffee Table (Measurements & Tips)
Start by listing the exact cuts you’ll need: two 4′ boards for the tabletop and four 16″ boards for the legs, with each piece measured to fit your layout and clearance needs.
Use that as your primary cut lists reference and note any variations for style or scale.
Cut legs to identical length for stability; measure twice, cut once.
Cut boards slightly long at first so you can trim to final dimensions after dry assembly.
If you don’t have a table saw, use a circular saw and a straightedge for precise cuts, then square edges with a plane or sanding block for a clean fit.
Record final trimmed dimensions so future projects use the same cut lists and avoid guesswork.
Remove Rounded Edges: Why and How
Removing the rounded edges from your boards gives you true square faces that make joints fit tightly and the finished table look crisp; you’ll get better seams, easier glue-ups, and a more professional result.
To remove rounded edges, clamp the board and run a straight fence with a circular saw if you don’t have a table saw; take thin passes until the edge is square. A table saw with a fine blade gives faster, more consistent results.
Squaring edges prevents gaps at seams, yields flush surfaces, and makes assembly repeatable. You can leave rounded edges for a softer look, but if you want tight seams and precise fits, you should remove rounded edges before glue-up and final sanding to guarantee stability and a refined appearance.
Arrange Boards: Grain Matching and Layout Tips
Now that your edges are square, lay out the boards to judge how the grain will read across the tabletop. Arrange boards by matching similar grain patterns together so the surface looks cohesive. Physically spread the boards on your workspace, flip pieces as needed, and step back to view changes. Use clamps during this layout to hold pieces tight and preview any potential gaps. Inspect each seam for alignment and visual flow; adjust until the pattern feels balanced. Taking this care here saves time later and improves the final aesthetic.
| Visual Goal | Action |
|---|---|
| Match grain flow | Pair similar patterns |
| Minimize gaps | Clamp and align |
| Final check | Step back and inspect |
Glue & Clamp the Tabletop Without Gaps
Once the boards are dry-fitted and you’ve matched the grain, spread a generous, even bead of wood glue along each mating edge and bring the pieces together, making certain faces are flush so seams close tightly.
Align the boards on a flat surface, then set clamps perpendicular to the joints and tighten evenly from one end to the other to prevent bowing or gaps. Check that faces remain flush as you incrementally increase pressure.
Align boards on a flat surface, clamp perpendicular to joints, and tighten evenly to keep faces flush and gap-free.
Wipe excess wood glue immediately with a damp cloth to avoid dried residue. Leave clamps in place at least one hour, preferably overnight, for full bonding strength.
After unclamping, inspect seams; light sanding will remove any slight ridges and ensure a seamless tabletop.
Cut Final Pieces: Top and Leg Dimensions
Cut the final tabletop to 42″ long by 20″ wide and rip the legs to 16″ high, measuring twice and cutting once to validate accuracy.
Now cut final pieces for the top and legs with a sharp blade and straight fence; if you’re joining two 4-foot boards, align and clamp them before trimming so the seam is tight.
Mark all cuts clearly, use a square at each corner, and cut slowly to avoid tear-out.
After cutting, test-fit the pieces on a flat surface to confirm dimensions and squareness.
Sand all edges and the tabletop face to remove splinters and ascertain a smooth joint.
Keep parts labeled so you don’t mix pieces before assembly.
Build Leg Assemblies: Pairing, Gluing, and Sizing
Pair boards into tight, matching triplets for each leg so the grain and thickness are consistent, then glue between each layer and clamp for at least 24 hours to get a solid bond.
Square and trim each assembly to a uniform 16 inches so all legs match for stability and appearance.
Before the glue sets, drill five pocket holes per leg and plan screw placement—attach with wood glue and 2.5-inch screws about 5 inches from the tabletop edge, checking alignment and stability as you go.
Pairing Boards for Strength
Strength comes from careful joinery, so glue three 16″ boards together and clamp them firmly to form each leg assembly. You’ll apply a generous bead of wood glue to the mating edges, press the boards flush, and keep them aligned while the adhesive cures.
After clamps come off, trim and sand each assembly to a uniform 16″ height so all legs match and the table sits level. For attaching legs to the tabletop, consider using pocket holes to hide fasteners and increase withdrawal resistance without visible screws.
Work one leg at a time, checking squareness and consistency. Proper pairing and sizing before final attachment prevents wobble and guarantees the leg assemblies carry the tabletop weight reliably for years.
Gluing Techniques And Clamping
Now that your boards are matched and fit snugly, get ready to glue and clamp each three-board leg assembly for maximum stability. Use proven gluing techniques: spread a generous, even bead of wood glue on each mating edge so the joint’s full length is covered.
Stack the three 16” boards, align faces and edges, then position clamps.
- Apply glue to edges consistently to avoid weak spots.
- Align assemblies on a flat surface before tightening clamps.
- Clamp firmly—enough pressure to close gaps but not squeeze out all glue.
- Let assemblies remain clamped for at least 24 hours to cure fully.
After unclamping, inspect for unevenness and sand edges lightly for a uniform finish before attaching legs to the tabletop.
Final Leg Sizing
Cut each leg piece to 16 inches and glue three sections together to form each sturdy leg assembly. Then clamp them tight and let them cure for at least 24 hours.
For final leg sizing, pair identical cut pieces and apply glue evenly to mating faces to avoid gaps. Use strong clamps and check alignment before the glue sets; keep surfaces flush so assemblies sit squarely.
After curing, remove clamps and verify each assembly’s length and squareness against a straightedge. Trim any minor discrepancies so all four legs match precisely.
Test-fit legs under the tabletop, adjust as needed, then attach them securely with pocket hole screws for a clean look and reliable stability that prevents wobbling.
Use a Kreg Jig and Pocket Holes to Attach Legs
When you’re ready to attach the legs, use a Kreg Jig to drill five pocket holes per leg about 5 inches in from the tabletop edge; orient the pocket holes toward the table center, apply wood glue to the joint, and drive 2.5‑inch Kreg screws to create a strong, hidden connection that improves the table’s stability and appearance.
You’ll repeat this for each leg, keeping the pocket hole faces inward so the underside stays clean. Clamp while fastening to prevent movement and guarantee tight glue contact. Check screw depth so heads sit flush without splitting the wood.
- Mark leg locations and clamp leg to tabletop.
- Set Kreg Jig and drill five pocket holes per leg.
- Apply glue, align, and drive 2.5″ screws.
- Wipe excess glue and let cure before flipping.
Position Legs: Alignment, Spacing, and Stability Checks
After fastening each leg with pocket holes and glue, move on to positioning so the table sits square and steady; place each leg about 5 inches in from the tabletop edge and align them under the corners for proper weight distribution.
Now position legs one at a time, using a level to make sure each is plumb and the underside of the tabletop is flat. Check spacing visually and measure between adjacent legs to confirm symmetry.
Position each leg individually, use a level to ensure plumb, and verify underside flatness and even spacing for symmetry
Use clamps to hold a leg while you drive screws and let glue set. Once all legs are attached, apply light pressure at various points on the tabletop to test for wobble.
If you detect movement, loosen, readjust alignment, re-clamp, and tighten until the table is stable and level.
Distress, Sand & Prep the Surface for Stain
Start by distressing the tabletop to get that rustic character—use a hand planer to nick edges and a multi-tool to add small gouges and dents in strategic spots, working with the grain so the marks look natural.
After distressing, follow a strict sanding progression: 80, 120, then 220 grit for a smooth, uniform surface.
Inspect for holes or low spots and fill with wood filler; sand filled areas flush once dry. Don’t stain until the surface is clean of dust.
- Distress edges and faces sparingly for consistent wear.
- Sand sequentially: 80 → 120 → 220, keeping strokes with the grain.
- Fill defects, let cure, then re-sand lightly at 220.
- Wipe surface with tack cloth before staining.
Stain Sequence: Whitewash to Jacobean (Step‑by‑Step)
Anyone can get a layered, aged look by following a deliberate stain sequence: Start with a 50/50 white paint and water whitewash, apply lightly for a subtle wash, let dry. Rub in Minwax Special Walnut, wipe excess fast for a warm base. Add Minwax Weathered Oak to introduce rustic depth, then finish with Minwax Jacobean for dark contrast. Allow adequate drying between coats to avoid tackiness.
| Emotion | Texture | Tone |
|---|---|---|
| Calm | Subtle whitewash | Warm walnut |
| Nostalgia | Weathered grain | Deep Jacobean |
| Pride | Smooth changes | Polished finish |
| Confidence | Layered depth | Timeless look |
Fill Holes, Add Plugs, Topcoat, and Common Fixes
Fill any pocket holes with wood filler or a sawdust-and-glue mix, let it dry, then sand smooth so the tabletop is uniform.
Use paint-grade Kreg plugs where you want a seamless look and trim them flush to match the grain.
Finish with a protective topcoat like polyurethane and inspect periodically for wear so you can touch up before damage spreads.
Filling Pocket Holes
When you want a seamless look, cover pocket holes with either wood filler or Kreg plugs—use paint-grade plugs for painted pieces and pine plugs for stained ones so the finish matches.
You’ll be filling pocket holes to hide fasteners and prepare for finishing. Use generous wood filler, smooth with a putty knife, and let it dry fully before sanding. If you add plugs, trim flush and sand.
Finish steps are predictable: sand with 220-grit, remove dust, then apply a protective topcoat like polyurethane.
- Apply filler or insert plug, leaving a slight overfill.
- Smooth with a putty knife or trim plug close to surface.
- Sand flush with 220-grit and clean dust.
- Topcoat with polyurethane for durability and uniform sheen.
Using Matching Plugs
After you’ve filled or plugged the pocket holes, matching wood plugs give the cleanest, most professional look for your coffee table. Choose plugs that match the table’s species—pine for pine—to keep color and grain consistent.
Glue each plug into its hole, let the adhesive set, then trim any excess. Sand plugs flush with 220-grit paper so they disappear into the surface; work lightly to avoid gouging surrounding wood.
Stain or paint over the plugs to blend them with the tabletop, wiping away excess immediately for an even coat. If a plug cracks or lifts, remove it, clean the cavity, and reset a new plug with fresh glue.
Matching plugs hide fasteners and leave a seamless, durable finish ready for final protection.
Applying Protective Topcoat
Inspect the sanded table closely and patch any remaining holes or imperfections with wood filler. Then glue in paint-grade Kreg plugs for a seamless look that matches your finish.
After the filler dries, sand flush with an orbital sander, removing any ridges so plugs blend. Next, add a protective topcoat: apply thin, even coats of polyurethane with a high-quality brush or foam applicator, following grain direction.
Allow recommended drying time between coats and lightly scuff with fine grit before recoating.
- Confirm filler and plugs are fully cured before finishing.
- Use the orbital sander for final leveling, not aggressive removal.
- Apply protective topcoat in dust-free conditions.
- Recoat or spot-fix scratches as needed to maintain finish.
Frequently Asked Questions
Can This Design Be Scaled to Other Table Sizes or Shapes?
Yes — you can scale and reshape it; adjust leg positions, support dimensions, and joinery proportionally, recalc load-bearing requirements, and adapt materials for thicker tops or longer spans to maintain strength and stability.
How Do I Adapt the Plan for Outdoor Use?
About 60% of outdoor furniture fails within five years—use weatherproof hardwood or treated lumber, stainless fasteners, exterior glue, and marine varnish; seal joints, elevate legs, and add removable slatted top for drainage so it lasts longer.
What Finish Is Safest for Homes With Pets or Children?
Use a water‑based polyurethane or hardwax oil; they’re low‑VOC, durable, and non‑toxic once cured. You’ll let it fully cure per instructions, sand between coats, and ventilate during application to minimize fumes.
Can I Substitute Plywood or Reclaimed Wood for the Tabletop?
Yes — you can substitute plywood or reclaimed wood. Choose exterior-grade or hardwood plywood, seal edges, and inspect reclaimed boards for rot, nails, or chemicals. Sand, stabilize, and use a durable, non-toxic finish suitable for your household.
How Do I Transport the Finished Table Without Damaging It?
You wrap edges with moving blankets, secure tabletop to base with straps, lift with helpers using proper grips, transport on flat surface, avoid stacking heavy items, and drive slowly, cushioning movement with foam or cardboard to prevent scratches and dents.
Conclusion
You’ve taken raw boards and turned them into a functional centerpiece; now seal the deal. Like a last sweep of a paintbrush across a portrait, stain, plug, and topcoat lock in your work and protect it from life’s small storms. Check leg alignment, sand any raised grain, and fill holes cleanly. With care in these final steps, your coffee table won’t just hold cups—it’ll hold up, season after season.