
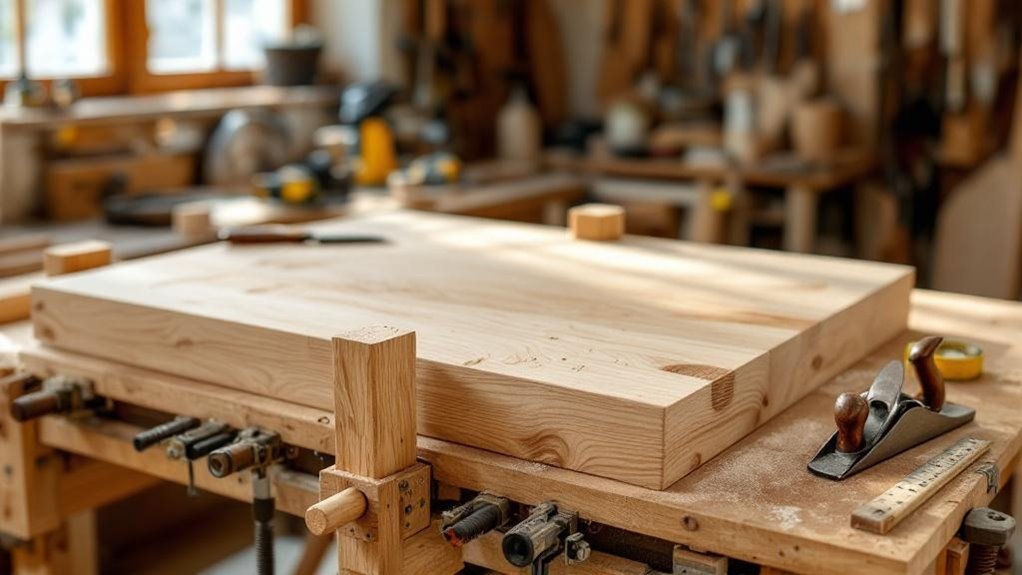
You’ll pick table type and final dimensions (dining 36×72″, coffee 16–18″ high, or console 30–36″ high), choose straight S4S boards in a suitable species, and make a precise cut list to fit common lumber sizes. Drill dowels with a jig, dry-fit and clamp frames square to 1/16″, then glue and fasten aprons with rabbets and slotted screws for tabletop movement. Sand to 220 grit, apply thin finish coats, and test strength—follow the full steps to complete it.
Key Takeaways
- Choose table type and final dimensions (e.g., 36″ x 72″ dining) to determine leg placement and apron lengths.
- Select stable S4S hardwood or poplar and inspect boards for straightness and minimal knots.
- Cut parts to a precise cut list, account for saw kerf, and dry-fit assemblies before gluing.
- Use dowels or simple pocket holes for strong leg-to-apron joints, and measure diagonals to ensure squareness.
- Leave elongated slots in aprons for tabletop screws, sand to 220 grit, and apply thin finish coats.
Project Overview and Final Dimensions
Start by building two identical frames: each needs precise leg assemblies and securely attached apron rails to guarantee structural integrity.
You’re building a table from solid wood using basic tools; cut components to standard lumber sizes with a circular saw and a crosscut jig to minimize waste. Use doweling for strong leg joins and measure diagonals during assembly to check squareness, keeping tolerance within 1/16 inch.
Build the table with solid wood, cut to standard sizes, use dowels for leg joints, and check diagonals.
Plan final footprint—commonly 36″ by 72″—but don’t choose type or set dimensions here. Allow functional clearances: typically 36″ for dining and 18″ near seating for coffee tables.
Mark and dry-fit all pieces before glue-up, clamp frames square, and recheck diagonals to assure the assembled frames stay true.
Choose Table Type and Set Dimensions (Dining, Coffee, Console)
With your frames squared and dry-fit, next decide what kind of table you’re building—dining, coffee, or console—because function drives the dimensions and proportions you’ll cut and join.
Decide by use: if it’s dining, plan about 36″ wide by 72″ long, and allow roughly 36″ knee clearance under the apron. For a coffee table aim 16–18″ height and 48–54″ length, keeping about 18″ from seating. For a console pick 30–36″ height and 12–18″ depth for narrow spaces.
Match those targets to standard lumber widths to reduce milling—I’m using full 1″ boards for the top when possible to save time.
Record final dimensions before cutting; they’ll determine leg placement, apron length, and joinery sizes.
Choose Wood: Hardwoods vs. Softwoods and Species
Choosing the right wood sets the table’s durability, appearance, and how easy it’ll be to build, so weigh hardwoods, softwoods, and species-specific traits before you cut.
Hardwoods like oak, maple, and walnut give durability and attractive grain but cost more and demand heavier work—expect tougher routing, sanding, and joinery.
Softwoods such as pine reduce cost and cut/plane easily, good for beginners, but dent and ding more readily. Use poplar when you want affordable hardwood performance with easy machining and excellent paint adhesion.
Whenever possible, buy S4S stock to avoid extra milling and achieve cleaner mating surfaces.
Inspect boards for straightness, consistent color, and minimal knots; reject warped or knotty pieces that will weaken joints or complicate finishing.
Make a Cut List and Order Lumber From Standard Sizes
Sketch your parts and match their dimensions to common board sizes like 2×4, 1×6, or 1×8 so you can plan cuts against standard lengths and reduce waste.
Make a precise cut list that shows each tabletop board, leg, apron, and brace with exact lengths and widths, then arrange those pieces on a layout to see how they fit across full boards.
When ordering, pick S4S boards, inspect for warps and knots, and add a bit of extra length per board to cover miscuts or final trimming.
Standard Lumber Sizes
Lumber planning starts with a tight cut list that matches your table’s dimensions to standard board sizes, so you can order just what you need and minimize waste. Use common nominal sizes—1×4, 2×4, 2×6, 2×8—but work from actual dimensions (a 1×4 is about 0.75″ x 3.5″).
Lay out required parts (apron, legs, top slats) against standard lengths to see how many pieces you can get per board. Include saw kerf in each cut calculation to avoid coming up short.
Reference a typical table footprint—36″ x 72″—when deciding board lengths so you cut full-size boards efficiently. When ordering, inspect for straightness, consistent grain and minimal knots; reject warped or heavily knotted boards to prevent fit and finish problems.
Optimizing Board Layout
Start by making a complete cut list that shows every part—top slats, apron pieces, legs, and any stretchers—with finished dimensions, quantities, and saw kerf allowances so you can lay those parts against standard board lengths (1×6, 1×8, 2×4, etc.) and see exactly how many boards you’ll need. Measure the intended space (for example 36″×72″) and pick standard sizes that minimize trimming. Note grain direction to prevent cupping and to plan matching faces. Order S4S lumber to skip milling. Use the cut list to map parts onto boards, grouping same-width pieces to reduce waste. Update quantities if any defects appear.
| Part | Qty | Board Size |
|---|---|---|
| Top slat | 8 | 1×8 |
| Apron | 4 | 1×6 |
| Legs | 4 | 2×4 |
Tools for Building a Wooden Table (Power and Hand Tools)
You’ll need a handful of reliable tools to build a sturdy wooden table: a circular saw for straight cuts, a drill/driver for fasteners and pilot holes, and a random orbital sander to finish surfaces smoothly.
You’ll need a few reliable tools—circular saw, drill/driver, and orbital sander—to build a sturdy wooden table.
Add basic hand tools: a tape measure and combination square for precise layout and to keep corners true. Use a doweling jig to drill aligned holes for strong dowel joints; it saves time and improves repeatability.
Bring several clamps to hold assemblies square while glue cures—long bar clamps and quick-release clamps are both useful.
Consider a router as an optional tool for decorative edges or for cutting joinery profiles.
Choose quality blades, bits, and sandpaper; maintain safety gear and keep tools sharp for clean, efficient work.
Prepare and Mill Boards: Flattening and Matching Grain
Before you mill anything, pick boards with straight grain and few knots so they’ll take a finish well and stay stable; then flatten one face of each board with a jointer or hand plane and square an edge to establish reliable reference faces for all cuts.
Cut boards to rough lengths allowing extra for squaring and sanding. Work one board at a time: joint the face until flat, then plane the opposite face to final thickness, and rip the squared edge on a table saw using the jointed edge as reference.
Lay out boards to match grain and alternate growth-ring orientation to reduce cupping and create a pleasing top. Temporarily clamp dry to check alignment and grain flow before final joinery and glue-up.
Layout Dowels, Rabbets, and Tabletop Fasteners
For a sturdy, long-lasting table, lay out dowels, rabbets, and tabletop fasteners with careful measurements and mirrored reference marks so each component lines up precisely during assembly.
Mark mating leg faces as mirror images before you drill dowel holes; use a doweling jig with depth stops to guarantee consistent depth and alignment so joints stay tight under load.
Cut rabbets on apron ends to increase glue surface and seat the aprons squarely against legs.
For the tabletop, drill 1/2-inch holes through aprons and use thin recessed screws so tips protrude slightly to secure the top while allowing seasonal wood movement.
- Use mirrored marks for all mating parts.
- Employ a doweling jig with depth stops.
- Cut rabbets for glued apron ends.
- Drill 1/2″ apron holes for recessed screws.
Cut Legs, Aprons, and Tabletop Boards (Crosscuts, Rip Cuts, Tapers)
Now that your joinery layout is marked and dowel locations are mirrored, cut the legs, aprons, and tabletop boards with care to preserve those reference marks and guarantee accurate fit-up.
Use a circular saw with a crosscut jig for leg end cuts to keep them square; taper legs by guiding the saw along a pencil line freehand for a clean, controlled slope.
Rip apron pieces slightly long so you can trim to final length after confirming squareness during dry assembly.
Cut tabletop boards first, orienting grain and alternating growth ring direction between adjacent boards to reduce future cupping.
Avoid moving dowel marks while cutting.
Sand all pieces progressively from 80 to 220 grit so mating faces and exposed edges are smooth and ready for assembly.
Drill Dowels and Screw Holes With Jigs and Depth Stops
Grab your doweling jig and set it up so every hole lines up perfectly between legs and aprons. Then use a drill bit fitted with a wooden sleeve as a depth stop to keep each hole consistent.
Clamp parts and a wooden spacer to prevent shift, then confirm alignment by sighting from an adjacent edge before drilling each hole. Use the jig to locate dowel centres; the sleeve limits depth so dowels seat fully without breaking through.
For screw holes, mark and drill pilot holes, then countersink so screws sit flush.
- Use the doweling jig for repeatable lateral alignment.
- Fit a wooden sleeve on the bit for uniform depth.
- Clamp a spacer to stabilize the assembly.
- Countersink screw holes for a clean, strong finish.
Assemble the Frame: Dry-Fit, Glue-Up, Clamping, and Squaring
Before you glue anything, dry-fit and test every frame component to confirm alignment and make any adjustments.
Apply an even layer of glue to all joint surfaces, assemble the frame, and clamp each joint with enough pressure to close gaps without distorting the wood.
Verify squareness by measuring the diagonals (within 1/16″), then let the glue cure fully before removing clamps.
Dry-Fit and Test
Lay out and dry-fit every frame component to confirm fit and alignment before you apply glue. Check each joint for snug contact, make necessary adjustments, and verify parts seat squarely. Once satisfied, mark clamp locations and note where squeeze-out will occur.
- Test-assemble without glue to confirm every mortise, tenon, and rail aligns.
- Measure both diagonals of the assembled frame; adjust until within 1/16″ for true squareness.
- Plan clamp placement so pressure is even across joints and corners during final assembly.
- Note any gaps or tight spots; correct them now rather than after glue-up.
You’ll save time and avoid rework by resolving fit issues during this dry-fit and test stage.
Glue-Up and Clamping
Once your dry-fit confirms everything seats square and any tight spots are corrected, spread a generous, even bead of glue on all mating surfaces and assemble the frame, then clamp it so pressure is distributed evenly across each joint.
Work methodically: apply glue, seat parts, and use enough clamps to eliminate gaps without crushing the wood. Protect faces with cauls or scrap to prevent clamp marks and maintain alignment.
After tightening, measure both diagonals—adjust clamps until diagonal measurements agree within 1/16 inch. Wipe squeeze-out promptly with a damp cloth to avoid sanding later.
Label and document clamp locations if you’ll repeat this setup. Finally, leave the assembly undisturbed for the full cure time specified by the glue manufacturer before removing clamps to preserve joint strength.
Attach Aprons and Fasten the Tabletop (Rabbets, Slots, Screws)
Start by cutting rabbets into the ends of the apron rails so they seat flush against the legs; this gives you a strong, square joint that keeps the apron aligned.
Next, cut slots in the apron faces where tabletop screws will pass; the slots allow seasonal wood movement and prevent split top edges.
Use a chisel and hammer to cleanly break off remaining wood after slotting for a precise, snug fit.
Mount the aprons and drive angled screws from the apron backs into the legs so fasteners stay out of sight.
Finally, drill recessed screw holes through the rails into the tabletop, countersink them so screw heads sit below the surface, and use appropriate-length screws to secure the top without splitting.
- Cut rabbets precisely.
- Slot for movement.
- Clean with hammer.
- Screw and recess.
Final Sanding, Finish Options, and Strength Testing
With the aprons and tabletop secured, you’ll move on to final sanding and finishing to protect the wood and refine the surface. Sand progressively: start 80-grit, move through 120 and 150, finish at 220-grit. Clean with a tack cloth or vacuum. Choose a finish: oil-based polyurethane for durability, water-based for easy cleanup, or natural oil to enhance grain. Apply thin, even coats, wait 4–6 hours between coats, and lightly sand between coats for a smooth result. For strength testing, add weight gradually and watch joints for movement or failure; address looseness before regular use.
| Finish Type | Dry Time | Notes |
|---|---|---|
| Oil-based polyurethane | 4–6 hrs | Very durable |
| Water-based finish | 4–6 hrs | Easy cleanup |
| Natural oil | 4–6 hrs | Enhances grain |
Frequently Asked Questions
How Do I Transport a Finished Table Without Damaging the Finish?
You’ll wrap the tabletop in a soft, breathable moving blanket, secure corners with painter’s tape, lift with help, carry upright if possible, avoid dragging, strap in place in your vehicle, and pad between surfaces to prevent shifts.
What Protective Pads Prevent Tabletop Scratches From Cookware?
Heat-resistant silicone, wool felt, cork, and neoprene pads prevent scratches; silicone withstands over 500°F so it protects hot cookware, felt cushions movement, cork resists moisture, and neoprene grips—choose size and adhesive based on pot weight and frequency.
Can I Add Adjustable Feet for Uneven Floors?
Yes — you can add adjustable feet to level the table. Choose threaded leveling glides, drill and insert compatible threaded inserts or use mounting plates, then adjust each foot until the tabletop sits stable and wobble-free on uneven floors.
How Long Should the Finish Cure Before Heavy Use?
Wait at least seven days before heavy use; most finishes cure enough for light handling in 24–72 hours, but full chemical cure and maximum durability usually take 7–30 days depending on product, temperature, and humidity.
What’s the Best Way to Repair Minor Dents or Gouges?
Think of dents as tiny rivers you’ll dam: you’ll raise them with a damp cloth and iron, sand lightly, fill deep gouges with wood filler or colored wax, sand smooth, then stain and finish to match the surface.
Conclusion
You’ve followed each step methodically, and now your table stands solid and true. Like a well-tuned instrument, it should feel balanced and responsive when you test weight and wobble. Double-check fasteners, glue joints, and the tabletop attachment, then sand and finish to protect the wood. If anything’s off, loosen clamps, tweak joinery, and re-tighten. Keep a maintenance plan—tighten screws and refresh the finish—to guarantee the table serves you for years.