
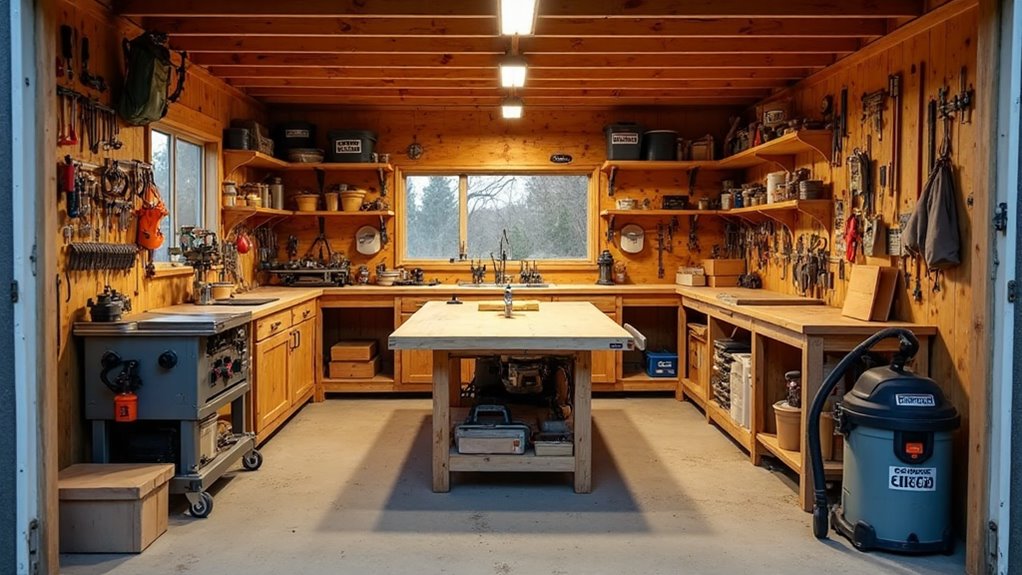
You’ll convert your 19’×9.6′ garage or shed into a year‑round woodworking shop that keeps a mid‑size SUV accessible while maximizing a 6’×2′ mobile workbench and vertical storage. Measure, sketch zones, and park first to mark a 3′ rear clearance and a car envelope. Favor mobile bases, pegboards, and a center or door‑aligned table saw with a 4’+ outfeed. Add task lighting, ventilation, a dedicated 20A circuit, and clear safety zones—keep prototyping to refine the plan and learn specific layouts.
Key Takeaways
- Prioritize a clear center aisle with a car-clearance envelope to allow vehicle access and 3+ feet rear clearance behind a parked mid-size SUV.
- Use a mobile 6’x2′ workbench and wheeled machines to keep the center open and enable flexible workflow reconfiguration.
- Place the table saw either centered (for door-feed work) or on the perimeter with a 4’+ outfeed table level with the blade.
- Maximize vertical storage—pegboards, shelves, cleats, and overhead racks—for tools and bulk materials to free floor space.
- Plan power, dust collection, lighting, heating, and marked safety zones before installing permanent cabinets and machines.
Who This Guide Is For and How to Use It
This guide is for hands-on woodworking enthusiasts who need to make a single-car garage or shed—roughly 19′ long by 9.6′ wide—into a practical, year-round workshop without losing vehicle access.
You’ll use measured constraints to develop a shop layout that preserves at least 3 feet of clearance behind a parked car while fitting essential work surfaces and circulation paths.
Plan the layout around measured constraints, keeping three feet behind the parked car for work surfaces and circulation
You’ll prioritize a mobile six-foot by two-foot workbench built from 2x4s and plywood, deploy vertical shelving and wall-mounted storage to free floor space, and plan dust collection and seasonal systems—portable heater for winter, natural-light strategies for summer.
Read this section as an operational checklist: measure, sketch, designate fixed versus mobile zones, and sequence installations to avoid rework.
Map Your 19′ X 9.6′ Garage: Quick Measuring Tips
Now that you’ve defined who the shop must serve and what stays mobile or fixed, it’s time to map the space with fast, accurate measurements.
Start by measuring the 19′ x 9.6′ perimeter, then record distances from the garage door opening to both side walls and any obstructions. Use a tape to guarantee at least 3′ behind a parked mid-size SUV for door operation and access.
Mark on the floor the exact footprints for the table saw and workbench so workflow remains unobstructed. Draft a scaled floor plan showing fixed cabinets, shelves, and portable storage to maximize vertical space.
Maintain clear pathways for mobility; position tools to prevent choke points. These precise steps let you plan a functional, efficient garage shop layout.
Park First: Car Clearances and Safe Tool Zones
Start by parking the SUV so you can mark a clear car clearance envelope that preserves at least 3 feet behind the vehicle for safe movement and garage door operation.
From that parked position, map a safe tool buffer around fixed machines—especially the table saw—so you’ve got unobstructed approach, exit, and material-feed paths.
Account for the door operation path and prioritize mobile bases for larger tools to keep those buffers intact without constant rearranging.
Car Clearance Envelope
Think of your parked mid-size SUV as the central element around which every clearance decision revolves: with a 19’×9.6′ garage you need at least 3 feet behind the vehicle and clear lateral zones so doors open fully, people can move safely, and tools don’t intrude into the parking envelope.
Define a strict car clearance envelope and plan all tool locations to its perimeter. Keep the table saw and dust collection against walls where possible, aligned to minimize cross-traffic and preserve shop workflow.
Use vertical storage and pegboards to maximize usable wall space, keeping floor areas adjacent to the vehicle free. Mark the envelope on the floor, enforce it—your vehicle access, emergency egress, and efficient woodworking all depend on that disciplined boundary.
Safe Tool Buffer
Park your SUV first and mark a strict clearance perimeter: with a 19′×9.6′ garage you must keep at least 3′ behind the vehicle and clear lateral zones so doors open and people can pass.
You’ll establish a safe tool buffer by arranging fixed storage along walls, assigning distinct tool zones, and keeping the center aisle unobstructed. Confirm paths to both car and equipment are direct and free of trip hazards.
Use mobile bases for bulky machines so you can retract them into their zones without shrinking the buffer. Label boundaries and rehearse movement patterns to maintain discipline.
- Mount wall cabinets and pegboards to free floor space
- Define a 3′ buffer with floor tape
- Keep rolling tools parked against walls
- Reserve centerline for access
- Inspect clearance before starting tools
Door Operation Path
Begin by parking your mid-size SUV so you can verify the minimum 3-foot clearance behind it and establish the garage door’s full swing without guessing; this single act sets the baseline for all tool placement and safe zones.
With a 19’×9.6′ footprint, map the vehicle envelope and keep center clearance clear so entry and exit remain unobstructed. Position benches, cabinets, and larger machines along walls, leaving a continuous path to the door.
Define a distinct safe zone around the table saw that never overlaps the car envelope; that preserves outfeed and operator space. Use fixed tape lines or floor marks to remind you where cabinets or carts must stay.
Regularly reconfirm clearances after rearranging equipment to maintain predictable door operation and safe workflows.
Pick Your Workflow: Perimeter Shop vs. Center-Saw Layout
Although both layouts can work in a 19′ x 9.6′ garage, you should choose the one that matches how you move through projects: a perimeter shop keeps tools and storage along the walls for an open center that’s ideal for large assemblies and clear circulation, while a center-saw layout anchors the table saw in the middle to create a defined safe zone and streamline feeding material from the garage door.
You’ll weigh accessibility, project type, and how often you need clear center space. Use mobile tool bases and vertical storage to adapt either plan. A central outfeed table can double as assembly space and storage, bridging both approaches when designed to your shop’s dimensions.
- Evaluate dominant tasks: assembly vs ripping
- Measure clearances for material flow
- Prioritize safe zones around blades
- Design mobile workstations
- Optimize wall storage for tools
Place Your Table Saw: Center or Door-Aligned?
You’ll weigh two clear options: centering the table saw creates a defined safe zone and smooth shifts to outfeed and assembly areas.
Aligning the saw with the garage door makes feeding long stock far easier and speeds long rip and crosscut workflows.
If you use a mobile base, you can shift between these setups to match each project’s demands without sacrificing shop flow.
Center Placement Benefits
Placing your table saw in the center of the shop gives you a clear, safe work zone around the blade and makes feeding long stock—straight out the garage door—much easier.
You’ll use that central position as the table saw next step in many cuts, moving stock to either side without bottlenecks. It creates a hub for shifts to your bench or outfeed table and keeps pathways open so you don’t set material on the floor.
Central placement preserves clear sightlines, reduces twisting while handling large pieces, and lets you configure outfeed and assembly areas logically around the saw.
You gain versatility: cutting, staging, and assembly all function within one organized footprint.
- Safer clearances around the blade
- Easier long-stock feeds
- Smooth shifts to workbench
- Maximal usable floor space
- Flexible outfeed and assembly space
Door-Aligned Workflow
If you line your table saw up with the garage door, you’ll gain a straightforward feed lane that makes handling long sheets and panels much quicker and less fussy. You’ll feed material directly through the saw, reducing rotations and awkward lifts; that efficiency is vital in a one-car garage.
Positioning the table saw door-aligned simplifies entry and exit for large stock, lowers setup time, and creates a clear safe zone around the blade. Measure door clearance first so the door operates fully with obstructed pathways avoided.
Keep outfeed support and rolling carts aligned with the feed lane to sustain straight cuts. This layout minimizes tool choreography, speeds repetitive work, and helps you maintain a safer, more productive shop.
Choosing the Right Table Saw for a One-Car Garage
Because space and workflow are the limiting factors in a one-car garage, choose a table saw that balances footprint and power—such as a SawStop PCS cabinet model for stationary precision or a compact jobsite saw for mobility—and plan placement, dust collection, and a minimum of three feet of infeed/outfeed support behind the blade to guarantee safe, accurate cuts.
You’ll evaluate dimensions against your floorplan, favoring a position near the garage door for long rip capacity. Prioritize integrated or compatible dust collection and a mobile base to reclaim floor space. Check electrical requirements and dust port size before buying. A deliberate, measured choice prevents cramped work and improves cut quality.
- Measure clearances and swing paths
- Confirm dust port compatibility
- Choose mobile base options
- Map electrical circuit capacity
- Test setup near the door
Designing a Multifunctional Outfeed and Assembly Table
Aim for an outfeed surface at least 4 feet wide and precisely level with your saw so large panels move smoothly without catching.
Fit the underside with organized storage—drawers or shelves for jigs, clamps, and blades—so tools stay within reach during assembly.
Put the table on lockable casters so you can roll it into position for cuts or clear it away and lock it solid for safe, repeatable work.
Outfeed Surface Dimensions
A solid outfeed surface that matches your table saw height makes cutting and assembly predictable and safe, so plan for a top that sits exactly level with the saw’s table.
Set outfeed surface dimensions to support full sheets: extend 30–48 inches beyond the blade to stabilize large panels and prevent tipping.
Keep the top rigid and flat; use torsion-resistant framing and a smooth work surface.
Consider foldable or extendable wings for occasional oversize work, and integrate a dedicated power outlet for routers or sanders.
Don’t rely on variable heights—consistency is safety.
- Match the outfeed surface dimensions to saw height precisely.
- Extend 30–48 inches for sheet support.
- Use stiff framing to avoid sag.
- Add foldable/extendable sides.
- Include a built-in power outlet.
Storage Beneath Workspace
Having your outfeed surface sit perfectly level with the saw makes it the obvious place to build storage beneath for quick access to tools and materials.
Design the multifunctional outfeed and assembly table so the underside becomes dedicated storage space: drawers for measuring and marking tools, open shelves for clamps and sacrificial boards, and cubbies for hardware bins.
Keep the top smooth and spacious to feed stock directly from the saw and to assemble parts without obstruction. Position storage for ergonomics — frequent items at waist height, bulkier supplies lower.
Consider casters for repositioning when needed, but prioritize secure stops (discussed later). Fit clear labeling and modular dividers to minimize search time and maintain order in a compact garage workshop.
Mobility And Locking
Roll the outfeed and assembly table where you need it, but lock it solid when you don’t—mobility should never compromise stability. You’ll fit heavy-duty casters for smooth repositioning, then use robust locking hardware to prevent any movement during cuts or assembly.
Build a plywood top for durability and flatness, add an under-shelf for tools and consumables, and provision a quick-disconnect dust-collection port to keep the space clean. The result is a multifunctional surface that shifts with project flow yet performs like a fixed bench.
- Heavy-duty casters with total-lock brakes for safe mobility and immobilization
- Plywood top sized for table-saw support and large assemblies
- Under-shelf storage for quick access to jigs and clamps
- Quick-disconnect dust port to maintain air quality
- Reinforced frame to resist racking when locked
Workbench Options: Compact, Foldaway, or 6′ Fixed
While your space and projects will dictate the best fit, choosing between a compact, foldaway, or six-foot fixed workbench comes down to balancing workspace needs, stability, and storage access.
When you evaluate workbench options, match bench size to typical projects: a six-foot fixed bench gives ample surface and superior stability for larger assemblies and heavy planing. Compact benches save floor space but force you to prioritize dimensions and features, so measure reach, clamping zones, and tool clearance before committing.
Foldaway benches buy flexibility—stow them to reclaim floor area while retaining adequate workspace for many tasks.
Whatever you pick, integrate under-bench drawers or shelves to keep tools accessible and work surfaces clear, aligning the bench with your workflow and available footprint.
Make It Mobile: Put Tools and Storage on Wheels
Give your stationary kit mobility by mounting saws and the planer on sturdy mobile bases so you can reconfigure the shop as projects demand.
Put tool chests and parts cabinets on heavy-duty casters or build rolling carts that double as work surfaces for mitering and assembly.
Fit quick-disconnect dust hoses and keep rarely used machines tucked in corners on wheels to free immediate floor space and streamline workflow.
Mobile Bases For Tools
A mobile base changes how you use your shop: fit casters to benches, saws, and storage so you can reposition heavy equipment instantly, clear a work area, or create a central cutting station when a project demands it.
Mobile bases let you shift planers, tables, and router stations into the best location for each task, then tuck them away to free floor space. You’ll pick lockable, heavy-duty casters and sturdy mounting plates to handle vibration and load.
Install mounting points that keep electrical and dust-collection lines tidy when tools move. Test stability before cutting; prioritize brakes and low centers of gravity.
- Choose casters rated above tool weight
- Use reinforced base plates
- Add toe brakes for safety
- Keep hoses and cords flexible
- Verify flat, level positioning before use
Rolling Storage Solutions
Put your storage on wheels and you’ll transform how the whole shop flows: rolling carts, tool chests, and custom trolleys let you bring a planer or miter saw to the work area, stash supplies out of the way, and reconfigure circulation in seconds.
Use rolling storage solutions and mobile bases to convert fixed tools into flexible assets; you’ll adjust layouts quickly to match project phases.
In a small shop, wheeled chests and carts keep tools organization intentional: frequent items stay close on casters, seldom-used gear rides to perimeter zones.
Mobility preserves clear aisles, speeds task shifts, and maximizes usable square footage.
Build or buy sturdy platforms with locking casters, balanced weight distribution, and secure mounting to maintain safety while you optimize workspace efficiency.
Vertical Storage That Saves Floor Space (Shelves, Cleats, Hooks)
Maximizing vertical storage lets you free valuable floor space while keeping tools organized and within reach: You’ll install sturdy shelf runs on the passenger-side wall for frequently used items, then push less-used gear to higher shelves and drawers to free workspace.
Use a DIY French cleat system to hang hand tools securely and relocate them as projects change. Mount extendable ladders on wall brackets to keep them accessible without using ground area. Fit hooks under shelves to store clamps and small tools vertically, clearing benches.
- Sturdy wall-mounted shelf for daily items
- French cleat panel for adjustable tool placement
- Wall brackets for ladder storage
- Under-shelf hooks for clamps and hand tools
- High shelves/drawers for seasonal gear
Using the Side Closet and Low-Height Spaces Efficiently
When you use the side closet and low-height spaces deliberately, you free your main workshop for active work while keeping seasonal gear and seldom-used items organized and accessible. Use lower shelves for central vacuum parts, lesser-used tools, and stacked bins; dedicate floor space beneath for portable equipment and low-height materials. Install compact cabinets and labeled bins to conserve floor area and speed retrieval. Rotate seasonal items like bicycles and tires so essentials stay reachable. Periodically assess contents against project needs; move rarely used items higher or farther back. This disciplined approach keeps your bench clear and your workflow uninterrupted.
| Zone | Best Use |
|---|---|
| Upper | Rare items |
| Mid | Frequently used |
| Lower | Vacuum/portable gear |
Dust Control and Air Quality for Indoor Saw Use
1 clear dust-management strategy will keep your indoor saw work from turning the shop into a health hazard, so prioritize a combination of source collection, ventilation, and regular air monitoring.
You’ll fit compact dust control gear—like a wall-mounted Oneida mini dust collector—to capture sawdust at the source, and pair it with routine fresh-air exchange to lower fine-particle buildup.
Inspect seals, hoses, and collection bins weekly, and track particulate levels with a simple monitor to protect your lungs and workflow. Keep the workspace tidy; settled dust becomes airborne with movement.
- Install source collectors on table saws and miter stations
- Use mechanical or window ventilation during and after cuts
- Run the mini collector during all cutting operations
- Monitor PM2.5/PM10 regularly
- Empty and service filters on schedule
Chop Saw (Kapex) Indoors: Dust, HEPA, and Best Practices
Because a Kapex (chop saw) throws fine dust even with improved shrouds, you should treat its station as a source-collection priority: place the chop saw in a dedicated corner with short, straight dust-collector runs and a wall-mounted Oneida mini dust collector or equivalent.
Connect hoses securely, check fittings each session, and maintain the collector to preserve suction. Use a HEPA air cleaner running continuously during and after cuts to cut airborne particulate load.
Position the collector inlet close to the blade without obstructing movement; newer Kapex models help, but they don’t eliminate fine dust. Keep workflows organized so hoses remain accessible and unstrained.
Inspect filters regularly and replace per manufacturer intervals. These steps minimize exposure and keep your one-car garage or shed workable for precision joinery.
Lighting and Climate: Winter Heating, Ventilation, and Task Lights
After sorting dust control and air filtration around your chop saw, turn attention to how lighting and climate affect accuracy and comfort in winter.
After addressing dust and filtration, focus on lighting and climate to keep winter work accurate and comfortable
You’ve added supplementary fluorescent lighting to compensate for short, dim days; position fixtures to eliminate shadows and reduce glare on cuts. An infrared heater handles drafts from the garage door, delivering focused heat without stirring dust.
In warm months, maximize natural ventilation by opening the door for through‑air. Monitor both heating and lighting regularly to maintain consistent conditions and prevent thermal or visual drift that harms precision.
- Position task lighting at the workbench and table saw for shadow‑free detail work
- Use cool‑temperature fluorescents for color accuracy
- Mount lights to avoid blade glare
- Service the infrared heater seasonally
- Check fixtures and controls monthly
Power and Wiring: Outlets, Circuits, and Safety Basics
For a safe, reliable shop you’ll plan circuits and outlet placement with the same care you give joinery—start by dedicating at least one 20‑amp circuit to power tools and laying out outlets every 4–6 feet along walls so you can run multiple tools without extension cords or overloads.
You’ll install a minimum of 4–6 outlets in a one‑car garage workshop, adding more where you expect extra equipment. Put GFCI outlets where moisture or cold might cause hazards, such as near sinks.
Provide a separate dedicated circuit for high‑draw equipment like dust collectors or large saws. Have all wiring installed or reviewed to meet local electrical codes. Label circuits clearly at the panel and plan conduit or raceways for future expansion.
Safety Basics: Clear Zones, First Aid, and Fire Protection
Good wiring and properly placed outlets keep tools powered and people safe, but you also need clear physical zones, first aid, and fire protection to manage the human risks that electricity and moving machinery introduce.
You’ll mark clear zones around heavy machines like table saws so movement and material handling stay unobstructed. Keep a dustproof first aid kit in a fixed, visible spot and a designated area for safety gear to reduce clutter.
Mount fire extinguishers by the entrance and near high-risk processes for immediate access. Inspect goggles, ear protection, and extinguishers regularly and log maintenance. Train everyone on extinguisher use and first aid basics; practice access routes to clear zones so responses are fast, calm, and effective.
- Mark and enforce clear zones around equipment
- Dustproof, accessible first aid kit
- Fire extinguishers at entrance and risk areas
- Designated storage for safety gear
- Regular inspection and training
Prototype, Test, and Tweak Your Layout Before Committing
If you want to avoid costly mistakes, prototype your shop layout with temporary markers, sawhorses, and portable tables before committing to permanent locations.
Use tape to mark tool footprints, circulation paths, and work zones, then place sawhorses or portable tables where larger machines would sit.
Walk the space while simulating tasks—rip, crosscut, assemble—to reveal clearance issues, outfeed needs, and sightline obstructions.
Walk the space performing rip, crosscut, and assembly motions to uncover clearance, outfeed, and sightline problems.
Record every snag: cramped approaches, blocked storage, inadequate dust hose reach.
Make incremental tweaks to spacing, orientation, and accessory placement, then retest.
Solicit feedback from experienced peers or shop forums; they’ll spot inefficiencies you missed.
Treat this prototype phase as iterative design: measure, test, document, and refine until the workflow is smooth and safe.
Frequently Asked Questions
How Big of a Shed Do I Need for a Workshop?
You’ll want at least 12 by 16 feet for a functional woodworking shed; that gives room for tools, movement, and 3-foot clearances. Consider mobile workstations and vertical storage to maximize efficiency in tighter layouts.
Can a Garage Be Used as a Workshop?
Yes—you can use a garage as a workshop. You’ll optimize space with vertical storage, a central workbench, efficient tool placement, and seasonal heating/lighting, ensuring clearances for vehicle access and safe, organized workflow.
What Is a Good Workshop Layout?
A good workshop layout centers a clear main workbench accessible from all sides, keeps tools and storage on walls, uses mobile bases for machines, and includes an outfeed/assembly surface plus vertical storage to maximize workflow and safety.
Can You Do Woodworking in a Shed?
Yes — think of a shed like a pocketknife: it’s small but versatile. You’ll insulate, wire, ventilate properly, use vertical storage and mobile benches, and you’ll work efficiently while keeping dust and comfort under control.
Conclusion
You’ve sketched, measured, and tested—now commit to a layout that fits your work and car. Treat the space like a clock: every tool earns a deliberate hour so motion stays smooth and safe. Balance workflow, lighting, power, and clear zones; prioritize the table saw and safe walkways. Prototype, tweak, then lock in labeled circuits, storage, and emergency gear. With careful choices, your one-car shop will run like a well-tuned tool.