
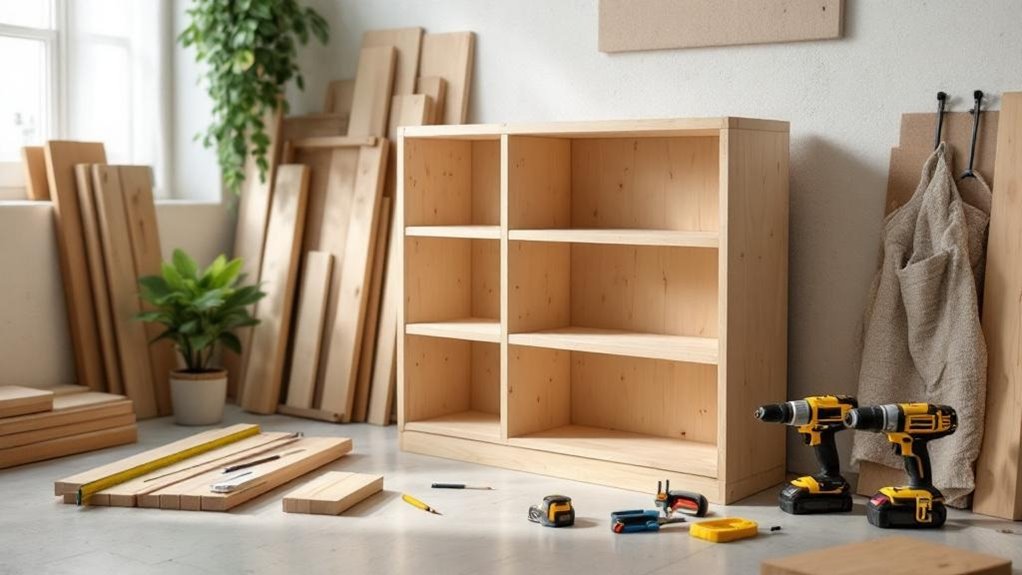
You can build a sturdy 12″×30″×48″ bookshelf using 1×12 pine and 1/4″ fir plywood with basic tools like a circular saw, drill, sander, and clamps; cut sides to 47 1/4″, a top to 30″, bottom to 28 1/2″, rip shelves to interior width minus 3/8″, and install fixed or adjustable shelves with peg holes for flexibility. Use dados for alignment, pre-drill screws, glue joints, sand through 80–220 grit, and finish with stain or paint to suit your room—keep going for step‑by‑step plans and tips.
Key Takeaways
- Start with a simple box bookshelf using readily available 1×12 boards and 1/4″ plywood back for straightforward cuts and assembly.
- Include a mix of fixed and adjustable shelves using shelf pins for flexibility and easier spacing adjustments as needs change.
- Use dado joints or pocket screws for strong, easy-to-align shelf attachments suitable for beginners.
- Pre-drill all screw holes, use wood glue at joints, and clamp square during assembly to ensure stability and prevent splitting.
- Sand progressively (80→120→220 grit), then finish with stain or paint and anchor tall units to studs for safety.
What This Guide Builds: A 12×30×48 Beginner Bookshelf
This guide shows you how to build a sturdy 12″ deep × 30″ wide × 48″ tall beginner bookshelf using readily available lumber and simple tools.
You’ll work with 1×12 pine boards for a rustic look and a 1/4″ fir plywood back to provide strength and stability. Cut side panels, top, bottom, fixed shelf, and adjustable shelf faces to size, then drill a grid of peg holes for adjustable shelves spaced for typical books and magazines.
Assemble the box with wood glue and screws, ensuring square corners and tight joints. To prevent sagging on longer spans, use thicker shelf stock or add center supports.
Finish by sanding and applying stain or protective topcoat for durability.
Choose a Bookshelf Style for Your Space and Skill Level
Match the bookshelf style to the room’s aesthetic and the tools you have on hand, since modern, industrial, farmhouse, and mission designs demand different cuts and finishes.
Pick a design that fits your skill level—simple fixed-shelf or adjustable-shelf units are best for beginners and need fewer tools.
Verify proportions (for example 12″ deep by 30″ wide) and material choice (1×12 pine or fir plywood) to guarantee the build fits the space and performs as required.
Match Style To Room
Pick a bookshelf style that complements your room’s decor and matches your skill level so the piece looks intentional and is buildable. Choose modern, farmhouse, or industrial silhouettes, then pick materials—1×12 pine boards or plywood—for finish and strength. For beginners, fixed-shelf or adjustable designs simplify construction: use clear dimensions (around 48″ tall by 30″ wide) and plan top and bottom supports accordingly. Personalize with simple decorative edges or stains without complicating joinery. Below is a quick comparison to guide selection:
| Style | Typical Material | Notes |
|---|---|---|
| Modern | Plywood | Clean lines, requires precise cuts |
| Farmhouse | Pine boards | Rustic look, forgiving finish |
| Industrial | Plywood + metal | Sturdy, needs hardware |
Use these bookshelf plans to balance aesthetics, proportions, and buildability.
Skill Level And Tools
When choosing a bookshelf style, assess your skill level and the tools you have on hand so you can select a design you can build accurately and safely.
Start with beginner-friendly schemes—farmhouse or children’s shelves use simple joinery and minimal tools. If you handle basic woodworking, try industrial or modern styles that add design complexity but remain doable.
Match materials to function: 1×12 pine for a rustic look, plywood for strength.
Plan for adjustable shelves with peg holes if you want flexibility. Verify dimensions fit your space; standard depth ~12″, width ~30″, height ~48″.
Confirm you have a circular saw, drill with bits, and sander or planes before committing.
- Tool check: circular saw, drill, sander
- Material choice: pine vs plywood
- Design choice: fixed vs adjustable shelves
Standard Shelf Proportions: Depth, Width, Height
Anyone building a bookshelf will want to start with standard proportions—12″ deep, 30″ wide, and 48″ tall—to accommodate books and magazines without wasting space. Use those dimensions as a baseline; subtract 3/8″ from interior shelf width to guarantee each shelf fits the frame.
For shelves taller than 32″, specify thicker lumber or add vertical supports to prevent sagging. Decide between fixed and adjustable shelves: fixed shelves are rigid and simple, adjustable shelves give flexibility when you space shelf-pin holes in 2″ vertical intervals and keep the front edge 1.5″ from the face for consistent reveal.
Lay out shelf spacing to match your tallest items, balance load distribution, and maintain a clean proportion that fits the intended room.
Choose Wood: Pine, Plywood, and Alternatives
Wood choice determines ease of build, appearance, and long-term stability, so start by deciding whether you want beginner-friendly pine, sheet goods like fir plywood for backs and shelves, or harder woods for durability.
Choose straight, uncupped boards; avoid twisting or heavy bowing. Use 1×12 pine (nominal) knowing its actual dimensions are 3/4″ x 11-1/4″ to simplify layout and cuts. Fit a 1/4″ fir plywood back to square the cabinet and resist warping.
If you opt for hardwood, expect tighter tolerances and potentially sharper tools.
- Pine: affordable, workable, visible knots for a rustic look.
- 1/4″ Fir Plywood: strength, stability, easy to fasten.
- Hardwood: durable finish, needs advanced tools and skill.
Tools and Supplies for a Beginner Bookshelf
Start by selecting 1×12 pine boards free of major defects and a 1/4″ fir plywood sheet sized for the back. Use a drill with appropriate bits and coarse-thread wood screws; pre-drill screw holes to prevent splitting.
Fit joints with wood glue and fasten with screws for mechanical strength. Use the carpenter’s square to confirm 90° corners before fastening.
Wear goggles and gloves during cutting and assembly to reduce injury risk.
Read the Plan and Mark Layout Before You Cut
Start by confirming the bookshelf’s overall dimensions and sketching a simple plan you can reference while cutting and assembling; this blueprint keeps measurements consistent and prevents costly mistakes.
Read the plan thoroughly, then transfer all critical dimensions to your stock.
Use a carpenter’s square to draw straight, precise lines.
Mark shelf peg locations at 2″ vertical spacing and 1½” from the front/back edges.
Use a marking gauge or dividers to lay out dadoes and mortises consistently across panels.
Label each part clearly and indicate grain direction, face, and edge.
Double-check every measurement and mark before cutting to avoid waste.
Follow this disciplined layout routine to guarantee parts fit accurately and assembly goes smoothly.
- Verify dimensions and sketch
- Square and mark peg holes
- Gauge dadoes/mortises and label parts
Cut List and Layout for a 12×30×48 Bookshelf
Start by confirming lumber dimensions and notes so you know the actual board sizes you’ll use (1×12 pine = 3/4″ x 11 1/4″, back panel = 1/4″ fir plywood).
Cut the parts to the listed sizes—two side panels at 47 1/4″, top 30″, bottom 28 1/2″, and shelves at interior width minus 3/8″ (typically 29 5/8″)—and lay them out for dry assembly.
Mark and drill shelf peg holes 2″ apart vertically and 1 1/2″ from the front and back edges on the side panels before final assembly.
Lumber Dimensions And Notes
To cut and lay out the parts for a 12×30×48 bookshelf, measure and mark two side pieces at 47 1/4″ each, a top at 30″, and a bottom at 28 1/2″, using 1×12 pine (actual 3/4″ x 11 1/4″) for the faces and 1/4″ fir plywood for the back; cut each shelf to the interior width minus 3/8″ so they fit flush.
Plan shelf-peg holes spaced 2″ vertically and 1 1/2″ from the front and back edges for adjustable shelving. Use the pine for exposed faces—expect knots and grain—and the plywood to square the carcass.
Label each part, note grain direction, and allow 1/16″ for finish. Check squareness after assembly and before fastening the back.
- Confirm stock dimensions and grain orientation.
- Cut shelves to interior width − 3/8″.
- Label and dry-fit parts prior to glue.
Shelf Peg Hole Layout
For the shelf peg layout, mark and drill 1/4″ holes every 2″ vertically on both side panels, with the hole centers set 1-1/2″ from the front and back edges so your shelves will sit square and remain adjustable; use a jig or story stick to transfer a consistent pattern, clamp a stop block to your drill press or guide, and label each row to keep left and right panels mirrored.
Measure from the panel top to establish a reference datum, then lay out hole centers down to the bottom, confirming final spacing matches shelf count. Use a 1/4″ brad-point or shelf-pin bit for clean entry. Keep holes perpendicular; check with a square.
Protect edges and record hole locations for future reference.
Cut List And Assembly
Begin by laying out and cutting all major components to the specified dimensions so you can dry-fit and confirm alignment before assembly. Cut two sides at 47 1/4″, a top at 30″, and a bottom at 28 1/2″. Rip shelves to interior width minus 3/8″ for a proper fit. Cut a 1/4″ fir plywood back to full bookshelf height and width.
- Measure and mark shelf peg locations vertically at 2″ spacing, 1 1/2″ from front and back edges for adjustable shelves.
- Pre-drill pilot holes at all screw joints and apply wood glue to mating surfaces before fastening to prevent splitting and increase strength.
- Dry-fit, adjust, then assemble permanently, verify square, install back panel for rigidity, and finish.
Drill Shelf-Peg Holes for Adjustable Shelves
Measure and mark the peg locations on both side panels, spacing them 2 inches apart vertically and 1½ inches from the front and back edges, so your adjustable shelves will sit level and supported. Use a carpenter’s square to transfer marks accurately and verify they’re plumb along the panel height.
Clamp a guide block if you want repeatable spacing before drilling. Select a 1/4-inch drill bit and set drill speed moderate for clean holes. Hold the bit perpendicular; a drill press yields best consistency but a steady hand works.
Drill straight through to the correct depth, avoiding exit tear-out by backing the panel with scrap. Repeat on the opposite panel, then check corresponding hole heights against a shelf or dowel to confirm alignment before assembly.
Joinery Options: Dadoes, Mortise-and-Tenon, Tusks
Now you’ll choose a joinery method suited to your design and tools: dadoes give shelves a snug, lateral-resistant seat, mortise-and-tenon creates a robust interlocking frame, and tusks or through-tenons lock joints without extra hardware.
Mark and cut each joint precisely—accurate shoulders and fits are what make these connections load-bearing and long-lasting.
I’ll show basic layout and cutting techniques for dado joinery, mortise-and-tenon, and tusks so you can pick the right option for your bookshelf.
Dado Joinery Basics
Choose the right joint for your bookshelf by weighing strength, appearance, and tooling:
Dado joints are grooves cut into the upright that cradle shelves, giving excellent lateral support and straightforward alignment. You’ll typically cut dados 1/4″ to 1/2″ deep so shelves fit snugly without large seams.
Use a table saw, router, or chisel—set fences and test cuts for precise width and depth. Fit should be firm but not forcing; sand or pare the groove if needed. Reinforce with glue or screws where appropriate.
Dadoes are faster and less visible than exposed joinery, making them ideal for functional shelving.
- Choose depth: 1/4″–1/2″ for strength and minimal seam.
- Select tool: table saw, router, or chisel.
- Fit and reinforce: test, adjust, glue/screw.
Mortise And Tenon
A mortise-and-tenon joint gives you one of the strongest, most reliable frame connections for a bookshelf, so use it where uprights meet stretchers or face frames; cut a rectangular mortise into one member and a matching tenon on the other so they seat snugly without forcing.
Lay out shoulder lines and mortise limits with a square and marking knife. Remove waste with a mortise chisel or drill followed by chopping to full depth; pare tenon cheeks and shoulders on a table saw or with a tenon saw for consistent fit.
Aim for a slight interference fit or a hairline gap for glue. Test-assemble parts dry, trim for tightness, then glue and clamp. Combine these joints with dados for shelf support.
Tusks And Through Tenons
You’ll lay out tenon dimensions to match mortise depth and wall thickness, cut shoulders square for full bearing, and test-fit before trimming the tusk.
The exposed tenon and tusk provide both ornament and tensile resistance. Use dadoes for shelf placement and combine methods for stability.
- Layout and cut tenon/tusk precisely.
- Test-fit, adjust shoulders, guarantee non-binding.
- Final glue or leave removable for repair.
Cut Parts: Marking, Sawing, and Waste Removal
Tidy, accurate marking sets the stage for every cut you’ll make: use a carpenter’s square to lay out precise 90-degree lines, employ dividers to transfer dimensions consistently, and carry edges around the case with a double square so all parts align.
After marking, cut parts to length with a panel saw for straight, clean edges; check fits and use a block plane to remove minor irregularities. Mark dado locations at 1/2 inch depth and confirm shelf positions before cutting.
For mortises, bore side-by-side holes with a Forstner bit to remove most waste, then pare to layout lines with a sharp chisel for a smooth, square socket. Keep marks visible, work methodically, and verify each dimension before final cuts.
Assemble the Case: Dry-Fit, Pre-Drill, Glue, Screw
Place the side panels, top, and bottom together for a dry-fit to confirm square alignment and correct gaps before you apply any adhesive.
Pre-drill pilot holes at each joint, then apply glue to the contact surfaces and drive screws in the prescribed sequence to clamp the parts while maintaining alignment.
Let the glued assembly cure fully per the glue manufacturer’s instructions before proceeding to sanding or loading the shelves.
Dry-Fit Alignment Check
Begin by dry-fitting the entire case so you can spot misalignments and correct them before glue is applied. Lay out shelves, sides, top and bottom; check mating edges, rabbets and dados. Adjust with a block plane or sandpaper until parts seat squarely. Mark locations for pilot holes while parts are clamped in final position so drill points stay accurate.
- Pre-drill pilot holes at all screw contact points to prevent splitting and guarantee precise fit.
- Verify squareness with a carpenter’s square and measure diagonals; correct any racking now.
- Confirm levelness on a flat surface; shim or trim until the unit sits evenly.
Only after this alignment check will you be ready to proceed with glue and fasteners.
Glue And Screw Sequence
Once your dry-fit and pre-drilling are confirmed, apply glue to all mating surfaces and immediately align the pieces for assembly so the adhesive can bond while you drive the screws. You’ll work efficiently: glue joints, clamp if needed, then insert screws into pilot holes to draw faces tight. Tighten screws evenly, avoid over-torquing, and wipe squeeze-out promptly. Let glue cure fully before loading the shelf.
| Step | Action |
|---|---|
| 1 | Dry-fit and verify alignment |
| 2 | Pre-drill pilot holes |
| 3 | Apply glue to mating surfaces |
| 4 | Clamp, screw, and allow full cure |
Follow that sequence to prevent splitting, secure a strong mechanical-and-adhesive joint, and guarantee durable bookshelf performance.
Fit the Back Panel and Attach Stretchers for Stiffness
Fit the 1/4-inch fir plywood back by spreading wood glue along the cabinet edges, setting the panel flush to the top and sides, and driving screws through the sides into the panel to lock it in place for rigidity.
Cut the back to the bookshelf’s exact height and width so it sits flush and prevents racking.
Install two stretchers, 28 1/2 inches long, horizontally between the side panels about 1/4 inch from the bottom to avoid shelf interference.
Use glue and screws at each end of the stretchers for a positive mechanical and adhesive bond.
After fastening, verify all joints are tight and the case is square; tighten any loose screws and correct misalignment before moving on.
- Glue and screw panel edges.
- Fit 28 1/2″ stretchers.
- Check joints and square.
Cut and Size Shelves to Fit the Case
Measure the interior width of the case and cut each shelf 3/8 inch shorter than that dimension so the boards slide in easily without binding; use 12-inch depth for standard shelving unless you need a different depth for specific items.
Measure the case interior and cut each shelf 3/8″ shorter so they slide in without binding.
Mark your cut lines squarely, clamp the board, and cut with a circular saw or table saw using a guide for straight edges. Sand cut edges smoothly to remove splinters and guarantee a clean fit.
Lay out shelf heights before installing: aim for uniform spacing of 12–15 inches depending on your storage needs. If you want adjustable shelves, drill peg holes 2 inches apart vertically, positioned 1½ inches from both front and back edges.
Test-fit each shelf before final sanding and finish.
Prevent Shelf Sag and Reinforce Long Spans
After you’ve test-fit and sanded the shelves, address sag on longer spans before final assembly. For shelves over 32 inches, choose thicker lumber or plywood/engineered panels to reduce deflection.
Add structural elements where load concentrates and keep clearances for adjustable hardware.
- Use thicker stock or plywood for spans >32″ to increase stiffness and resist bending.
- Install vertical dividers or a center support to shorten effective span and evenly distribute loads.
- Fit adjustable shelf pegs and/or screw-in brackets/braces to the case sides or wall; they let you reposition supports and add rigidity.
Measure anticipated loads, place supports at load points, and predrill hardware locations. These steps will minimize long-term sag and maintain alignment.
Sanding the Bookshelf for a Smooth Finish
Start sanding with a coarse 80-grit paper to remove milling marks and level any high spots, then work progressively to 120- and finally 220-grit for a smooth, finish-ready surface.
Use a sanding block or orbital sander to keep pressure even and surfaces flat; blocks are best for edges and corners, orbitals speed up flats. Always sand along the wood grain to avoid scratch patterns and to preserve pine’s knots and swirls.
Check frequently for low or high spots by sight and touch, and repeat targeted sanding as needed with the previous grit before moving finer.
After completing 220-grit, remove dust with a damp cloth, wiping with the grain and allowing the wood to dry fully before proceeding to finishing.
Finishes: Stain, Lacquer, Paint, and Drying Tips
When choosing a finish for your bookshelf, consider how each option balances appearance, durability, and drying time so you can match the product to the shelf’s use and environment.
You’ll stain to enhance grain and color, lacquer for fast-drying durable gloss, or paint for full-color coverage.
Follow manufacturer drying times (typically 1–24 hours) and sand lightly between coats for adhesion and smoothness.
- Stain: Apply evenly, wipe excess, allow recommended drying, then seal if needed to protect the wood.
- Lacquer: Spray or brush thin coats, allow rapid cure between coats, and work in a ventilated area to avoid defects.
- Paint: Prime if required, apply multiple thin coats with drying intervals, sanding between coats for an even finish.
Troubleshooting, Personalization, and Decorative Touches
If you want your bookshelf to fit your space and last, plan personalization and address common issues up front: resize the carcass or add adjustable shelves by drilling holes every 2 inches vertically, select stains or paints to match your decor, and prevent sagging on spans over 32 inches by using thicker lumber or adding center supports.
Measure and cut to exact dimensions, confirm squareness with a carpenter’s square, and pre-drill fastener holes to avoid splitting.
Add decorative touches—rounded edges, routed profiles, or shallow carvings—before final sanding. Sand through progressive grits, wipe dust, and apply multiple lacquer or stain coats with proper drying between coats.
Test stability under load and secure the unit to wall studs if tall or top-heavy.
Frequently Asked Questions
Can This Bookshelf Be Wall-Mounted or Anchored for Earthquake Safety?
Yes — you can wall-mount or anchor it for earthquake safety. Use heavy-duty L-brackets or seismic straps, fasten into studs with lag bolts, add anti-tip brackets at top, and verify load ratings and secure installation.
How Much Weight Can Each Shelf Safely Hold?
Each shelf safely holds about 30–50 lbs if built as specified; heavier loads need thicker shelves, stronger fasteners, and studs or anchors. You’ll reinforce with brackets, center supports, and quality plywood to increase capacity.
Can I Scale the Plans to Fit Awkward Spaces or Odd Dimensions?
Like a tailor adjusting a suit, you can scale the plans—measure carefully, maintain shelf depth-to-span ratios, reinforce longer spans with thicker stock or supports, and adjust joinery; double-check load ratings and fastener placements before building.
Are There Eco-Friendly or Reclaimed Wood Options Recommended?
Yes — you can use reclaimed lumber, salvaged pallets, FSC-certified timber, or engineered reclaimed boards; you’ll inspect for rot, remove nails, plane and joint as needed, and seal with low-VOC finishes to guarantee durability and safety.
What Common Mistakes Should Beginners Avoid on Their First Build?
You’ll often feel rushed, but avoid haste: measure twice, cut once; use proper joinery and hardware; clamp and square assemblies; sand and finish for protection; don’t overload shelves; follow safety protocols with tools and supports.
Conclusion
You’ve turned plans into a 12×30×48 shelf that’s more than wood and fasteners—it’s a frame for knowledge. Treat joints like roots, shelves like branches, and finishes like bark protecting what grows within. Check sag, sand smooth, and seal with care; each deliberate step strengthens the whole. When you stand it upright, you’ll see a small forest of effort, practical and steady, ready to hold books and the moments they contain.