
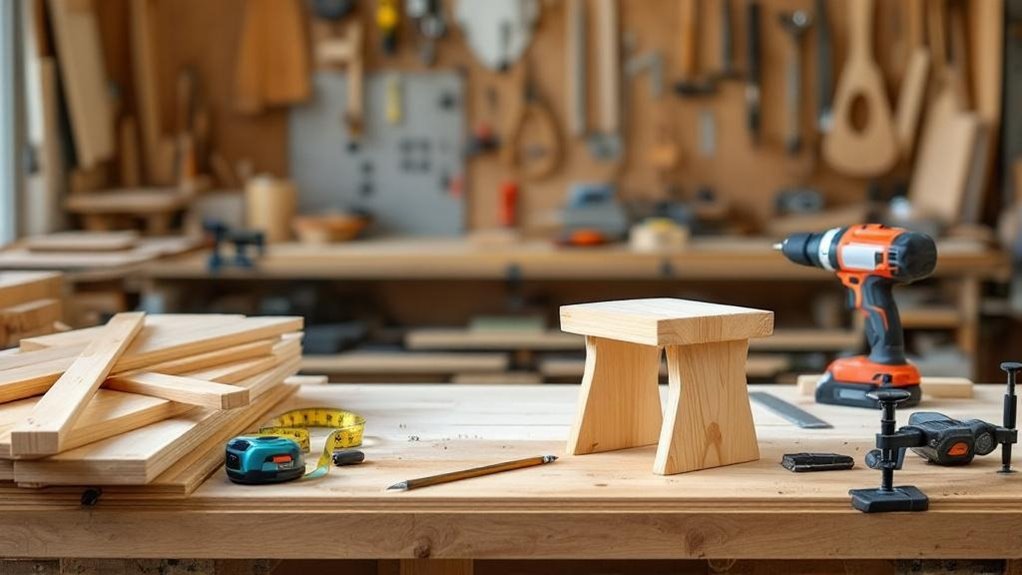
You’ll find step-by-step woodworking plans that let you build useful, confidence-boosting pieces fast—think a sliding crate, kids’ bookshelf, clothes rack, or doormat. Start by studying the full plan, double-checking the cut list and materials so you aren’t surprised at the hardware store. Borrow or rent a circular saw and drill, prioritize safety gear, and practice measuring, clamping, and consistent cuts. Follow sanding and finishing tips for a polished result, and keep going to learn tools, joinery, and larger projects.
Key Takeaways
- Start with simple step-by-step plans (e.g., crate, kids’ bookshelf) to build skills and get quick, satisfying results.
- Read the entire plan first to identify tricky steps, required tools, and missing materials before cutting any wood.
- Create a detailed cut list and measure twice, mark clearly, and use stop blocks or clamps for consistent cuts.
- Use recommended essential tools (circular saw, drill, tape measure) and wear safety gear: goggles, ear protection, and a dust mask.
- Follow finishing steps—sanding, joining choices, and sealant—and use online tutorials and free plans for guidance.
7 Easy Beginner Woodworking Projects to Build First
Start with a few simple projects that let you build skills quickly and see real results—things like a sliding wood crate for storage, a kids’ bookshelf, a clothes drying rack, or a wooden doormat.
You’ll find free plans with step-by-step instructions that make each beginner woodworking project approachable. Many projects use just a few common materials and basic techniques, so you’ll minimize costly mistakes while learning joinery, measuring, and finishing.
Some builds, like the drying rack or doormat, wrap up in a single day, giving you quick wins and motivation to tackle larger pieces. These easy woodworking projects improve organization and let you personalize home décor, letting creativity guide simple variations as your confidence and skills grow.
Essential Tools for Beginner Woodworkers (Buy vs. Borrow)
A good circular saw, a reliable drill, and a sturdy tape measure will make your early projects feel possible rather than frustrating, but you don’t have to buy everything at once—borrowing tools from friends or renting them from a home improvement store lets you try different equipment, learn proper use, and save money while you decide which tools earn a permanent spot in your shop.
Start by prioritizing essentials that match your woodworking plans and buy quality versions of those you’ll use most. Borrow specialty or expensive items to test fit and function, and always use safety gear—goggles and ear protection—when handling borrowed power tools.
Gradually expand your collection based on real project needs to avoid overspending.
How to Read and Prepare Beginner Woodworking Plans
Once you’ve figured out what tools you’ll keep and what you can borrow, you’ll want to get comfortable with the plans themselves before cutting any wood.
Read the entire beginner woodworking plans document first so you spot tricky steps and note required tools per section. Pay attention to measurement units and terminology; misunderstandings cause most mistakes.
Follow the step-by-step instructions visually—study diagrams and images alongside the text so you know how pieces fit and which faces matter.
Cross-check the materials list to confirm quantities and types before shopping. Highlight any steps that seem unclear and research or ask for clarification.
Preparing this way keeps your workflow smooth, reduces surprises, and builds confidence as you move into actual cutting and assembly.
Materials, Cut Lists, and Measuring Tips to Avoid Mistakes
Start by choosing the right materials for your project and making a precise cut list that notes each piece’s dimensions and quantities.
Measure carefully with a tape and square, mark cut lines clearly, and check measurements against the plan before you cut.
Use stop blocks or clamps when repeating cuts so every piece stays consistent and you avoid costly mistakes.
Accurate Material Selection
Before you cut a single board, check the wood type against your project’s needs and make a complete cut list so you buy the right lengths and quantities.
For accurate material selection, match wood species to function: choose softwoods for lighter, easy-to-shape pieces and hardwoods for durable furniture.
Use your free plans to verify dimensions and quantities, then note grain direction and board width to reduce waste. Measure with a reliable tape and mark with a square for crisp reference lines.
Double-check every measurement and compare marks to the plans before cutting; a quick recheck prevents irreversible errors.
Buy a little extra stock for mistakes and defects, but don’t overbuy—balance economy with a safety margin.
Precise Cut Lists
A precise cut list is your project’s roadmap, and getting it right will save time, money, and frustration—so measure carefully and plan deliberately. You’ll list each part, its material, and exact dimensions so you buy only what you need and minimize waste.
Measure twice, cut once; that rule alone prevents costly mistakes. Use a square or framing square when marking to keep angles true, especially on pieces that must align. Track adjustments you make during cutting and note them for future projects—those notes sharpen your skills.
For simple Free Woodworking projects like cutting boards, document board thickness, length, and grain direction. A clear, itemized cut list speeds assembly and keeps your build on budget and on schedule.
Measuring And Marking
With your cut list in hand, now focus on measuring and marking so those pieces come out true and fit together cleanly. Use a reliable measuring tape and transfer each dimension carefully from your detailed cut list. Verify numbers twice before you cut; that simple habit saves wood and time.
Square your lines with a carpenter’s square so corners and joints sit at right angles. Marking should be crisp: a sharp pencil or chalk and a straightedge give clean guides for sawing.
After you mark, recheck critical dimensions on the material to confirm accuracy matches the list. Work methodically—measure, mark, verify—so every component aligns confidently and your assembly goes together without surprises.
Step‑by‑Step Build: Measuring, Cutting, Joining, Finishing
Start by measuring carefully with a tape measure and square so your cuts and joins line up perfectly.
Use sharp blades and follow tool guidelines to make safe, clean cuts, then pick joining methods—screws, dowels, or pocket holes—that match the strength and look you want.
Finish by sanding smooth, applying stain or sealant, and allowing proper drying time for durable results.
Accurate Measuring Techniques
Measure twice, cut once—it’s the rule you’ll use every time you pick up a tape measure, square, or caliper. Accurate measuring is the foundation of good work; it guarantees parts fit, joints sit tight, and your project looks professional.
Use your tape measure for long runs, a square to confirm right angles, and a caliper for tight tolerances. Always double-check each dimension before you mark. Mark clearly with a sharp pencil or marking knife so lines stay visible and precise.
To keep pieces consistent, set up simple jigs or guides that repeat the same cut length reliably. Treat your woodworking tools as partners: keep them calibrated and clean, and you’ll avoid wasted material and save time while building with confidence.
Safe Cutting Practices
Now that your measurements and markings are checked, move on to cutting with safety and control as your priorities.
You’ll find these easy to build woodworking ideas go smoother when you plan each cut. Use a sharp blade suited to your saw, secure the piece with clamps, and keep hands away with push sticks or guides. Consider a straight edge for circular saws to hold true lines.
- Measure twice, cut once — accuracy prevents wasted materials.
- Choose the right, sharp blade — cleaner cuts, less forcing.
- Clamp work and use push sticks — stability and distance from blade.
- Use a straight edge guide for long cuts — professional results.
Stay focused, work deliberately, and you’ll cut safely and confidently.
Strong Joining Methods
With your pieces cut to size, focus on joinery that matches the load and look you want: pocket hole screws for quick, hidden assemblies; dado or rabbet joints for shelving and boxes; and mortise-and-tenon for frames and heavy-duty connections.
Measure carefully with a tape measure and combination square so joints fit tight. Choose the right blade and maintain correct cutting angles for clean mating surfaces. Use wood glue with mechanical fasteners to boost holding power and fill tiny gaps.
Clamp parts squarely until glue cures, then check alignment before proceeding. Finish joints by sanding and applying a protective coating to block moisture and hide minor imperfections.
These strong joining methods will make your DIY project durable, stable, and professional-looking.
Fixes for Common Problems: Warping, Gaps, Miscuts
A few simple habits will save you hours of frustration when you run into warping, gaps, or miscuts: store and use properly dried wood in a stable environment to reduce warping, keep your saws calibrated to avoid angle errors, and always double-check measurements before cutting.
Simple habits—dry and acclimate lumber, keep tools calibrated, and always double-check measurements—to avoid warps, gaps, and miscuts.
You’ll fix common problems quickly with these practical steps.
- Inspect and acclimate lumber: let wood sit in your shop to prevent warp.
- Glue and clamp joints tightly; use color-matched wood filler for small gaps.
- Sand miscuts smooth or add trim to conceal edges; measure twice to avoid repeats.
- Calibrate blades and check squares regularly to prevent angle errors and miscuts.
Follow these tips, stay patient, and your projects will look cleaner and fit better.
Beginner Woodworking Safety Checklist and Workshop Setup
Fixing warps, gaps, and miscuts gets a lot easier when your shop is set up for safe, repeatable work. As a beginner, prioritize safety gear (goggles, ear protection, dust mask), a sturdy workbench, good lighting, and a reachable first aid kit. Read tool manuals before use, keep tools stored in a clear area, and tidy regularly to avoid trips and confusion. You’ll work faster and with more confidence when everything has a place.
| Item | Purpose | Placement |
|---|---|---|
| Safety goggles | Eye protection | Near bench |
| Ear protection | Hearing safety | Tool station |
| Dust mask | Respiratory safety | Entry shelf |
| First aid kit | Immediate care | Wall-mounted |
| Tool manuals | Proper use | Tool storage |
Where to Find Free Plans, Videos, and Bundle Deals
You can start finding free plans on sites like Ana White and Pinterest, where beginner-friendly projects come with material lists and diagrams.
Watch YouTube and social media tutorials to see each step and pick up techniques you can try in your own shop.
For more variety and savings, look for bundle deals that let you grab multiple plans at a discount so you can build skills across different projects.
Free Plan Resources
Start by tapping into free plan hubs like blogs, manufacturer sites, Pinterest, and Ana White’s blog—these sources give you clear, beginner-friendly projects with diagrams, material lists, and often step-by-step video tutorials.
You’ll find FREE project plans that include cut lists and tips, so you can gather supplies confidently. Look for bundle deals too; promotions like “Buy 2 plans, get 1 free” save money and give structured practice.
- Blog collections — varied styles and skill levels.
- Manufacturer sites — reliable specs and hardware notes.
- Pinterest boards — quick inspiration and links to plans.
- Community forums — share progress, ask questions, get feedback.
Use these resources to pick a simple first build, follow the diagrams, and build momentum.
Video Tutorials Available
Hundreds of free video tutorials—on YouTube, Instagram, TikTok, and niche woodworking sites—give you step‑by‑step visuals that make tricky cuts, joinery, and finishing techniques easy to follow; pair those videos with free plans that include cut lists and diagrams, or grab a bundled plan+video package to get a complete roadmap for each project.
You’ll find content for basic jigs, furniture, shelves, and small decor items that matches your skill level. Use videos to watch tool setup, cutting sequences, and glue‑up order before you start. Free plans reinforce measurements and materials so you won’t guess critical dimensions.
If you prefer structure, buy bundle deals that combine detailed plans and guided videos. Join social feeds to ask questions, share progress, and gather DIY inspiration.
How to Customize Plans: Sizes, Styles, and Material Swaps
Although the basic plan gives you a solid foundation, tweaking sizes, styles, or materials lets you tailor the piece to your space and taste; measure your site first, then adjust dimensions so the finished work fits and functions as intended.
You’ll want to customize plans and consider material swaps thoughtfully: changing dimensions affects joinery and hardware, while style tweaks—legs, edges, finishes—define the look. Recalculate measurements whenever you alter size or material to keep strength and balance.
Swap solid wood for plywood to cut weight, or use reclaimed lumber for character and sustainability. Follow these clear steps:
- Measure space and list new dimensions.
- Note joinery and fastener changes.
- Choose materials for function and look.
- Recalculate cuts and test fit before final assembly.
A 6‑Month Beginner Woodworking Roadmap (Next Projects & Skills)
Over the next six months, you’ll build skills and confidence by moving from simple, well-scoped projects to more involved work—begin with a wooden doormat or kids’ bookshelf, then take on a charging station and a tool-storage wall cabinet as your tool handling and joinery improve.
In month one, focus on safety training and tool familiarity so you work securely.
Month one: prioritize safety training and tool familiarization to build confident, secure woodworking habits.
Months two and three, set goals like mastering pocket-hole joints and completing an easy DIY doormat and small bookshelf to gain baseline techniques.
Months four and five, try new joints and build a charging station that organizes cords and adds practical storage space.
In month six, tackle the wall cabinet, document lessons learned, and plan your next skill-driven projects based on what you enjoyed.
Frequently Asked Questions
Can I Sell Items I Build From Free Plans Commercially?
Yes — you can usually sell items built from free plans, but check the plan’s license and copyright, avoid trademarked designs, and document modifications; if uncertain, contact the creator or seek legal advice to confirm commercial use.
What Are Simple Finishing Products Safe for Kids’ Toys?
You’d think kids love mystery coatings, but choose clear, food-safe finishes: food-grade mineral oil, beeswax, shellac (de-waxed), or water-based polyurethane labeled non-toxic. You’ll apply thin coats, dry fully, and sand between layers.
How Do I Calculate Project Cost Before Starting?
Estimate materials, hardware, and finishes’ costs, add tool rental or purchase amortization, then include labor and contingency (10–20%). You’ll tally totals per item, sum them, and compare to your budget before you start.
Can I Use Reclaimed Wood for Beginner Projects?
Yes — you can, but expect surprises: reclaimed wood brings character and hidden nails. You’ll save money and learn joint tricks, yet you’ll prep, remove fasteners, and check moisture and rot before cutting to guarantee safe, sturdy projects.
What Basic Hand Tools Are Worth Buying First?
Start with a reliable chisel set, quality bench plane, coping saw, block plane, claw hammer, tape measure, combination square, screwdrivers, hand saw, and a sturdy workbench; you’ll build skills fast and avoid frustrating shortcuts.
Conclusion
You’ve got a clear path: start small, learn the tools, follow plans, and prioritize safety. Tackle one of the seven beginner projects, then scale up by swapping materials or adjusting sizes. For example, Sarah built a simple farmhouse shelf in weekend sessions, learned miters and finishing, and now makes custom pieces for friends. Keep practicing, use free plans and videos, and in six months you’ll confidently take on more complex builds—one measured cut at a time.