
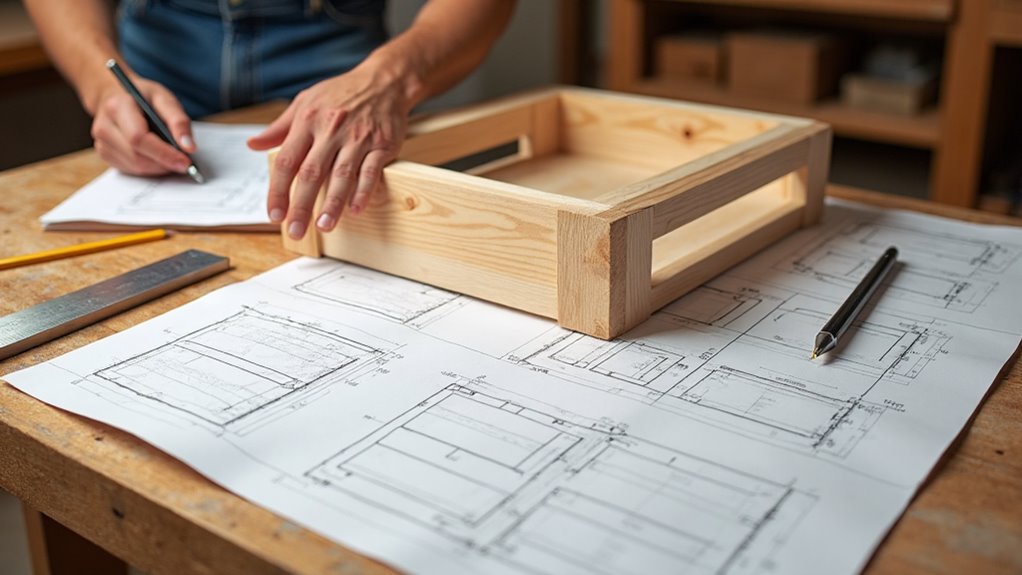
Start by defining your goal so you know what the plans must deliver, then gather measurements, material specs, safety gear, and your tools. Scan the title block, legend, and revision notes to confirm version, scale, and symbols. Trace overall dimensions, part names, and joinery types, tally quantities against the cut list, and mark hardware locations. Plan assembly order and a dry fit, note finishing steps, and double‑check stock sizes to avoid surprises—keep going and you’ll pick up pro tips.
Key Takeaways
- Identify and cross-check all dimensions, scales, and units before measuring or cutting.
- Match the cut list to drawings to confirm part counts, sizes, and required lumber stock.
- Decode symbols, legend, and title/revision blocks to ensure you’re using the correct plan version.
- Visualize assembly sequence from exploded and plan views, then perform a complete dry fit.
- Label and group cut parts with IDs and destinations to prevent misassembly and streamline workflow.
Define Your Goal: What “Reading Woodworking Plans Without Guessing” Means
When you read woodworking plans without guessing, you precisely interpret every dimension, material spec, and assembly instruction so you can cut, fit, and join parts with confidence.
Define your goal by treating reading blueprints as an active task: identify required dimensions, material types, and joinery methods before you touch tools.
Parse the cut list to confirm part quantities, lengths, and widths, marking stock accordingly.
Study diagrams to visualize sequence and alignment, noting reference points and mating faces.
Learn common terminology and symbols to remove ambiguity and reduce stops for clarification.
Practice analyzing varied plans to speed recognition of patterns and pitfalls.
Your objective is predictable, repeatable outcomes achieved through disciplined plan reading rather than trial and error.
Checklist: What to Gather Before Reading Woodworking Plans
Before you open the plans, gather your tools and safety gear—tape measure, square, pencil, cutting tools, goggles, and gloves—so you can measure and work safely.
Compile the wood and materials list with species, nominal versus actual sizes, and hardware to confirm everything’s on hand.
Keep the plans and any notes or instructions nearby to cross-check measurements and specific techniques as you read.
Tools And Safety Gear
A clear checklist helps you start each project safely and efficiently: gather safety glasses, hearing protection, a dust mask, and gloves; confirm you have a tape measure, square, saws (hand or power), chisels, and a drill; set up a sturdy workbench or stable surface; and organize materials so you won’t interrupt your workflow—also scan the plans for any special tools or safety steps the project requires.
You’ll want tools arranged by task: measuring, cutting, shaping, and fastening. Inspect safety gear for wear and fit; replace damaged glasses, torn masks, or ineffective hearing protection.
Keep a first-aid kit and fire extinguisher accessible. Before you cut, verify blade guards, clamps, and dust collection are functional. A methodical setup reduces errors and keeps you safe.
Wood And Materials
You’ve already checked your tools and safety gear; now make sure the materials side is equally organized by creating a concise checklist of everything the plans call for: list specific wood species and sizes, fasteners, hinges, glues, finishes, and any specialty items so you can confirm local availability and pricing.
Before you immerse yourself in woodworking plans, verify local stock of specified species and consider substitutes for hardness, stability, and finish compatibility.
Note nominal versus actual lumber sizes to avoid sourcing mistakes. Include quantities, grain orientation needs, and moisture considerations to reduce waste and warp risk.
Catalog required hardware and finishes with part numbers or images.
With this materials checklist completed, you’ll streamline purchasing, prevent delays, and focus on accurate construction.
Plans And Measurements
When you open the plans, gather a measuring tape, square, pencil, and a clipboard so you can immediately verify dimensions, note scales (often 1/4″ = 1′), and mark any critical tolerances.
You’ll confirm material types and hardware from the list to prevent miscalculations and mismatches during assembly. Use the measuring tape and square to validate cut list dimensions against full-size diagrams before cutting. Note the drawing scale and convert carefully when reading a blueprint; a small error compounds across parts.
Highlight critical dimensions and assembly notes on the clipboard, and record any deviations you plan to make. Systematically reviewing diagrams, cut lists, and materials keeps layout accurate and reduces guesswork once you move to the bench.
How to Read the Finished Drawing and Overall Dimensions
Although it may seem tempting to plunge into cutting, study the finished drawing and overall dimensions first so you clearly see proportions, key features, and how the pieces relate before you lay out material or start building.
When reading the finished drawing, trace outlines, note scales, and identify principal components and joinery. Use overall dimensions to confirm fit in the intended space and to set reference points for layout. Cross-check the drawing against the material list to verify quantities and sizes, avoiding surprises at the bench.
Visualize how components align during assembly so you can plan cuts and sequences that maintain accuracy. Attend to dimension details—tolerances, offsets, and cumulative lengths—to reduce costly mistakes and rework.
Read the Title Block, Revision Block, and Legend
Check the title block first to confirm the project name, drawing number, client, and date so you’re working from the correct document.
Scan the revision block for any changes and their dates to make sure you’re using the latest instructions.
Use the legend to translate symbols and abbreviations before interpreting dimensions or cutting parts.
Title Block Details
Start by scanning the title block, revision block, and legend so you can quickly find the project name, client, drawing title, company info, any changes, and symbol definitions; these three areas give you the authoritative details and updates that guide accurate interpretation and execution. Focus next on title block details: the project name, client, drawing title, and company logo anchor the sheet; scale, sheet number, and date orient you. Check the revision block for dates and concise change notes so you use the latest version. Use the legend to clarify symbols without guessing. Refer back to these blocks whenever a detail seems uncertain.
| Project | Client | Date |
|---|---|---|
| Name | Owner | YY/MM/DD |
Legend And Symbols
When you consult the legend and symbol key, you’ll decode every shorthand and graphic used across the sheets so you don’t guess what a mark means. Check the Title Block first for project title, client, and company logo to anchor the drawing’s scope.
Next, scan the Revision Block to note dates and descriptions of changes so you work from the correct version. Then use the legend and symbols section to match each icon and abbreviation to its meaning—electrical outlets, plumbing fixtures, fasteners, and structural members.
Relying on that key prevents misreads and costly mistakes. Building familiarity with Title Block, Revision Block, and legend and symbols speeds navigation and guarantees accurate execution of the woodworking plan.
Understand Scale and Convert Measurements Correctly
Because most shop drawings use a set ratio—commonly 1/4″ = 1’—you need to read the scale indicator first and apply the scale factor precisely to every measured dimension.
You must understand scale: identify the drawing scale, then convert each blueprint inch to actual feet or inches by multiplying by the scale ratio. Use consistent units—convert fractions to decimals if that reduces error—and label converted dimensions on a separate copy.
Double-check every conversion; a single misread scale causes misfitting parts. Practice standard conversion techniques on sample plans until you’re quick and accurate.
When in doubt, measure a known reference on the drawing (a marked door or board) to confirm the scale before cutting or ordering materials.
Match Parts Using the Cut List: Quantities and Board Sizes
Start by confirming each part quantity on the cut list so you won’t run short mid-build.
Check nominal board sizes against their actual dimensions before cutting to guarantee pieces will fit.
After you cut, label and organize every piece per the list to speed assembly and avoid mix-ups.
Confirm Part Quantities
Begin by aligning your cut list with the project drawings and tallying each part so you can confirm quantities and board sizes before you cut.
You’ll verify counts against drawings, ensuring the cut list’s quantities match required pieces and preventing shortages or unnecessary waste. Check specified board sizes to know what lumber to buy; that prevents confusion over nominal versus actual dimensions later.
As you cut, mark each piece with its part name and note it off the list to maintain order and avoid mix-ups during assembly. Cross-reference the marked parts with the plans one more time to catch omissions or duplicates.
This methodical check saves time, reduces material waste, and keeps your build accurate from purchase through assembly.
Match Nominal To Actual
Now that you’ve confirmed quantities and marked each part, it’s time to match those cut-list entries to actual board sizes on hand.
Compare each nominal size on the cut list to the board’s actual measured dimensions; remember nominal dimensions are larger than finished, planed sizes.
Verify your supplier stocks the nominal sizes called for—variations can force plan changes.
Lay out boards and, one at a time, check length, width, and thickness against the cut list, noting any shortfalls or oversized stock you can rip or resaw.
Update the cut list if you adjust layout to minimize waste.
This step prevents miscuts, speeds assembly, and guarantees every part you cut will meet the project’s required actual dimensions.
Label And Organize Pieces
Although you’ve matched nominal to actual and adjusted quantities, you should label and group each cut piece immediately as you finish it so parts don’t get mixed up later.
Use a clear labeling system that matches the cut list names and quantities—mark part ID, length, width, thickness, and destination. Group similar-role parts (rails, stiles, shelves) together and stack them in labeled zones so you can grab assemblies quickly.
After cutting, double-check each piece against the cut list and update any annotations for changes. Keep the cut list visible and current; cross off completed pieces and note defects or rip adjustments.
This disciplined labeling and organization saves time, prevents assembly errors, and guarantees every board size and quantity aligns with the plan.
Read Plan, Elevation, Section, and Isometric Views
How do you quickly make sense of multiple drawings for the same project? First, read plan views to grasp the bird’s-eye layout, positions, and horizontal dimensions.
Then check elevation views to confirm heights, exterior faces, and how profiles align front-to-back or side-to-side.
Use section views next to inspect internal joins, hidden layers, and vertical relationships where components meet; treat sections as a precise slice through the assembly.
Finally, consult isometric views for a clear 3D reference that resolves any remaining spatial ambiguity.
Cross-reference dimensions and alignment between all views at each step, and mark any discrepancies before cutting. This sequence—plan, elevation, section, isometric—keeps interpretation systematic and reduces costly mistakes.
Spot Lines & Symbols on Woodworking Plans and What They Mean
Understanding the lines and symbols on woodworking plans lets you read a drawing as a set of precise instructions rather than a vague sketch. You’ll use spot lines and symbols to distinguish visible object lines (solid, thick) from hidden lines (dashed), read center lines (long-short dashes) for symmetry, and follow dimension lines with arrows and numeric values for exact cuts. Symbols denote components or actions—circles for dowels, triangles for brackets—so check the legend for each plan. Rely on the legend to decode uncommon marks before you cut or assemble. Below is a quick reference table to keep at hand while you work.
| Marking | Meaning |
|---|---|
| Solid thick | Visible edge |
| Dashed | Hidden feature |
| Long-short | Center line |
| Arrowed | Dimension |
| Shape | Component symbol |
Identify Joinery and Fasteners: What Each Detail Tells You
Start by locating the joinery and fastener callouts on the drawing, then read each note for type, size, and quantity so you know exactly what to buy and how pieces will connect.
You’ll identify joinery—mortise and tenon, dovetail, dados—by symbol and dimension; those details tell you where strength is concentrated and which tools to prepare.
Identify joinery—mortise and tenon, dovetail, dados—by symbol and dimension to target strength and prepare tools.
Fasteners—screws, nails, dowels—are listed with diameter, length, and spacing, guiding your selection for material and load. Diagrams show placement and alignment so you can visualize mating faces and clearances.
Quantities and dimensions prevent underbuying and misfits. Use this section to confirm structural integrity, pick appropriate tools, and adapt techniques for consistent, secure joints without guessing.
Plan Assembly Order and a Dry‑Fit Strategy Before Cutting
Because sequencing affects fit and stress, plan your assembly order before you cut so each subassembly supports the next and you can work efficiently; label every part as you go, then perform a complete dry fit to check alignments, clearances, and fastener locations, making any trimming or jig adjustments while nothing’s permanent.
You should study the plan assembly order in the diagram, note which pieces form stable subassemblies, and mark mating faces and orientation.
Assemble dry connections with clamps and temporary fasteners, verifying joints, gaps, and fit of hardware locations.
Use the dry fit to reveal interference, miscuts, or joinery issues, then correct parts or jigs. Consult peers or resources if problems persist.
Only proceed to final cutting and permanent joining once the dry fit is flawless.
Anticipate Finishing Steps: Sanding, Sealing, and Hardware Placement
Plan your finishing steps as you build so sanding, sealing, and hardware fit are integrated, not afterthoughts. Map where hinges, screws, and fittings will sit; mark locations on parts and in the plans before final assembly to avoid conflicts.
Sand all surfaces methodically: start with coarse grit, progress through finer grits, and remove dust between steps. After final sanding, apply a sealing coat to stabilize the wood and guarantee uniform absorption of stains or paint.
Note drying times for each product and schedule subsequent coats accordingly to prevent tackiness or uneven finish. Use proper PPE—masks and gloves—when sanding and applying finishes.
Integrating these steps reduces rework and guarantees hardware aligns with the finished surfaces.
Troubleshoot Before Cutting: Double‑Checks and Common Mistakes
Before you cut a single board, double‑check measurements, sequence, and materials so you don’t compound small errors into big rework. When you troubleshoot before cutting, verify blueprint dimensions against actual stock—nominal sizes vary. Cross‑reference the cut list with diagrams to confirm lengths, widths, and quantities; resolve discrepancies before any saw runs.
Review assembly order in the instructions; wrong sequence can create misaligned joints that are hard to correct. After each cut, mark pieces clearly with location and orientation so you won’t confuse parts during assembly.
Dry‑fit subassemblies to reveal gaps, twist, or interference before committing to glue or permanent fasteners. These methodical checks prevent wasted material and save time by catching mistakes early.
Frequently Asked Questions
How to Read Blueprints in Carpentry?
You read carpentry blueprints by first reviewing the title block and legend, then identifying plan, elevation, and section views, using the grid to locate areas, interpreting line types and dimensions, and cross-checking revisions and symbols.
How Do You Interpret Production Plans or Blueprints?
Think of plans as maps guiding your build: you read title blocks, scales, views, lines and symbols, verify measurements, note materials and revisions, sequence assembly steps, cross-check details, and practice regularly so you won’t have to guess.
How to Read a Layout Plan?
You read a layout plan by identifying scale and grid, locating dimensions, matching symbols to the legend, noting placement and alignments, measuring directly from scaled drawings, verifying notes for cuts and assembly, and cross-checking parts before cutting.
How to Start Reading Blueprints?
Roughly 70% of construction errors stem from misread plans, so start by scanning the title block, legend, and scale. Then identify views, note line types and dimensions, and cross-check measurements before cutting or assembling.
Conclusion
You’ve got this: gather gear, get the gist, and go gradually. Read title blocks, revise your route, and reconcile scales; recognize joinery, review fasteners, and rehearse a dry run. Plan assembly, pre-sand placements, and predict finishing phases. Double‑check dimensions, detect common dangers, and devise deliberate backups. Calm, careful craftsmanship cuts costly errors—consistent checkpoints create confident cuts and clean, correct creations every time.