
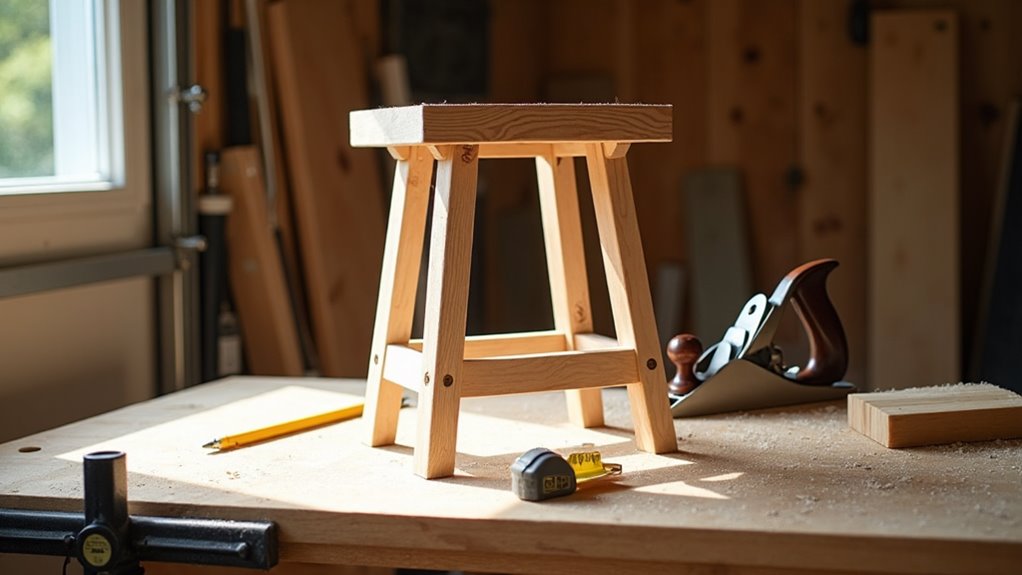
You’ll build simple, confidence-boosting projects that teach measuring, cutting, sanding, and basic joinery in a single weekend. Start with quick wins like a cutting board, wall hooks, or a pencil caddy to practice marking, crosscuts, and glue-ups. Use a compact tool kit—miter or circular saw, jigsaw, drill, sander—and enforce PPE and tidy workflow. Choose softwood and clear templates for reliable results, then move to multi-session builds to expand skills if you want more.
Key Takeaways
- Pick short, focused projects (4–10 hours) like a cutting board or pencil caddy to practice measuring, cutting, and finishing.
- Use softwoods and simple joinery to learn measuring, square cuts, glue-ups, and safe tool handling.
- Prepare tools, templates, and materials beforehand to keep weekend builds efficient and kid-friendly.
- Teach one technique per project—crosscuts, pocket holes, or sanding—to build confidence through tangible results.
- Prioritize safety: PPE, clear workspace, and supervised demonstrations when beginners or children use power tools.
Who This Guide Helps (Kids, Beginners, Busy Weekends)
Anyone with a curious mind and a few spare hours can get started.
You’ll find this guide tailored to kids and absolute beginners, presenting beginner projects like birdhouses and simple spoons that teach measuring, cutting, and assembling.
A beginner-friendly guide offering kid-safe projects—birdhouses and spoons—that teach measuring, cutting, and simple assembly.
You’ll work on DIY wooden items designed to fit busy weekends, so family sessions stay focused and productive. Each project’s plan is concise, time-boxed to a few hours, and sequenced to build confidence through tangible results.
You’ll learn essential techniques without jargon, following clear instructions that minimize risk and frustration. By the end of a session you’ll have a practical object and improved skills, making subsequent projects more ambitious and enjoyable while reinforcing safe, deliberate workshop habits.
Quick Wins: One-Afternoon Weekend Projects List
Pick three reliable one-afternoon projects to build your skills: a quick cutting board to practice shaping and finishing, simple wall hooks to nail basic layout and joinery, and a one-day desk organizer to combine measuring, cutting, and assembly.
You’ll follow clear steps, use standard tools, and finish usable pieces in a single session. These projects are designed to boost precision, confidence, and practical technique without overwhelming you.
Quick Cutting Board Build
A one-afternoon cutting-board build gives you a compact, high-value project to practice milling, glue-ups, and finishing without needing advanced tools. You’ll cut and square lumber, dry-fit strips, and glue a simple pattern—this cutting board is easy to build yet demands precision.
Use contrasting species or edge-grain versus end-grain layouts to explore aesthetics and durability. With just a miter saw, router, clamps, and sanders you’ll learn accurate measurement, clean joints, and controlled glue squeeze-out.
Finish with food-safe oil and small bevels for comfort. The focused scope teaches workflow: plan cuts, batch operations, clamp uniformly, then finish. Completing it builds confidence and gives you a reliable kitchen tool while sharpening fundamentals for larger projects.
Simple Wall Hooks
Make a set of simple wall hooks in a single afternoon to practice accurate measuring, clean cuts, and secure hardware placement while adding immediate function to your home. You’ll find this simple to build project uses minimal materials and just a drill, saw, and tape measure.
Follow exact measurements, cut square edges, sand faces, and mark fastener locations so each hook sits flush and holds weight reliably. You’ll drill pilot holes, countersink screws, and verify alignment before mounting.
This short project teaches joinery basics and gives instant organization, building confidence for more complex work. If you want to make one, plan materials and steps, work methodically, and test load capacity.
- Smooth wooden board with staggered metal hooks
- Brass peg accents on stained oak
- Painted maple hooks in a row
- Rustic reclaimed-plank pegs
One-Day Desk Organizer
Build a compact desk organizer in an afternoon to practice accurate cuts, clean joins, and tidy finishing while producing a useful desktop solution.
You’ll follow a clear step-by-step plan that teaches cutting, sanding, glue-up, and screw placement without overwhelming you. Use a few wooden boards, wood glue, and screws—materials that keep costs low and setup simple.
Lay out compartments for pens, paper clips, and notes so the project reinforces measurement and layout skills while permitting personalization. Work methodically: measure twice, cut once; sand progressive grits; dry-fit before final assembly; clamp square during glue cure.
Finishing with oil or varnish clarifies grain and protects the piece. This one-day desk organizer delivers confidence and motivates further woodworking projects.
Quick-Start Tool Kit for Weekend Projects
For weekend projects you’ll want a compact set of essential power tools — a miter saw for accurate crosscuts, a band saw for curves, and a router for clean edge work — paired with basic hand tools like chisels and a mallet for precise joinery.
Start with quality basics and add specialty items as your skill and project scope grow. Don’t skip proper safety gear and a tidy storage system so you can work efficiently and confidently.
Essential Power Tools
When you’re gearing up for weekend woodworking, assemble a compact power-tool kit that covers precise crosscuts, straight ripping, intricate curves, drilling/driving, edge shaping, and smoothing—start with a miter saw, circular saw, jigsaw, cordless drill with varied bits and speeds, a router, and a random orbital sander, and always include goggles and a dust mask.
You’ll use these woodworking tools to tackle basic wood projects efficiently and safely. Choose reliable brands, match blade types to material, and prioritize variable-speed cordless drills for control. A router lets you cut profiles and recesses; the sander finishes without swirl marks.
Maintain blades and bits, secure stock before cutting, and use dust extraction when possible to protect lungs and prolong tool life.
- A trimmed maple shelf after a clean miter cut
- Smooth tabletop edges from a router profile
- Curved jigsaw cut on a chair back
- Even sanded plank ready for finish
Basic Hand Tools
Although power tools speed many tasks, a compact set of hand tools gives you control, precision, and the ability to finish details a saw or router can’t. You’ll want a curated quick-start kit: a quality hand saw, chisels, mallet, clamps, square, and measuring tape, plus safety gear. Invest in durable, accurate tools so your cuts stay true and tools last.
| Tool | Purpose |
|---|---|
| Hand saw | Straight cuts |
| Coping saw | Intricate cuts |
| Chisels | Clean joints |
| Clamps | Secure glue-ups |
| Mallet & square | Assemble and verify 90° |
Learn clamp technique, saw selection, and measuring tape discipline. Use goggles and a dust mask. Practice delivers control, not quantity.
Safety Basics Every Weekend Woodworker Must Follow
Safety starts before you pick up a tool: always wear proper PPE—safety glasses, hearing protection, and a dust mask—to guard against flying debris, noise, and fine particles.
You’ll set a disciplined workspace: ventilate the room, eliminate distractions, and keep floors and benches clear so focus doesn’t slip. Learn each tool’s manual and safety features before use; confident tool handling prevents mishaps.
Clean sawdust and offcuts routinely to avoid trips and hidden hazards. Use push sticks, featherboards, and guards; keep hands away from blades and rotating bits. Inspect tools and cords for damage, and lock out power when changing blades or bits.
- A bench swept clean, bright task light
- A masked face near a spinning blade
- Push stick guiding a small board
- Tools lined up, cords untangled
Weekend Shop Workflow: Plan, Mill, Glue, Finish
Because a clear workflow turns scattered tasks into predictable progress, you should plan each weekend project before you touch a tool: sketch dimensions, list materials and fasteners, and note required jigs and machines so milling goes straight and efficient.
With that blueprint, mill parts to final faces and thicknesses, prioritizing consistent reference edges and accurate cuts for tight joinery.
Prepare a glue-up sequence: dry-fit, mark orientations, select adhesive suited to species and stress, then apply even glue and clamp with monitored pressure to maintain alignment.
After clamps come finish preparations: progressive sanding, tack-off, test stains or sealers on scrap, then apply finish in controlled passes.
A disciplined plan-to-mill-to-glue-to-finish rhythm reduces waste and yields predictable, high-quality results.
Project Group A: One-Afternoon Builds for Kids and Beginners
You’ll start with quick starter projects that finish in an afternoon and build confidence through clear, measurable steps.
I’ll outline safe, kid-friendly builds—like a pencil caddy or simple birdhouse—with age-appropriate tool choices and mandatory safety checks.
You’ll learn essential tools and techniques (hammering, basic cuts, laminating, and chiseling) presented in precise, teachable sequences.
Quick Starter Projects
When you’re starting out, one-afternoon builds give you clear, achievable goals that teach core skills without overwhelming a young learner. You’ll focus on easy projects that introduce measurement, cutting, joining, and finishing in a single session.
Choose a good project that matches attention span and tools available, then plan materials and steps precisely.
- Pencil Caddy: about one hour, basic cutting and assembly, instant reward.
- Pencil Box: practices measuring and groove cutting, customizable lid options.
- Door Stop: explores angles and decoration, teaches shaping and sanding.
- Mobile Phone Caddy: lamination practice, practical form and fit.
Each build reinforces a single core skill while producing a functional item, so you can assess progress and build confidence reliably.
Safe Kid-Friendly Builds
Looking for quick, safe projects that teach core skills? You’ll find a curated set of one-afternoon wood builds that balance safety, learning, and satisfaction.
Start with a Pencil Caddy or Wooden Doormat—both are easy projects that let kids around ten practice measuring and hammering with clear, repeatable steps. A Birdhouse introduces basic geometry and safe tool use while producing a tangible reward.
Monster Truck kits engage creativity and problem solving in a slightly longer session, still suitable for an afternoon. A simple Chopping Board exposes learners to timber variety and finishing basics without complexity.
The Mobile Phone Caddy teaches lamination and precision layout, appealing to tech-savvy youngsters. Each project emphasizes supervision, simple joints, and achievable outcomes to build confidence.
Tools And Techniques
After trying a few kid-friendly builds, it helps to focus on the tools and techniques that make those one-afternoon projects safe, predictable, and satisfying. You’ll rely on basic tools—hammer, handsaw, tape measure, clamps—and simple techniques like marking, square cuts, and glue-up.
Choose easy projects with clear templates (pencil caddy, birdhouse, phone stand) so you can teach measuring, cutting, and assembly without complexity. Emphasize precise measuring and controlled cutting; teach children to steady stock and keep fingers clear. Use common materials to reduce variables and boost success.
Finish with light sanding and straightforward joinery to produce a useful object in hours, reinforcing confidence and creating a clear pathway to more advanced builds.
- A small birdhouse clamped for safe sawing
- Tape-measured board with marked cut lines
- Glue-up of a pencil caddy on a flat surface
- Light sanding to reveal clean edges
Project Group B: Multi-Session Builds That Teach Joinery
Because multi-session builds break larger projects into manageable steps, you’ll get repeated, focused practice on core joinery—like mortise-and-tenon and dado joints—while assembling functional pieces such as bookshelves or shop cabinets.
With multi-session builds, you concentrate on one joint type per session, honing measurement, layout, and cutting accuracy without rushing. You’ll learn to sequence work so glue-ups, clamping, and fitting happen predictably, reducing errors.
Facing real assembly challenges teaches problem-solving: tweak a tenon, re-scribe a dado, or reinforce a shelf. Over time, incremental progress builds confidence as raw boards become sturdy furniture.
You’ll also accept minor imperfections, extract clear lessons, and apply them to subsequent projects, steadily improving your joinery and overall workmanship.
Project Group C: Outdoor Builds That Teach Weatherproofing
Anyone tackling a raised planter or garden arbor will learn that weatherproofing is as important as joinery: choose rot-resistant lumber like cedar or redwood, seal exposed end grain and joints with appropriate caulks or epoxy, and apply exterior-grade finishes to block moisture and UV.
You’ll plan builds with outdoor furniture standards in mind, selecting materials and finishes that resist rain and sun. You’ll seal joints methodically, slope surfaces for runoff, and finish with two coats of exterior varnish or paint. These tasks teach durable construction habits transferable to any outdoor build.
- A cedar planter shedding rain from a gently sloped lid
- An arbor with sealed mortise joints glancing sunlight
- Smooth end grain sealed against soaking
- Painted slats repelling afternoon sun
Essential Beginner Skills You’ll Learn From Each Project
You’ll build core joinery techniques first—edge gluing and basic joints that make assemblies strong and true.
You’ll learn precision milling basics next, tightening your measurements and cuts so parts fit without fuss.
Finally, you’ll practice finishing and maintenance—sanding, sealing, and caring for wood to protect function and appearance.
Core Joinery Techniques
When you tackle weekend projects, you’ll build a repertoire of core joinery techniques—mortise and tenon for permanent strength, dados and rabbets for accurate paneling, and exterior-specific joints for weatherproof outdoor work—that form the foundation of reliable woodworking.
You make confident decisions about joint selection, learning how mortise and tenon lock frames, how dados guide panels, and how rabbets seat edges. You join pieces so they resist shear, twist, and weathering. Repetition across cutting boards, toys, birdhouses, and planters hones fit and glue technique, accelerating competence.
- A snug tenon fitted into a clean mortise, fibers aligned for strength.
- A precise dado housing a shelf, straight and square.
- A rabbet delivering a flush, seamless corner.
- An exterior lap or coated joint resisting moisture.
Precision Milling Basics
Because precise milling underpins every successful build, you’ll learn to cut wood to exact, repeatable dimensions before assembly, ensuring parts fit without forcing or filling gaps. You’ll practice precision milling on boards and simple furniture, measuring and rechecking to maintain uniformity. You’ll gain confidence by learning to calibrate tools—miter saws, routers, jointers—so cuts stay true and waste drops. Thickness planing and jointing become routine, improving fit and reducing sanding. Hands-on projects show how accuracy strengthens joints and elevates finish quality. Maintain disciplined setups: mark, clamp, measure, cut, verify. The result is predictable parts, cleaner assemblies, and faster builds as your millwork skills advance through deliberate repetition and meticulous checking.
| Skill focus | Outcome |
|---|---|
| Planing | Uniform thickness |
| Calibration | Repeatable cuts |
Finishing And Maintenance
- You sand progressively to remove scratches and guarantee adhesion.
- You test stains to match color and depth.
- You apply sealant thinly for even cure.
- You schedule cleaning and recoat intervals for durability.
Choose Woods and Materials for Beginners
Start by choosing woods that match your skill level and the project’s demands; softwoods like pine or fir and stable sheet goods like plywood give you forgiving, affordable options for cutting, sanding, and joinery.
You should choose woods deliberately: softwoods are a good idea for practice pieces because they cut easily and forgive minor errors. Use plywood for shelves, boxes, and flat surfaces where stability matters.
Reserve hardwoods such as oak, maple, or cherry for projects that need durability and fine finishes, understanding they require sharper blades and more careful sanding.
Match material to environment—treated lumber outdoors, fine hardwoods indoors—and prefer sustainably sourced or reclaimed boards.
Inspect stock for straightness, knots, and moisture content before you buy or cut.
Simple Jigs and Setups That Speed Up Weekend Builds
A few well-designed jigs and a consistent shop setup can cut your build time and raise the quality of every piece you make.
You’ll find that simple jigs — a crosscut sled for accurate table saw cuts, a pocket hole jig for fast, strong joins, and a measuring jig for repeatable lengths — let you work quickly without sacrificing fit.
Simple jigs — a crosscut sled, pocket hole jig, and measuring stops — speed work and ensure accurate, consistent fit.
Set a dedicated workbench with clamps, stops, and a router table setup so shaping and hollowing become repeatable steps.
Organize tool storage near stations to reduce motion and keep focused.
Build these fixtures once, use them every weekend, and your projects’ll gain consistency and speed while you learn core techniques.
- Crosscut sled
- Pocket hole jig
- Measuring jig with stops
- Router table with fences
Time and Cost Estimates for Typical Weekend Projects
Most weekend projects fall into a clear time-and-cost window, so you can plan a build without guesswork: expect roughly 4–10 hours from layout to finish for typical pieces, with beginner-friendly items like chopping boards or birdhouses often done for under $20. You’ll know the time to start and can schedule work sessions confidently. Plans usually list hours and materials, so you budget precisely. A DIY desk organizer or phone caddy is a 1–3 hour task; a storage box sits nearer the midrange. If the project is easy, cost stays minimal and tool needs are basic.
| Project | Time | Estimated Cost |
|---|---|---|
| Chopping board | 4 h | <$20 |
| Birdhouse | 4 h | <$20 |
| Desk organizer | 1–3 h | $10–$25 |
| Storage box | 6–8 h | $15–$40 |
Troubleshooting Common Mistakes : Fixes That Work Fast
Anyone can hit a snag in a weekend build, but you can fix most problems quickly if you know the right remedy: You’ll use straightforward troubleshooting steps to keep your woodworking on schedule.
If wood warps, apply moisture to the concave side so it realigns as it dries. Straighten an inaccurate cut with a router and straight-edge guide for a clean edge. Remove fresh glue spills with a damp cloth and gentle scrubbing before they cure.
Sand slightly to tighten loose mortise-and-tenon fits, checking alignment before assembly. Flatten uneven surfaces with a hand plane or belt sander to guarantee a smooth finish.
- Wet the concave face to correct warping
- Guide your router for a perfect edge
- Wipe glue while it’s still tacky
- Sand tenon edges carefully
How to Teach a Kid or Friend a Weekend Woodworking Project
When you teach a kid or friend a weekend woodworking project, plan a simple build like a birdhouse or pencil caddy, lay out every tool and material beforehand, and use clear step‑by‑step templates so the session stays focused and safe.
Teach a simple weekend woodworking project: prepped plans, tools ready, and clear step‑by‑step guidance for focused, safe learning
Choose a project that teaches fundamentals—measuring, cutting, hammering—and that can scale toward a small furniture project later. Organize the workspace, pre-cut parts if needed, and explain each step before they act.
Demonstrate tool use, then supervise hands-on practice; insist on protective gear and correct posture. Teach how to use a drill for pilot holes and fastening, showing control and bit choice.
Allow limited personalization—paint or trim—so they own the result while you reinforce joinery and safety.
Where to Find Free Plans, Templates, and Community Feedback
Where can you find reliable, free woodworking plans and useful feedback? You’ll start with reputable sites that publish clear, step-by-step free plans and templates designed for beginners, often illustrated with photos or diagrams.
Join active forums and social media groups to solicit community feedback; experienced members correct technique, suggest tool choices, and flag pitfalls. Subscribe to focused blogs and YouTube channels for visual tutorials that reinforce written instructions. Engage regularly: post progress photos, accept critique, and replicate recommended adjustments to accelerate skill growth.
- A simple bedside shelf plan with exploded diagrams and parts list.
- A small birdhouse template showing cut layouts and joint details.
- A rustic toolbox plan photographed at each assembly stage.
- A practice cutting jig template you can print and test.
Use feedback, iterate, and build confidence.
Next Steps After Five Projects: Level-Up Project Ideas and Goals
After five projects under your belt, push into intermediate builds that force you to refine joinery, milling, and layout skills—think a wall-mounted shelving unit or a sturdy DIY workbench that require accurate squaring, consistent dadoes, and reliable fastenings.
You should then plan projects that combine multiple components—coffee tables, simple outdoor benches—to practice edge joining, assembly sequences, and finish preparation. Set concrete goals: master a router for clean grooves, buy a jigsaw for curved cuts, or learn consistent planing for uniform thickness.
Tackle one advanced technique per build—basic inlay, reclaimed-wood refinishing—so progress is measurable. Share milestones in forums or local clubs to get critique and iterate. Choose projects that stretch a single weak skill until it’s reliable.
Frequently Asked Questions
What’s a Good Beginner Woodworking Project?
A simple cutting board’s ideal: you’ll practice milling, gluing, sanding, and finishing while choosing shapes and woods. You’ll learn accurate measuring, safe tool handling, and basic joinery, creating a practical piece that builds confidence quickly.
How to Start Woodworking With No Experience?
Start by choosing simple projects like cutting boards, get basic tools (miter saw, clamps, hand tools), follow free plans and videos, join workshops or forums, practice milling and gluing, expect mistakes and learn from them confidently.
What Is the Best Wood for Beginner Projects?
Like a patient tutor, softwoods—pine, cedar, fir—and plywood are best for beginners. You’ll choose softwood for ease and cost, plywood for stability and flatness; pick hardwoods later when you’ve sharpened skills and tools.
What Woodworking Project Is Most Profitable?
Custom furniture pieces like reclaimed wood tables are most profitable; you’ll command high margins, especially on larger items, but smaller personalized goods (cutting boards, engraved gifts) sell quickly and often yield the best return per hour.
Conclusion
You’ve started smart: you picked doable projects, learned key tools, and practiced safe, efficient workflow. Keep that momentum. Next weekend you’ll try something a bit bolder—maybe a dovetailed box or a small stool—and you’ll realize how much of woodworking is about disciplined habit, not luck. Stay meticulous, follow the steps, and watch your confidence build. When you’re ready, the next challenge will reveal itself—are you ready to take it on?