
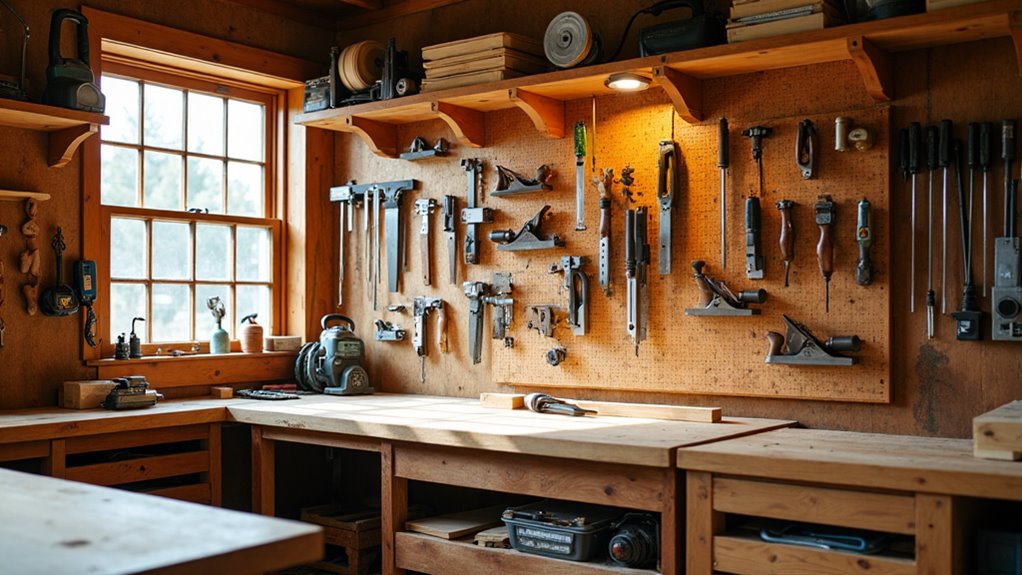
You can reclaim bench space and speed projects by zoning tools by use—keep your top 20% within arm’s reach and stow the rest higher or in cabinets. Use pegboards, French cleats and magnetic strips for vertical storage, labeled bins and clear jars for fasteners, and under‑bench drawers or a foldable worktop to save room. Add mobile carts, long‑tool hangers, cord reels and a dedicated finishing cabinet for safety. Follow simple weekly culls and labels to stay organized and learn practical layouts next.
Key Takeaways
- Keep the 20% of tools you use most within arm’s reach to minimize motion and speed workflow.
- Combine pegboard and French cleat systems for flexible, heavy-duty wall storage that maximizes vertical space.
- Use labeled clear jars, modular bins, and drawer organizers for fasteners and small parts visibility.
- Build under-bench drawers, foldable worktops, and mobile carts to save floor space and increase versatility.
- Store finishing supplies in a dedicated, well-labeled cabinet away from heat and electrical panels for safety.
Quick Wins: 5 Steps to Tidy a Small Shop Now
Start by thinning everything out: sort tools and materials into donate, sell, or keep piles so you free immediate floor and bench space.
Next, toss obvious trash and small wood chunks into heavy-duty garbage bags so surfaces stay usable.
Third, apply the 80/20 idea mentally: decide which 20% of tools you’ll keep at arm’s reach, but don’t deep-dive into zonal planning here.
Fourth, buy labeled storage solutions—clear bins and tubs—for categories like electrical or painting, and dedicate small drawers for small parts so you stop hunting screws.
Finally, set a weekly five-minute reassess routine: tidy a shelf, re-label if needed, and return misplaced items.
These quick steps make tool storage tidy, keep the shop organized, and prevent clutter from spiraling.
Plan by Frequency: Set Your 80/20 Tool Zone
Think regarding reach: keep the roughly 20% of tools you grab for 80% of the work within arm’s reach of your bench so you cut motion and save time. Identify that core set, then arrange tool storage so high-use items sit where you naturally work.
Position the bench against a wall or centrally based on your workflow, creating a consistent 80/20 tool zone. Use labeled bins and small designated zones for screws, fasteners, and consumables you touch every session.
Store seldom-used tools in cabinets or higher shelves. Keep everything reassessed monthly — projects change, so move items to preserve accessibility.
This focused, usage-driven layout keeps your workspace organized, reduces steps, and makes setup and cleanup faster without wasting real estate on rarely used gear.
Maximize Vertical Storage With Pegboards & Cleats
Lay out your pegboard hooks by function and frequency so each tool has a dedicated spot and you can grab what you need without shifting items.
Combine that with a few French cleats for heavier gear and you’ll swap or expand storage quickly as your collection changes.
Add magnetic strips for metal bits and fasteners to keep small items visible and off shelves.
Pegboard Hook Layout
While pegboards and cleats both reclaim vertical space, a well-planned pegboard hook layout gives you the fastest access to hand tools and small accessories. Mount pegboards off the wall with spacers or washers so hooks clear the surface and tools hang freely.
Start by grouping tools by task—mark zones for measuring, cutting, fastening—so frequently used items sit at shoulder height and are easy to find. Use a mix of single hooks, multi-prong hooks, shelves, and small baskets to support odd-shaped items and consumables. Label each zone and outline tool silhouettes to return items consistently and keep tools organized.
Reserve the adjacent wall-mounted cleat for heavier gear; keep the pegboard dedicated to quick-access hand tools and small parts.
French Cleat Flexibility
Pegboards handle quick-access hand tools, but when you need a more heavy-duty, reconfigurable system, French cleats give you the flexibility to rearrange larger items without rebuilding racks.
You’ll mount a matching pair of cleats—one on the wall, one on the tool carrier—at a preferred bevel of about 30 degrees so heavy tools lock in securely. Use straight, continuous runs across wall space to support shelves, cabinets, jigs, and bins; shorter cleat strips work for individual holders.
Combine cleats with pegboards to mix hooks and custom carriers, maximizing vertical tool storage and organization. Build cleats from plywood or dimensional lumber for an economical solution, and space them to balance load, accessibility, and future growth.
Compact Workbench Ideas for Small Shops
One smart compact workbench gives you a full-featured workspace without hogging your shop: build it from plywood or MDF with a foldable top or collapsible legs so you can stow it flat when needed.
Design a storage system under the surface—drawers, pull-out shelves, and cubbies—to keep tools and materials organized and within reach.
Design under-bench storage—drawers, pull-outs, and cubbies—to keep tools organized and within easy reach.
Add a pegboard-backed backsplash or integrated pegboard walls to use vertical space for frequently used hand tools.
Include built-in clamp storage or an integrated tool rack at the bench edge to cut clutter and speed setup.
If you need occasional repositioning, choose a model that accepts casters but focus primarily on fixed, space-saving features that maximize utility in small shops without creating workflow bottlenecks.
Mobile and Rolling Carts That Streamline Workflow
You can keep the compact workbench at the center of your shop and use a mobile cart to carry the rest of your gear to the task at hand.
Mobile carts act as a flexible storage unit that brings tools to your workspace, cutting trips across the shop and speeding workflow. Customize trays, hooks, and bins so you have organized access to the tools you use most. Choose carts with shelves and compartments to maximize vertical space and maintain a clutter-free floor.
- Locking casters for stability when cutting or drilling.
- Modular compartments for drill bits, clamps, and measuring tools.
- Slim profile designs that tuck away to open up floor space.
Keep it mobile, locked, and purpose-built.
Smart Small‑Parts Storage: Labeled Jars & Modular Bins
Several clear jars and modular bins can turn a cluttered parts drawer into a fast, reliable system you’ll actually use.
Mount labeled jars under shelves by screwing lids to the underside so small parts—screws, nails, bolts—sit visible and secure, freeing bench space. Use transparent containers so you see contents at a glance and grab what you need without opening every jar.
Pair those with wall- or shelf-mounted modular bins that group components by function or size; label each compartment consistently to speed retrieval and return. Keep a simple label key and stick to one format (size, type, project) so organization stays intuitive.
This setup reduces search time, prevents work-surface clutter, and scales as your collection grows.
Clamp, Fence, and Long‑Tool Hangers That Save Floor Space
Having small parts sorted in jars and bins clears bench space and makes it logical to tackle larger storage needs like clamps, fences, and long-handled tools.
You’ll save floor space by mounting simple wood rails or heavy-duty hooks for clamp storage so each clamp stays visible and accessible. Use hinged or sliding fence hangers to keep rails off the floor and allow one-handed retrieval.
Build long-tool hangers from scrap wood or metal brackets to secure rakes, shovels, and other long-tool items vertically along walls. Add pegboards or magnetic strips where appropriate to hold odd-shaped pieces and keep everything organized.
- Mount clamp rails at elbow height for fast grab-and-go.
- Install sliding fence hangers for compact rail storage.
- Group long-tool hangers by function for workflow efficiency.
Tame Cords and Hoses With Simple DIY Holders
Tame cords and hoses by installing cord and hose reels or wall-mounted hooks so each line gets its own labeled spot and stays off the floor.
You can make recycled spool holders or simple PVC cradles from repurposed materials to fit different diameters and prevent tangles.
Mount brackets and pegboard hooks near workstations for quick access to whatever you use most.
Cord And Hose Reels
A simple DIY cord or hose reel made from PVC pipe or a wooden spool keeps your shop safer and more efficient by stopping tangles and freeing floor space.
You’ll mount cord reels to a wall or ceiling to reclaim the workspace and keep tools accessible. Build reels with clips or hooks to fasten cords, and design detachable spools so you can replace cables without reworking the entire system.
- Use PVC or a wooden spool for a low-cost, durable reel.
- Add adjustable stops and clips so cords stay organized at set lengths.
- Mount reels high to clear floor space and reduce trip hazards.
Regularly coil and secure cords to cut search time and extend tool life.
Wall-Mounted Hooks
When you mount simple hooks or a rod rack on the wall, extension cords and hoses stay off the floor and are ready to use, cutting trip hazards and clutter in tight shops. You’ll use wall-mounted hooks to organize cords, placing them near tools for fast setup and teardown. Build holders from scrap wood or repurposed metal for a low-cost solution. Stagger hook heights to store different lengths and types, maximizing vertical space and keeping floors clear. Install sturdy anchors and space hooks to prevent tangling. This simple system streamlines workflow in a small shop and keeps cords accessible without bulky reels.
| Item | Location | Benefit |
|---|---|---|
| Hook | Near workbench | Quick access |
| Rod rack | Wall bay | Neat spacing |
| DIY board | Corner | Low cost |
| Staggered hooks | Vertical | Saves floor space |
Recycled Spool Holders
If you liked how wall-mounted hooks keep cords off the floor, recycled spool holders offer a compact way to wind and store those same cords and hoses without tangles. You can make use of discarded spools to build simple, durable holders that mount to studs or sit on shelves, keeping your shop organized and reducing cord wear.
They handle various lengths and types, so you’ll reach for the right hose or extension quickly. Install them vertically to free floor space and group by function—air, power, extension.
- Mount spools at eye level for easy winding and removal.
- Label each spool for fast identification.
- Use smaller items like cable ties or dowels to secure loose ends.
Dedicated Sanding & Finishing Cabinet for Safety and Order
Because keeping sanding and finishing supplies out of your immediate work area reduces clutter and risk, dedicate a cabinet specifically for them and arrange it for quick, safe access.
Store sanding supplies by hanging abrasive sheets from their sleeves and securing boxed sanding discs on slotted racks so you can grab the grit you need fast.
Hang abrasive sheets by their sleeves and store boxed sanding discs on slotted racks for quick grit access.
Position the cabinet away from heat sources and electrical panels to minimize fire hazards when you house finishing supplies like stains, film finishes, and solvents.
Date and categorize each can—film finishes, stains, solvents—so you won’t waste time guessing contents or age.
Use bins or labeled shelves to create an organized system that separates flammables from nonflammables, keeps lids tight, and helps you work efficiently and safely.
Routine Maintenance: Cull, Label, and Keep Your Shop Organized
Set a regular maintenance slot to cull tools and materials you no longer use, sorting them into keep, donate, sell, or recycle piles so clutter doesn’t build.
Label bins, drawers, and fastener jars clearly with a label maker so you can grab the right item without searching.
Always return tools to their designated spots after use and periodically reassess layouts based on what you actually reach for.
Cull Unneeded Tools
When you take stock of your tools every six months, sort them into three clear piles—donate, sell, or keep—and move each item immediately so clutter doesn’t return. You cull unneeded tools with purpose: review duplicates, broken items, and tools you never reach for.
Keep workflow in mind—store common tools within reach and rarely used ones higher up. Use simple storage solutions like pegboards and bins so each retained tool has a designated spot and you can maintain orderly shop habits.
- Inspect: test function, note condition, decide donate/sell/keep.
- Allocate: place keep items in organized zones; rarely used goes high.
- Dispose: list sell items, bag donations, recycle irreparable pieces.
This routine helps organize and sustain efficiency.
Label Storage Clearly
After you’ve culled what you don’t need, labeling is the next step to keep the gains from slipping away.
You’ll label storage clearly by assigning specific categories—electrical, plumbing, painting—and using a label maker for crisp, consistent tags.
Arrange bins and tubs into an organized system so items are grouped logically and easily retrievable during projects.
Add color-coded labels to distinguish fasteners, hardware, and consumables at a glance; reserve one color for project parts tubs to prevent mix-ups.
Update labels whenever inventory shifts, and replace worn tags as part of routine maintenance.
Keeping labels current minimizes search time, reduces clutter on work surfaces, and preserves the efficiency you achieved when you culled unneeded tools.
Frequently Asked Questions
How Do I Secure Tools From Theft in a Shared Shop?
Lock tools in labeled, anchored cabinets or lockers, use keyed or electronic access, secure expensive items with cable locks, install cameras and motion lights, keep an inventory with photos, and get shop insurance to deter and recover theft.
What’s the Best Way to Store Flammable Finishes Safely?
Store flammable finishes in a dedicated, labeled metal safety cabinet or ventilated flammable storage locker, away from ignition sources, temperature extremes, and exits; keep containers tightly sealed, use spill trays, maintain an inventory, and follow local regulations.
How Can I Protect Stored Tools From Moisture and Rust?
Treat tools like sailors’ gear—keep them dry and salted: store in airtight bins with desiccant packs, oil metal surfaces lightly, use rust-inhibitor paper or silicone bags, maintain stable temperature, and rotate/inspect tools regularly to prevent corrosion.
Are There Storage Ideas for Irregularly Shaped Workpieces?
Yes — you can use wall-mounted adjustable brackets, slotted plywood racks, hooked pegboards, foam-padded bins, and rolling carts with adjustable dividers. Label zones, secure odd shapes with straps, and stack horizontally to prevent warping.
How Do I Organize and Store Woodworking Jigs Efficiently?
You’ll feel like a wizard with labeled, modular jig boards and drawer inserts that hold every odd shape; mount pegboard slots, foam-cut trays, and magnetic strips, then index photos and templates so you’ll grab the right jig instantly.
Conclusion
Think of your shop as a compact orchestra—every tool has a seat and a role. Use the 80/20 zone for your soloists, hang clamps and long tools like a tidy percussion rack, stack sanding supplies in a ventilated cabinet, and roll carts like mobile conductors. Cull, label, and tame cords so rehearsals start quickly. With these practical steps, your small shop plays clean, efficient music instead of chaotic noise.