
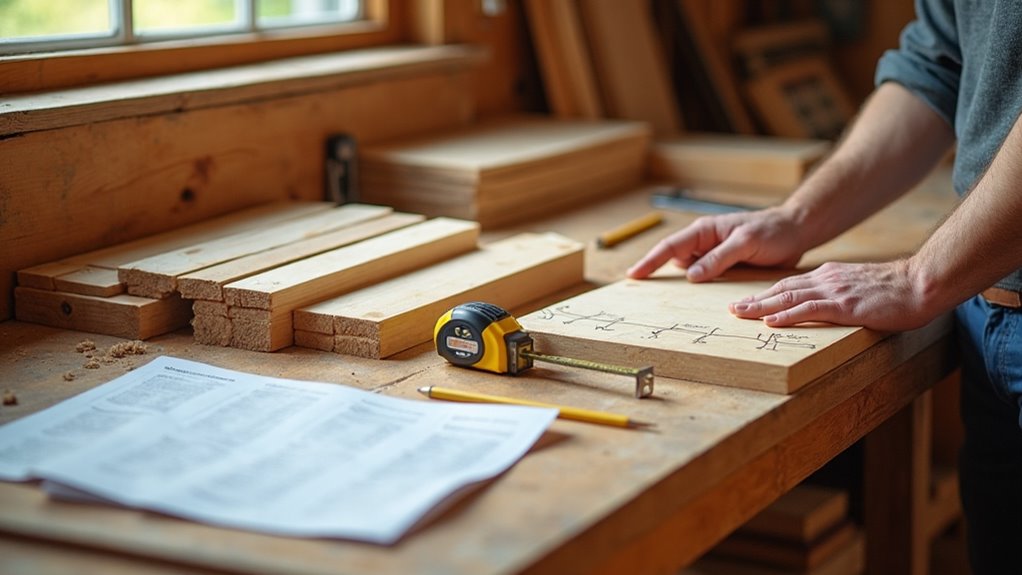
A cut list is your plan: it lists every part, quantity, exact dimensions, and material so you don’t waste wood or time. You’ll make it after finalizing drawings and choosing solid boards or sheet goods, note grain direction and joinery allowances, and add a small waste buffer. Label parts, double-check thicknesses, and mark pieces as you cut. Follow a saw-ready sequence and verify each item against the drawing first — keep going to pick up practical tips and workflows.
Key Takeaways
- A cut list itemizes every part with exact dimensions, quantity, and material to turn your design into a clear, buildable plan.
- Finalize drawings and materials first so your cut list reflects joinery allowances, grain direction, and accurate panel sizes.
- Group measurements by stock type (solid wood, sheet goods, hardware) and plan panel layouts to minimize waste.
- Add allowances for milling, acclimation, and a waste buffer, then label each part immediately after cutting.
- Cross-check the cut list against drawings, measure twice before cutting, and track completed parts with a check column.
What a Cut List Is and Why Beginners Need One
When you’re starting a woodworking project, a cut list gives you a clear, practical plan by listing every piece you’ll need—its exact dimensions, quantity, and material—so you can cut confidently and avoid surprises.
You’ll use cut lists to map out each component, account for grain direction, and note material thickness so pieces fit together precisely. For beginners, they simplify complex builds by turning plans into manageable steps and showing what to cut first.
Following a solid cut list reduces waste, prevents costly mistakes, and keeps your workspace organized. You’ll gain confidence as you see parts come together predictably, and you’ll finish cleaner, more accurate work because you planned the cuts instead of guessing as you go.
When Should You Create Your Cut List?
After you’ve finalized a detailed design and chosen your materials, create the cut list before you buy or cut anything; doing so guarantees you pick the right sheet goods and board sizes, plan grain orientation and joinery, and avoid costly shortages or excess.
You should make the cutting list once your plan has all measurements and material specs so you can order accurately and avoid waste. Preparing it before cutting keeps your workflow organized, reduces mistakes during assembly, and helps you think through joinery and grain.
Make a cutting list once measurements and materials are set—order accurately, avoid waste, and prevent assembly mistakes.
When you’re ready, include:
- specific part dimensions and quantities
- material types and sheet/board sizes
- grain orientation and face selection
- planned joinery and allowances
This timing saves money and time, and keeps the build predictable.
Gather Drawings and Measurements
Now that you’ve finalized your design and prepared the cut list, gather or create clear, dimensioned drawings that show every part and how they fit together.
Draw each component to finished dimensions, noting joinery allowances and how parts meet so you won’t be surprised during assembly. Measure carefully and record results on the drawings; use relative dimensioning to show relationships between adjoining pieces for more accurate fits.
Organize measurements by category—solid wood, sheet goods, hardware—so your cutting lists stay neat and searchable. Cross-check drawings against your cutting lists regularly to catch mistakes before the saw spins.
Take time here: precise drawings and measurements save material, time, and frustration when you move from paper to project.
Choose Materials: Solid Wood, Sheet Goods, Hardware
Material choices make or break a project, so pick them with purpose: solid wood for visible, durable surfaces; sheet goods like plywood or MDF for larger panels and carcasses; and the right hardware for function and fit.
You’ll choose materials based on use, budget, and appearance. Dimensional lumber (2x4s, 2x6s) is easy to plan by the foot; hardwoods like oak or maple suit fine furniture; pressure-treated lumber works for outdoor builds. Sheets usually come 4×8 feet, so plan cuts to minimize waste.
Don’t forget hardware when you choose materials — screws, hinges, and slides affect assembly and performance.
- Match material to role: face, structure, or outdoor exposure
- Plan sheet yields to reduce scrap
- Account for common lumber lengths
- List required hardware types and counts
Fields Every Cut List Must Include (Qty, Dims, Notes)
You’ve picked the right wood and hardware—next, you’ll put that plan on paper with a cut list that tells you exactly what to cut and how many.
Start by listing Qty for each component so you buy and prepare just enough material, avoiding waste and surprises at the bench. Add precise Dims—length, width, thickness—for every part; tight measurements make cutting and assembly go smoothly.
Use a Notes column for species, edge treatment, or other special instructions that affect fit or finish. Include a simple check column to track pieces as you cut and confirm accuracy.
A clear, organized cut list speeds workflow, reduces mistakes, and keeps you confident as you move from cutting to assembly.
Use Grain Orientation and Face Veneer Rules
When you plan cuts, note the grain direction so the length of each piece follows the wood fibers for strength and a clean look.
For plywood, always mark which face veneer will show so matching and seams stay consistent during assembly. Staying aware of grain and veneer selection prevents splintering, keeps joints tidy, and makes the finished piece look professional.
Grain Direction Basics
Because wood fibers run lengthwise, orienting pieces so their long dimension follows the grain gives you the best strength and stability. With plywood, you should always align the face veneer grain for consistent appearance and performance.
You’ll learn to read grain direction, recognize length versus width, and plan cuts so parts match visually and structurally. Think ahead to avoid warped panels or stressed joints.
- Match long dimensions to grain for strength and stability.
- Note each board’s length (long) and width (short) before cutting.
- Align plywood face veneer grain for uniform appearance and performance.
- Plan joint and board layout to minimize warping and cracking.
Follow grain direction when marking and cutting; it keeps assemblies tight, looks cohesive, and lasts longer.
Veneer Face Selection
Choosing the right veneer face starts with grain orientation—so match the face veneer grain across adjoining pieces to keep the look consistent and the assembly stable. You’ll use the face veneer grain as your primary reference, checking grain running direction on each sheet before cutting. Lay pieces out so grain running flows visually across seams; that prevents awkward breaks and improves stability. Double-check orientation when marking parts, because a flipped veneer can ruin the aesthetic. Consider pattern flow and how light will hit the surface; small adjustments make a big difference. Use this quick checklist to keep things steady and predictable:
| Check grain running | Match adjoining faces | Verify before cut |
|---|---|---|
| Yes | Yes | Yes |
Apply Relative Dimensioning: Which Parts Set Final Size
Decide which key structural parts — like side panels and stretchers — will set the final height and depth, and cut them to exact size first.
You’ll trim relative parts, such as backs and shelves, to fit those finished dimensions so everything aligns during assembly.
For face frames, make their stiles and rails match the assembled cabinet measurements, not just your original plan, to avoid gaps and misalignment.
Key Structural Parts
Think of the side panels and shelves as the project’s rulers: they set the final height and depth, so you should cut and fit them first.
When you create your cut list, mark these as relative dimensioning parts—everything else references them. Size and fit them carefully; they determine case geometry and reveal any fine adjustments needed.
- Side panels and shelves -> set height and depth; cut first
- Tops, bottoms -> leave for fine-tuning during assembly
- Face frame pieces -> size to the assembled case, not paper measurements
- Back panel -> finalize to the rabbet-to-rabbet distance for a snug fit
Relative Parts Adjustment
Now that your side panels and shelves are set and fitted, focus on how the remaining pieces get their final lengths from those anchor parts.
With relative parts adjustment you let key parts — side panels, shelves — dictate finished height and depth. Measure the actual assembled distances, then trim tops, bottoms and crosspieces to match; that guarantees snug joints rather than relying solely on plan dimensions.
For case backs, cut to the final distance between rabbets so the back sits square and supports the unit. Keep your drawings handy and recheck dimensions as you go; plans guide you, but the built assembly sets the true sizes.
This practical, measured approach keeps fit tight and saves rework.
Face Frame Alignment
Face frames get their final size from the case parts they attach to, so let the assembled side panels and shelves determine your face frame component lengths and heights rather than trusting the plan alone.
You’ll use relative dimensioning: the side panels set height and depth, and assembled tops/bottoms may need trimming so the face frame fits snugly. Adjust the back trim to match the final rabbet distance for good performance and appearance. Keep your cut list updated as you assemble.
- Measure assembled case height and depth before final cuts.
- Update the cut list when tops/bottoms shift during test fitting.
- Trim back panels to fit the rabbets after assembly.
- Dry-fit face frame before glue to confirm alignment.
Accurate alignment improves strength and finish.
Size Key Parts: Sides, Rails, Stiles Precisely
A precise cut list starts with sizing the key parts—sides, rails, and stiles—so you’ll get tight joints and a square frame every time.
Start by calculating side dimensions for the finished height and depth; these set the envelope for the project. Measure rails to fit between stiles and match the planned spacing so the width and strength are correct.
Start by sizing sides for finished height and depth; cut rails to fit between stiles for correct width and strength.
Cut stiles to exact thickness and height so they seat snugly against rails and sides, avoiding gaps that spoil alignment.
Label every piece on your cut list and mark orientation on the parts as you cut. Work methodically: measure twice, cut once, and assemble dry to confirm fit. This disciplined approach keeps your first build accurate and confidence high.
Size Relative Parts: Tops, Bottoms, and Backs to Fit
Think of tops, bottoms, and backs as parts that must relate to the assembled frame, not fixed dimensions you cut once and forget; measure them against the assembled sides, rails, and stiles and cut them slightly oversized so you can trim for a perfect fit.
You’ll use the cut list as a guide, but verify final dimensions after assembling key parts. Tops and bottoms get trimmed to remove gaps; side panels must be precise since they set height and depth.
Trim the case back to the final spacing between top and bottom. Always cross-check against your original drawing before final cuts to avoid mistakes.
- Measure against the assembled frame
- Cut tops/bottoms oversized, then trim
- Confirm side panels are exact
- Trim back to final spacing
Plan Sheet Goods for Your Cut List (Board Drawing)
When you plan sheet goods, aim to maximize sheet yield by nesting parts tightly and keeping grain direction consistent for visible faces.
Use layout tools or a quick sketch to arrange pieces so long grain runs where it matters and waste is minimized.
Don’t forget to adjust your cut list for leftover scraps and consider biscuit-joining narrow boards to make wider panels when needed.
Maximize Sheet Yield
Maximizing sheet yield starts with laying out all your parts on full 4×8 sheets so you cut as little waste as possible. You’ll plan each panel and narrow board, deciding when to join slim strips with biscuits to reach required widths and reduce scrap.
Use CAD to try many layouts fast; manual marking works but takes longer. Always remember to cut with awareness of grain orientation for appearance and strength, but don’t plunge into grain strategy here.
- Arrange parts to fill sheets edge-to-edge
- Use narrow boards and biscuit joints to salvage offcuts
- Run CAD nesting to test alternative layouts quickly
- Mark manual layouts carefully when you can’t use software
These steps help you maximize sheet yield, save money, and build efficiently.
Grain Direction Strategy
A clear grain-direction strategy makes your board drawings both stronger and more attractive, so plan cuts with the grain running along the length of parts whenever possible.
When you work with plywood, match cuts to the face veneer grain so visible panels read consistently and edges align. Note the ‘A’ side and ‘B’ side on your cut list so you preserve the best surfaces for faces.
If you need wider pieces, plan narrow boards and biscuit-joint them with grain direction matched to avoid mismatch and weak joints.
Use CAD to lay out board drawings and test grain orientation virtually; it speeds decisions, reduces waste, and improves yield.
A solid grain direction strategy keeps your assemblies durable and visually cohesive.
Nesting And Layout
Efficient nesting arranges your parts on sheet goods to cut material waste and save money, so plan layouts that follow grain direction and standard panel sizes like 4×8 sheets.
You’ll turn your cut list into a board drawing that maps parts, shows grain, and highlights leftover usable offcuts. Use CAD for faster adjustments and clearer visualization, or sketch by hand if you prefer.
Consider biscuit joints to join narrow strips and gain flexibility.
- Prioritize grain alignment for visible faces
- Group similar-width parts to reduce kerf loss
- Rotate parts only when appearance allows
- Mark potential offcuts for future use
Nesting well lowers cost, reduces scraps, and makes your builds cleaner and more predictable.
Add Allowances: Oversize for Milling, Acclimation, Waste
When you build your cut list, add deliberate allowances so parts start oversized for milling, acclimation, and waste; cut each piece at least 1″ longer and 1/4″ wider than final dimensions, add about 1/8″ per cut for kerf where applicable, and include extra boards to cover defects or miscuts.
You’ll acclimate lumber in the shop for several days before milling so moisture-driven movement is minimized. Track kerf cumulatively when planning repeated cuts.
Add a waste buffer—extra pieces or length—to cover knots, checks, and mistakes so assembly isn’t delayed. This planning reduces rework, saves trips to the lumberyard, and improves final fit.
Keep your cut list updated with allowances so every part arrives ready for accurate milling and assembly.
Label Parts: Codes, Story Poles, and Marking Lumber
Start by tagging every part on your cut list with a clear code and then mark the matching boards before you cut so you always know which piece becomes what. You’ll avoid confusion during assembly and keep materials organized.
Use story poles—marked strips or sticks—to verify measurements and locate cuts and joints as you work. Mark lumber clearly with the same codes from the cut list, and mark waste areas so scrap isn’t used by mistake.
- Assign short, consistent codes (e.g., T1, S2) that match the cut list.
- Keep story poles handy at the workbench and near the saw.
- Write codes on face and edge of boards for easy retrieval.
- Shade or X-out waste zones to prevent accidental use.
This system minimizes errors, reduces re-cuts, and saves material.
Create Check Columns and a Cutting Workflow
Although you’ll have your measurements and labels ready, add two check columns to your cut list—one for rough layout and one for final sizing—so you can tick off each step as you go; this makes it simple to see what’s been measured, what’s been cut, and what still needs a final trim.
Create check columns clearly headed and aligned with part codes so each tick ties to a physical piece. Before cutting, cross-verify every measurement against your drawing.
Add clearly headed check columns aligned with part codes, and always cross-verify every measurement against your drawing before cutting.
Start your cutting workflow with the largest parts or subassemblies to optimize material use and reduce waste. Group similar components together to speed repetitive cuts and assembly.
Use a consistent labeling system that matches the check columns to the lumber, keeping the process organized and dependable.
Common Mistakes First-Time Builders Make and How to Avoid Them
Don’t let small measuring errors snowball into big problems—double-check material thickness before you cut.
Pay attention to grain direction so your pieces look and fit the way you intended.
And always make a quick test cut to confirm your setup before committing to full-scale parts.
Measuring Errors Add Up
Anyone can make measurement mistakes, and in woodworking those small errors compound fast—especially for first-time builders who skip thickness allowances, don’t measure twice, or fail to label parts.
You’ll avoid costly rework by treating measuring errors as the enemy. Account for material thickness in your cut list, and always measure twice before cutting. Label each piece clearly so you don’t waste time identifying parts during assembly. Keep a tidy workspace and check calculations before buying stock.
- Always add thickness allowances to your dimensions.
- Measure twice, cut once: reduce cutting errors by up to 50%.
- Label every cut piece immediately to prevent confusion.
- Use a detailed cut list to avoid omitted materials and delays.
Stay methodical; small checks stop big problems.
Ignoring Grain Direction
After you’ve tightened up measuring habits, pay the same attention to grain direction—it’s not just about looks, it affects strength and how pieces move over time.
You’ll avoid warping and uneven finishes when you plan each cut so the grain flows across joins. Treat plywood differently: use the face veneer grain as your guide to keep panels visually consistent.
Before cutting, lay out parts to see how humidity and stress will act on each piece; cutting without that view often causes assembly headaches and extra material use.
If you spot misaligned grain early, reorient cuts or swap parts rather than forcing a join.
With simple planning and attention to grain direction, your builds will fit better, last longer, and look more professional.
Skipping Test Cuts
While it’s tempting to skip test cuts to save time, doing so almost guarantees fitment problems and wasted material once you start assembling parts. You’ll avoid surprises by making a few quick checks on scrap wood to confirm blade height, fence alignment, and joint fit. Test cuts verify settings and your technique so you don’t ruin good stock.
- Use scrap for test cuts before committing to final pieces.
- Check fence, blade/bit height, and miter/angle accuracy.
- Confirm joinery fit (dovetails, dados, mortises) on a sample.
- Adjust and re-test until measurements match expected results.
Make test cuts a routine habit; they cost little but prevent costly rework, boost confidence, and improve overall accuracy on your first builds.
Tools and Apps to Speed Cut-List Creation
One or two well-chosen tools can cut hours from your layout work and reduce costly mistakes: digital programs like SketchUp or dedicated cut-list optimizers let you input parts, auto-calc material needs, and produce cutting diagrams that often shrink waste by up to 25%.
Use apps to generate optimized layouts, then export or print diagrams for the shop. Complement those digital outputs with a simple spreadsheet to sort, filter, and tweak lengths and quantities quickly.
Keep a story pole and tape measure handy as a physical check—measure twice digitally, then verify once in person. Combining physical measuring tools with apps improves accuracy, saves material, and builds your confidence.
Start small, let the software handle tedious math, and focus on clean execution.
Turn Your Cut List Into a Saw-Ready Cut Sequence
Now that you’ve got a tidy, optimized cut list from your apps and spreadsheet, turn it into a saw-ready sequence that saves time and material. Organize cuts in the order you’ll make them—start with the longest pieces to minimize movement and waste.
Use exact cut list dimensions when laying parts out on boards and add blade kerf to every calculation. Label each cut with its part code so you can grab and cut quickly. Keep your workspace clear, choose the right saw and a sharp blade, and respect grain orientation for a clean finish.
Use exact cut dimensions, add blade kerf, label parts, keep the workspace tidy, and respect grain for clean cuts.
Check measurements as you go to catch mistakes early.
- Start longest-to-shortest for efficiency
- Account for kerf in layouts
- Label parts with codes
- Maintain a tidy, safe workspace
Verify the Cut List Against the Drawing Before Cutting
Double-check your cut list against the project drawing before you touch the saw: confirm every dimension and quantity, pay special attention to how key components relate to each other, and verify material thickness so assemblies will fit as intended.
Lay the drawing and cut list side by side, and tick off each part as you match sizes and counts. Measure raw stock with a tape to verify the actual thickness equals what’s assumed; note any discrepancy.
Mark adjustments directly on the cut list so the shop layout reflects reality. Reconfirm critical mating dimensions—dado depths, edge allowances, and panel fits—against the drawing one last time.
When everything aligns, you’ll cut with confidence and avoid costly mistakes.
Frequently Asked Questions
How to Make a Cut List for Beginners?
Start by drafting a simple plan with measurements, then list each part, material, quantity, and dimensions. Use relative sizing, label parts with codes, add checkboxes, and double-check measurements before cutting; you’ll stay organized.
What Are Common Mistakes in Creating Cutting Lists?
You’ll make mistakes like a first voyage: forgetting material thickness, omitting parts, mislabeling pieces, skipping measurement double-checks, and miscalculating yields. Stay organized, remeasure, and plan cuts to avoid waste and delays.
What’s the Difference Between a Cut List and a Bom?
A cut list shows the exact pieces, dimensions, and quantities you’ll cut from stock to build something, while a BOM lists all materials, hardware, and finishes you’ll need overall; you’ll use the BOM to create the cut list.
What Are Common Woodworking Mistakes to Avoid?
Don’t assume mistakes are minor; they compound—so measure twice, cut once. You’ll avoid wrong thickness, missed cuts, bad grain orientation, unlabeled parts, and wasted trips by planning a detailed cut list, checking measurements, and labeling everything.
Conclusion
Think of your cut list as a map and your lumber as a forest: with a clear plan you’ll avoid getting lost or wasting good wood. Before the first cut, double-check quantities, dimensions, and materials, then sequence cuts for efficiency. You’ll save time, money, and frustration by staying organized and patient. Trust the process, learn from small mistakes, and treat each project as practice—soon the map will feel like second nature.